Managing devices
Once your devices are connected, this guide shows you how to give them readable names, check their data, sort them into groups and delete them safely.
You find your devices under Devices & assets → Devices in the left menu. Tenant administrators find them under Entities → Devices.
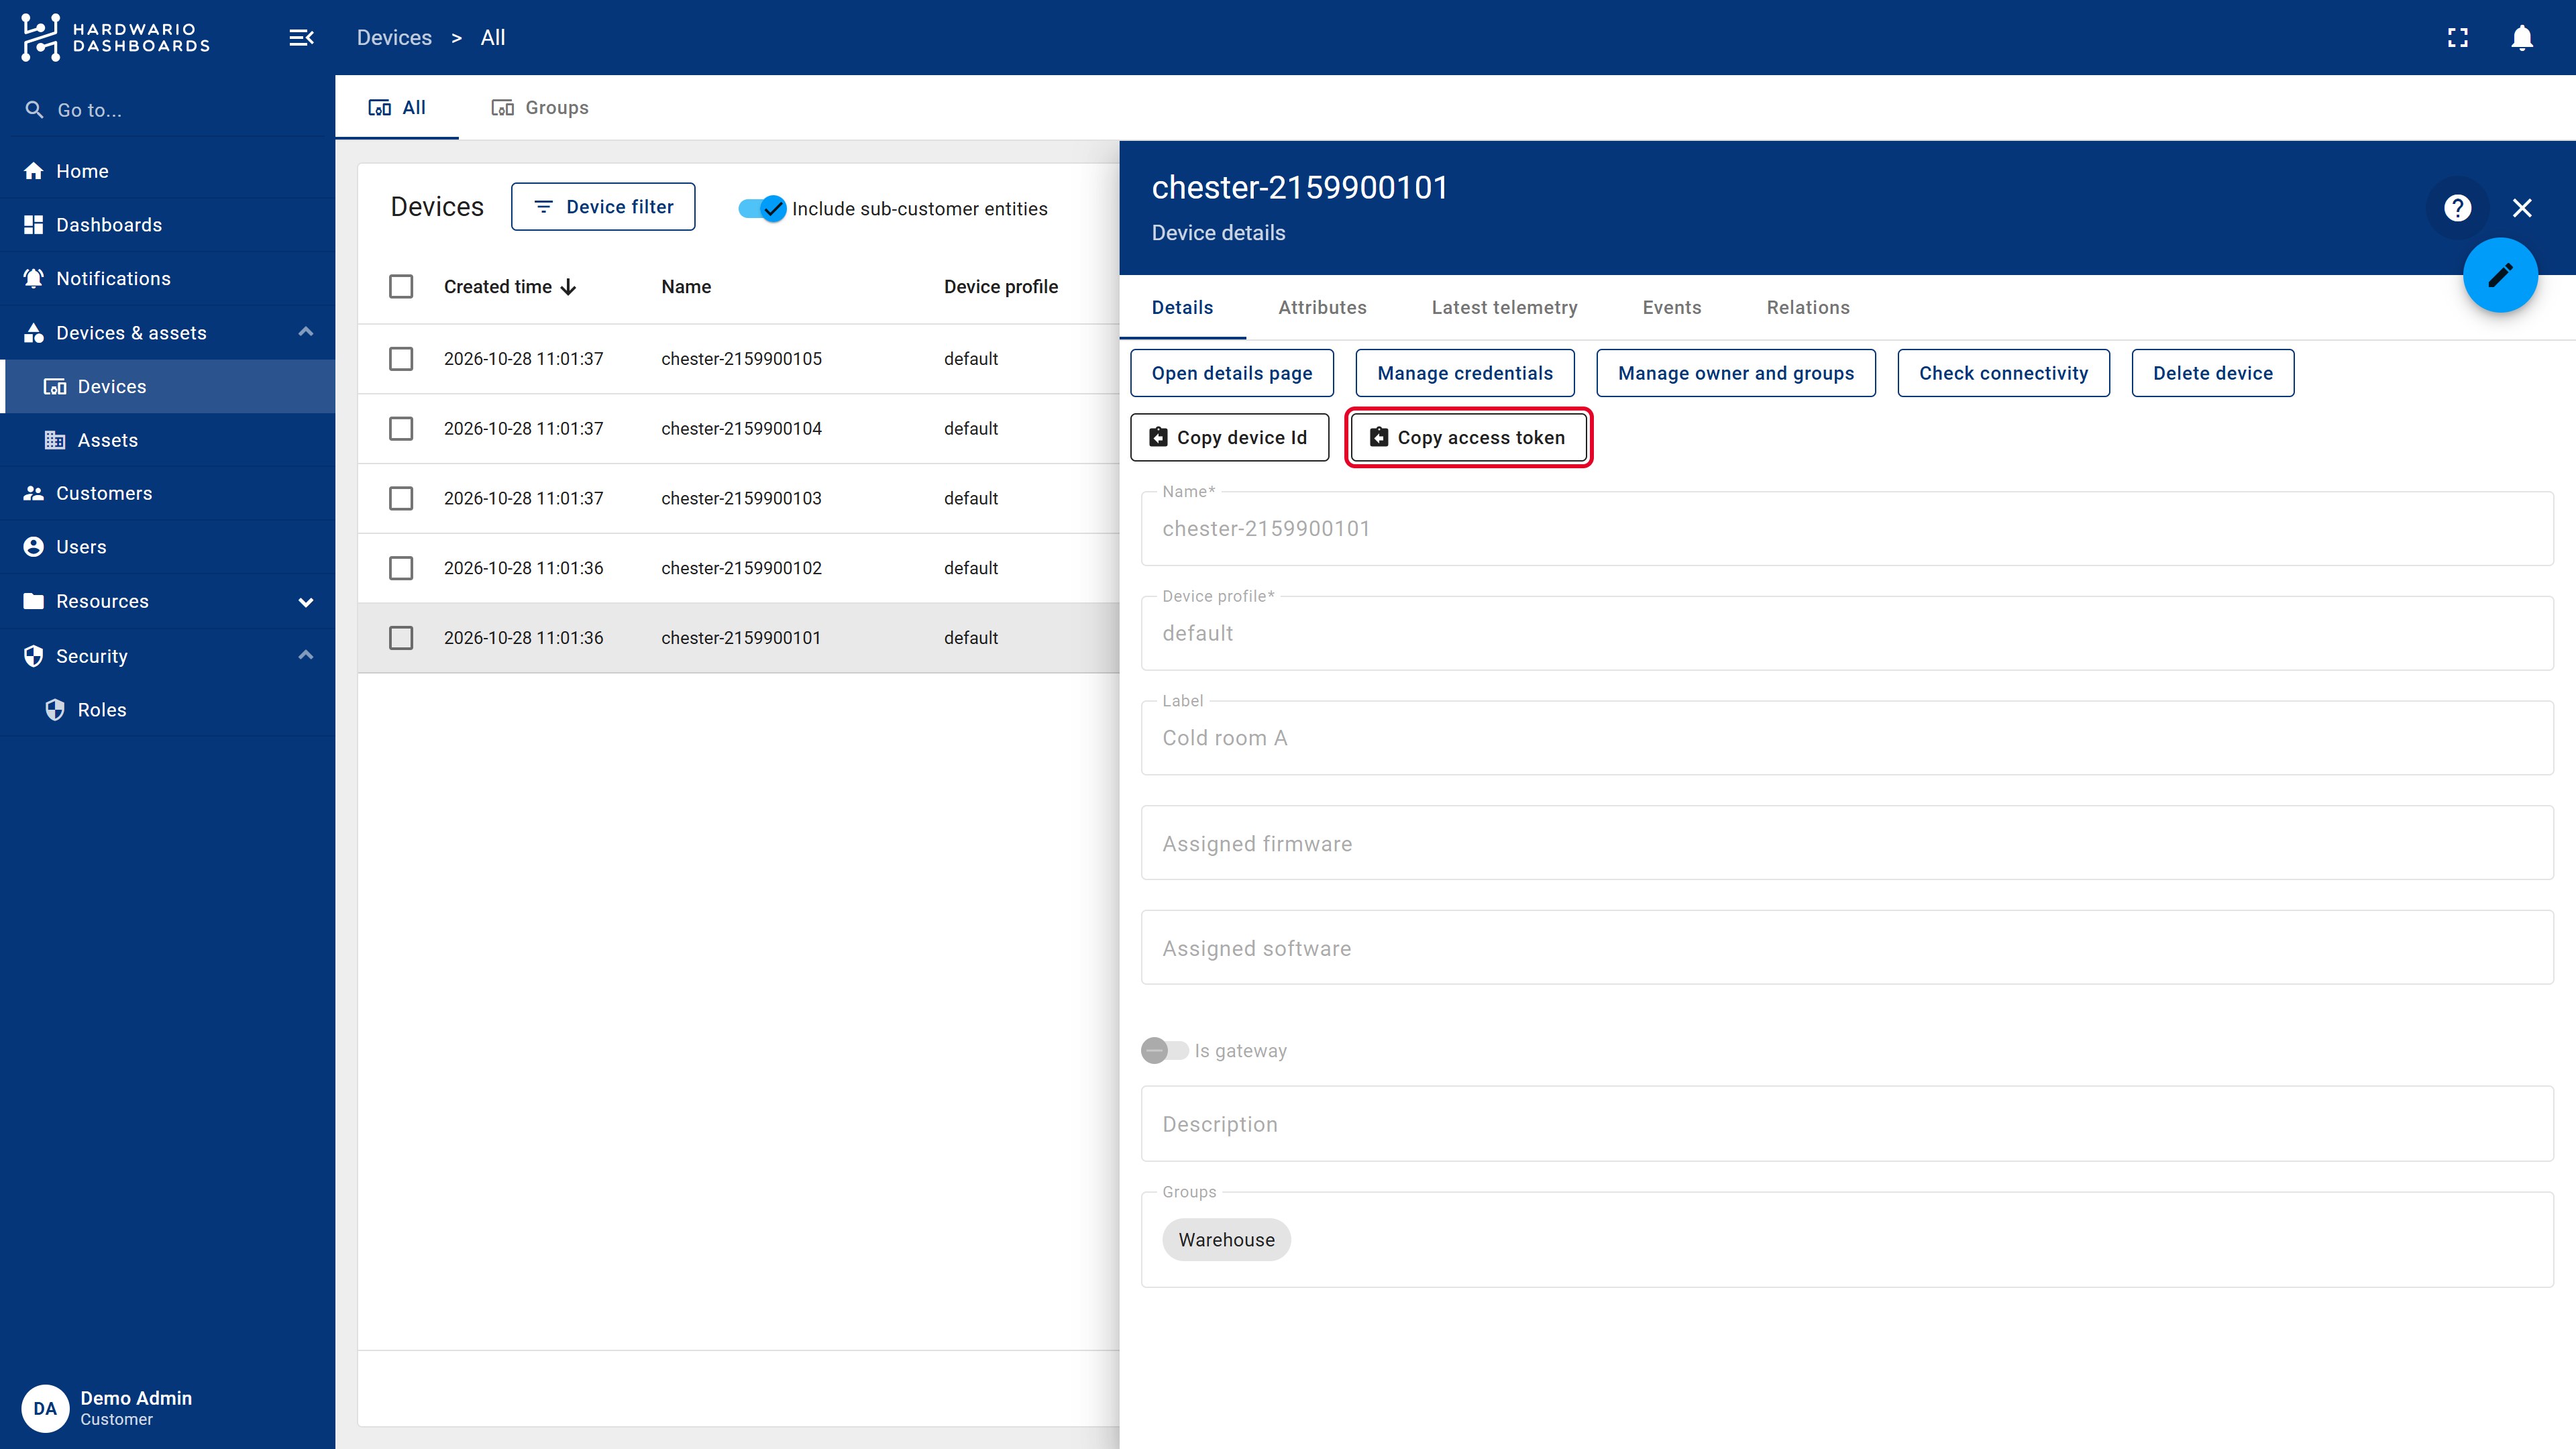
Give a device a readable label
Devices connected automatically are named chester- plus their serial number. That is practical for us, but not very friendly for you. A label is the readable name you'll see in lists and on your dashboards.
- Click the device in the list. The device details open on the right.
- Click the pencil icon in the top-right corner of the details.
- Fill in the Label, for example Cold room A. You can also add a Description.
- Confirm with the tick icon.
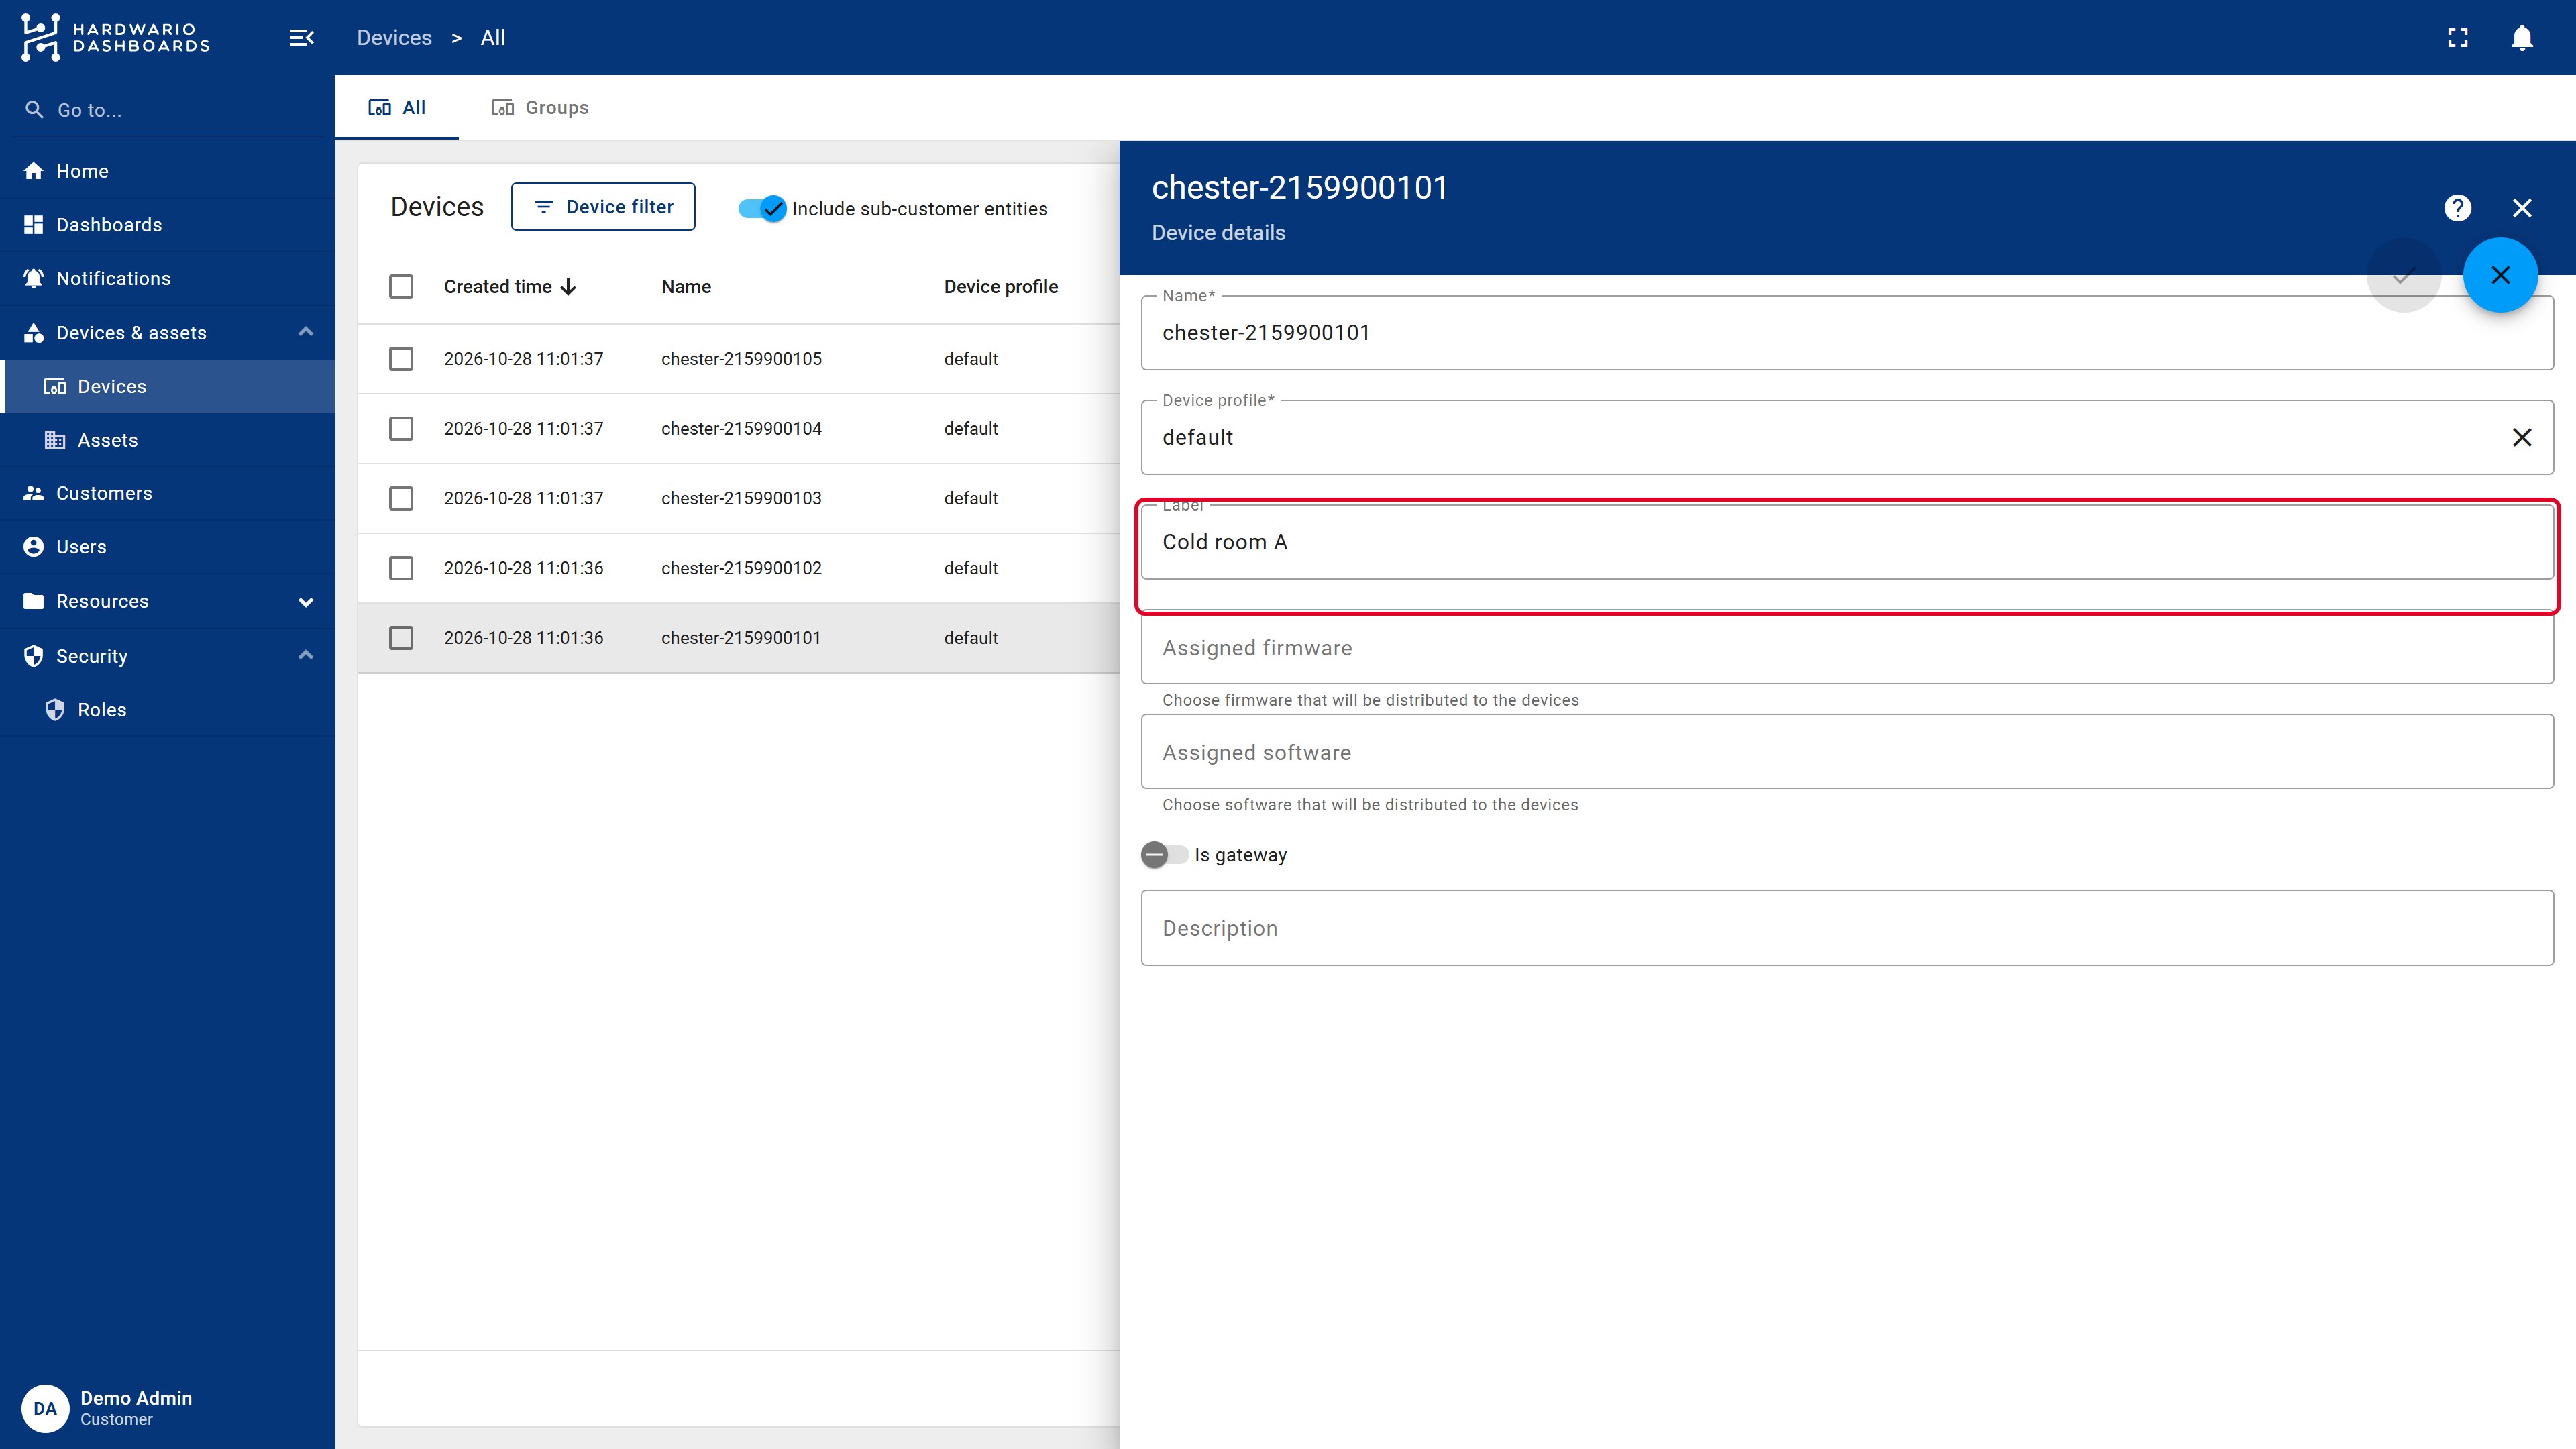
Change only the label, not the Name. The automatic connection finds the device by its name. If you rename it, the next message creates a new device.
Check the device data
The device details have several tabs:
| Tab | What you'll find there |
|---|---|
| Details | Name, label, device profile, groups and buttons such as Copy access token and Manage owner and groups. |
| Attributes | Information about the device. With the automatic connection: the device name from HARDWARIO Cloud, product, firmware version and similar. |
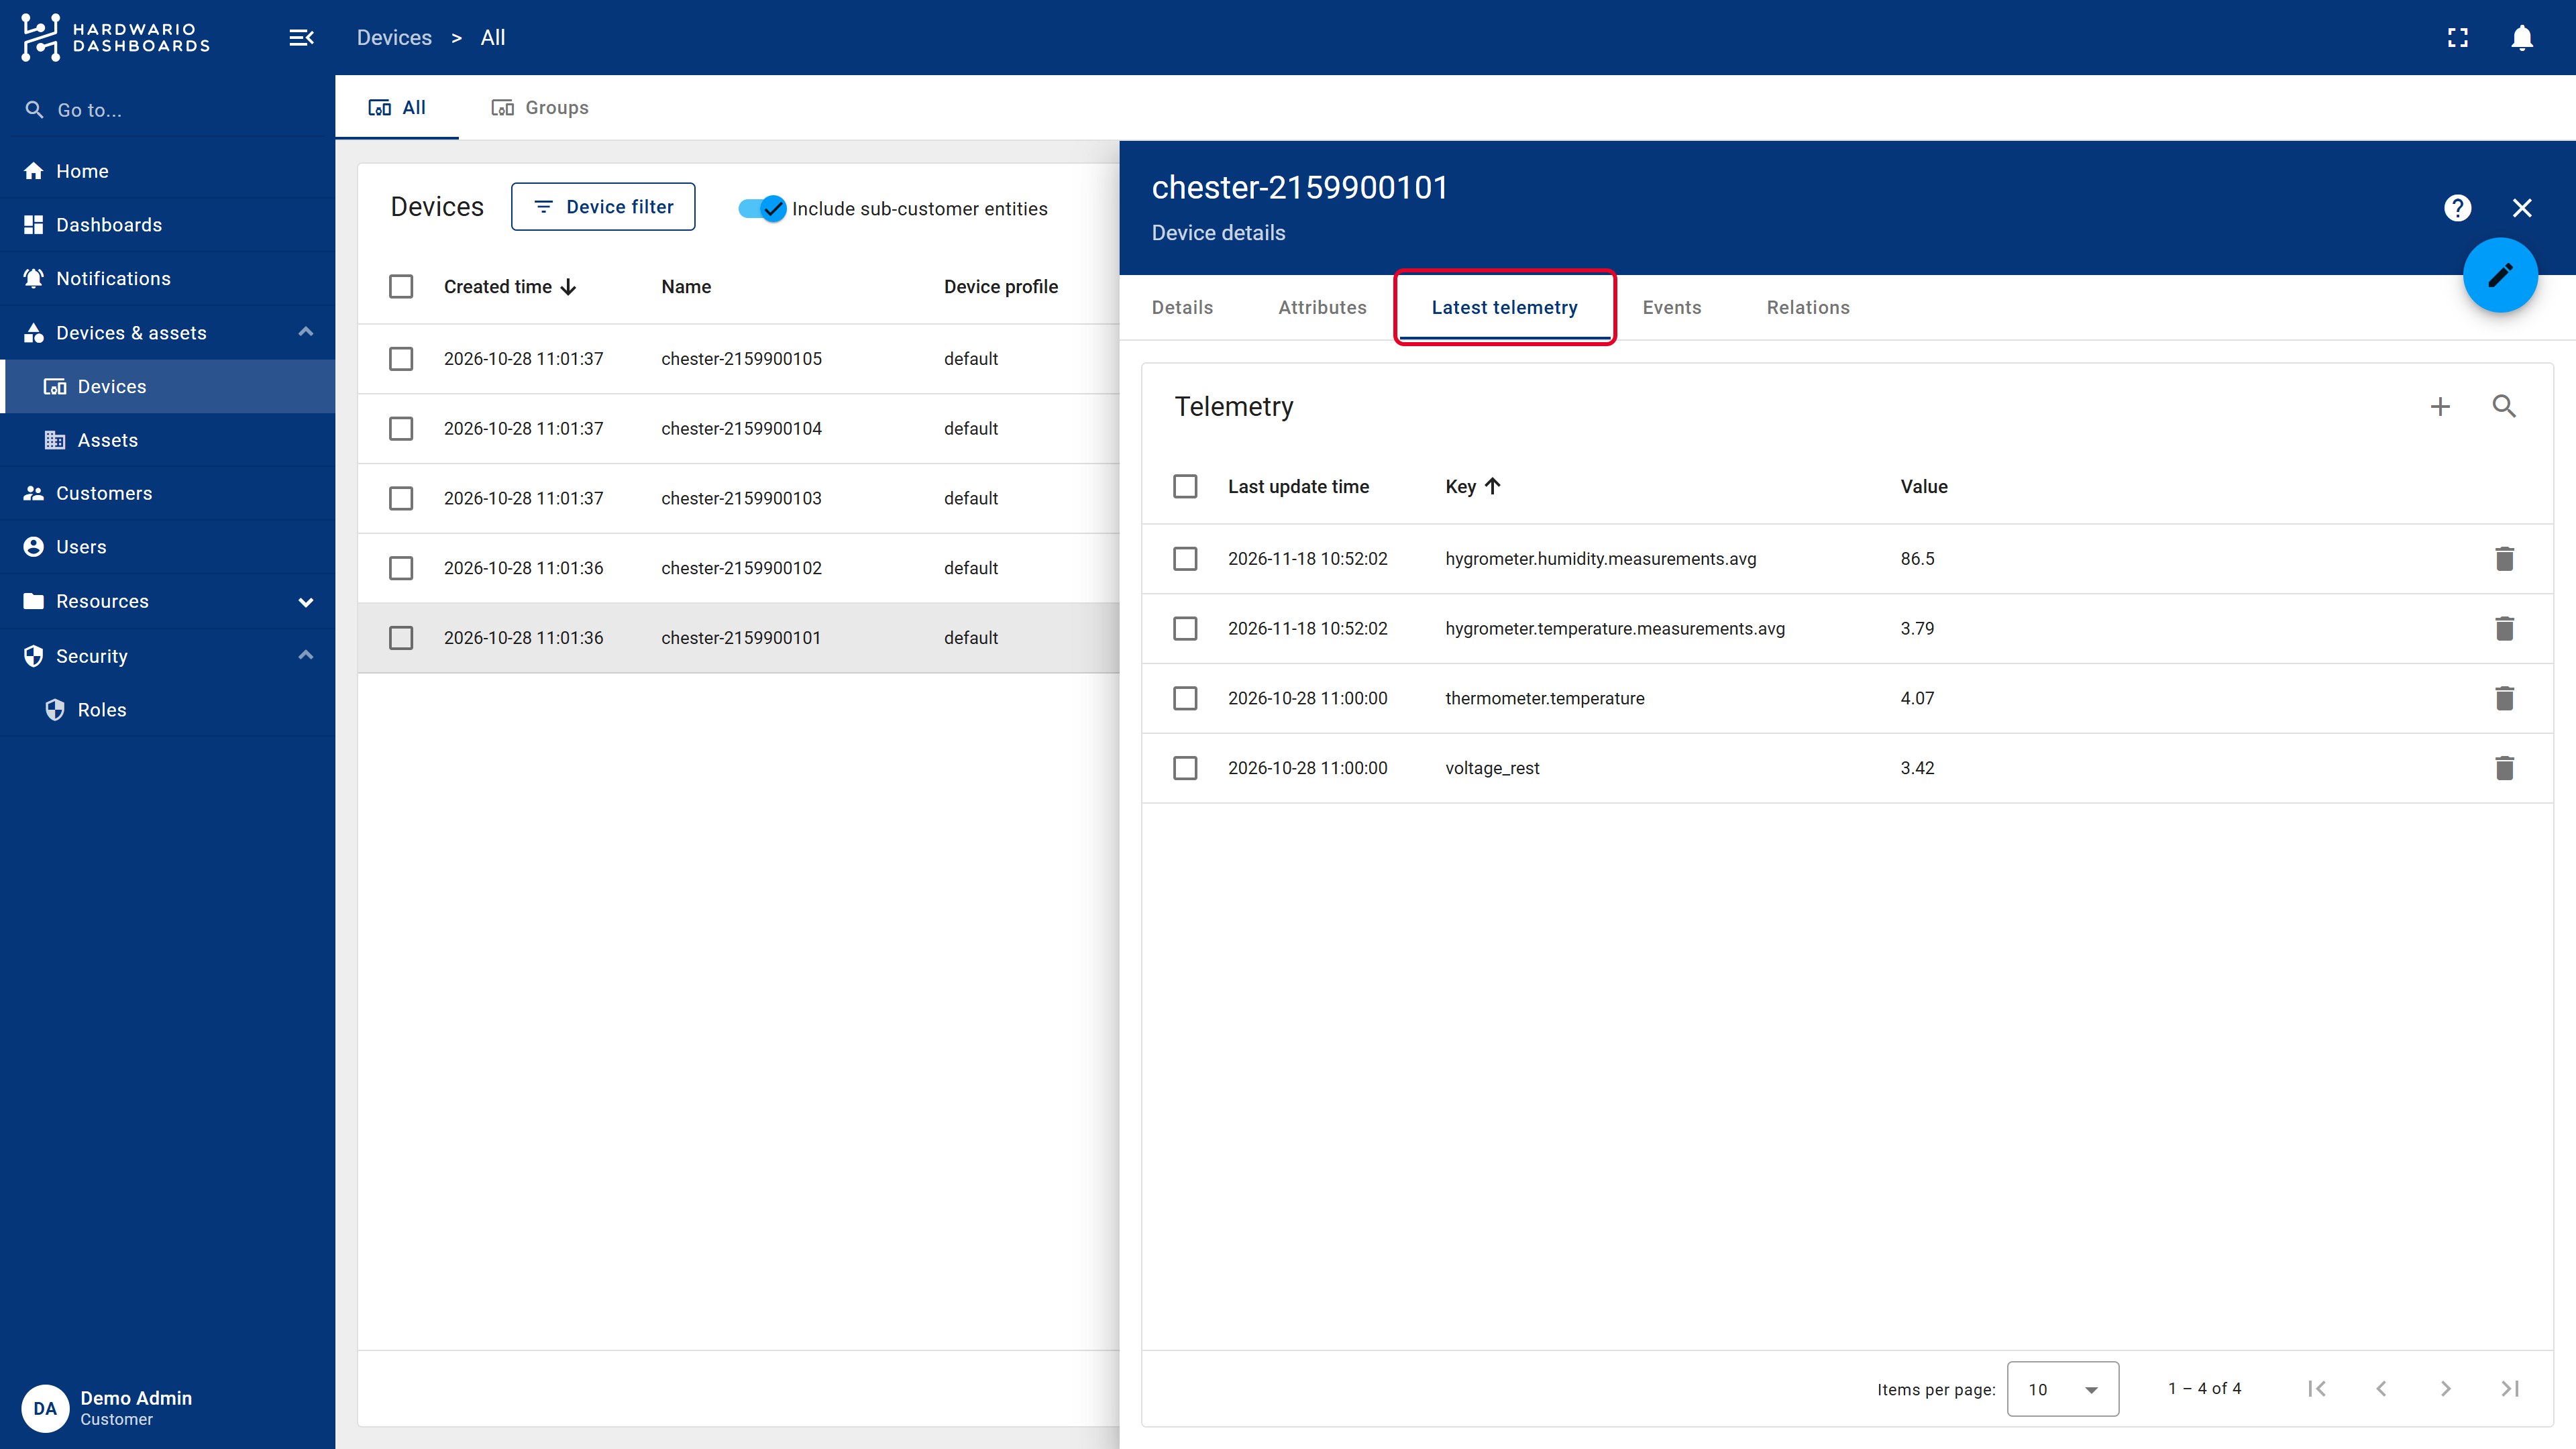
| Latest telemetry | Every value the device sends, with its latest reading and the time it arrived. |
| Events, Relations | Advanced information, usually not needed. |
Latest telemetry is the place to check whether data is arriving. It also shows the exact names of the values (keys), which you'll need for dashboards and notifications.
Sort devices into groups
Groups keep a growing fleet organized, for example by building, site or customer. They are also the key to deciding who sees what and what a public link shows.
A device can belong to several groups at once. Every device is always in the group All.
Create a group
- Open the Groups tab at the top of the devices list.
- Click Add entity group, enter a Name (and optionally a description) and click Add.
Add devices to a group
- On the Groups tab, open the group the devices are in now. If you don't use groups yet, open All.
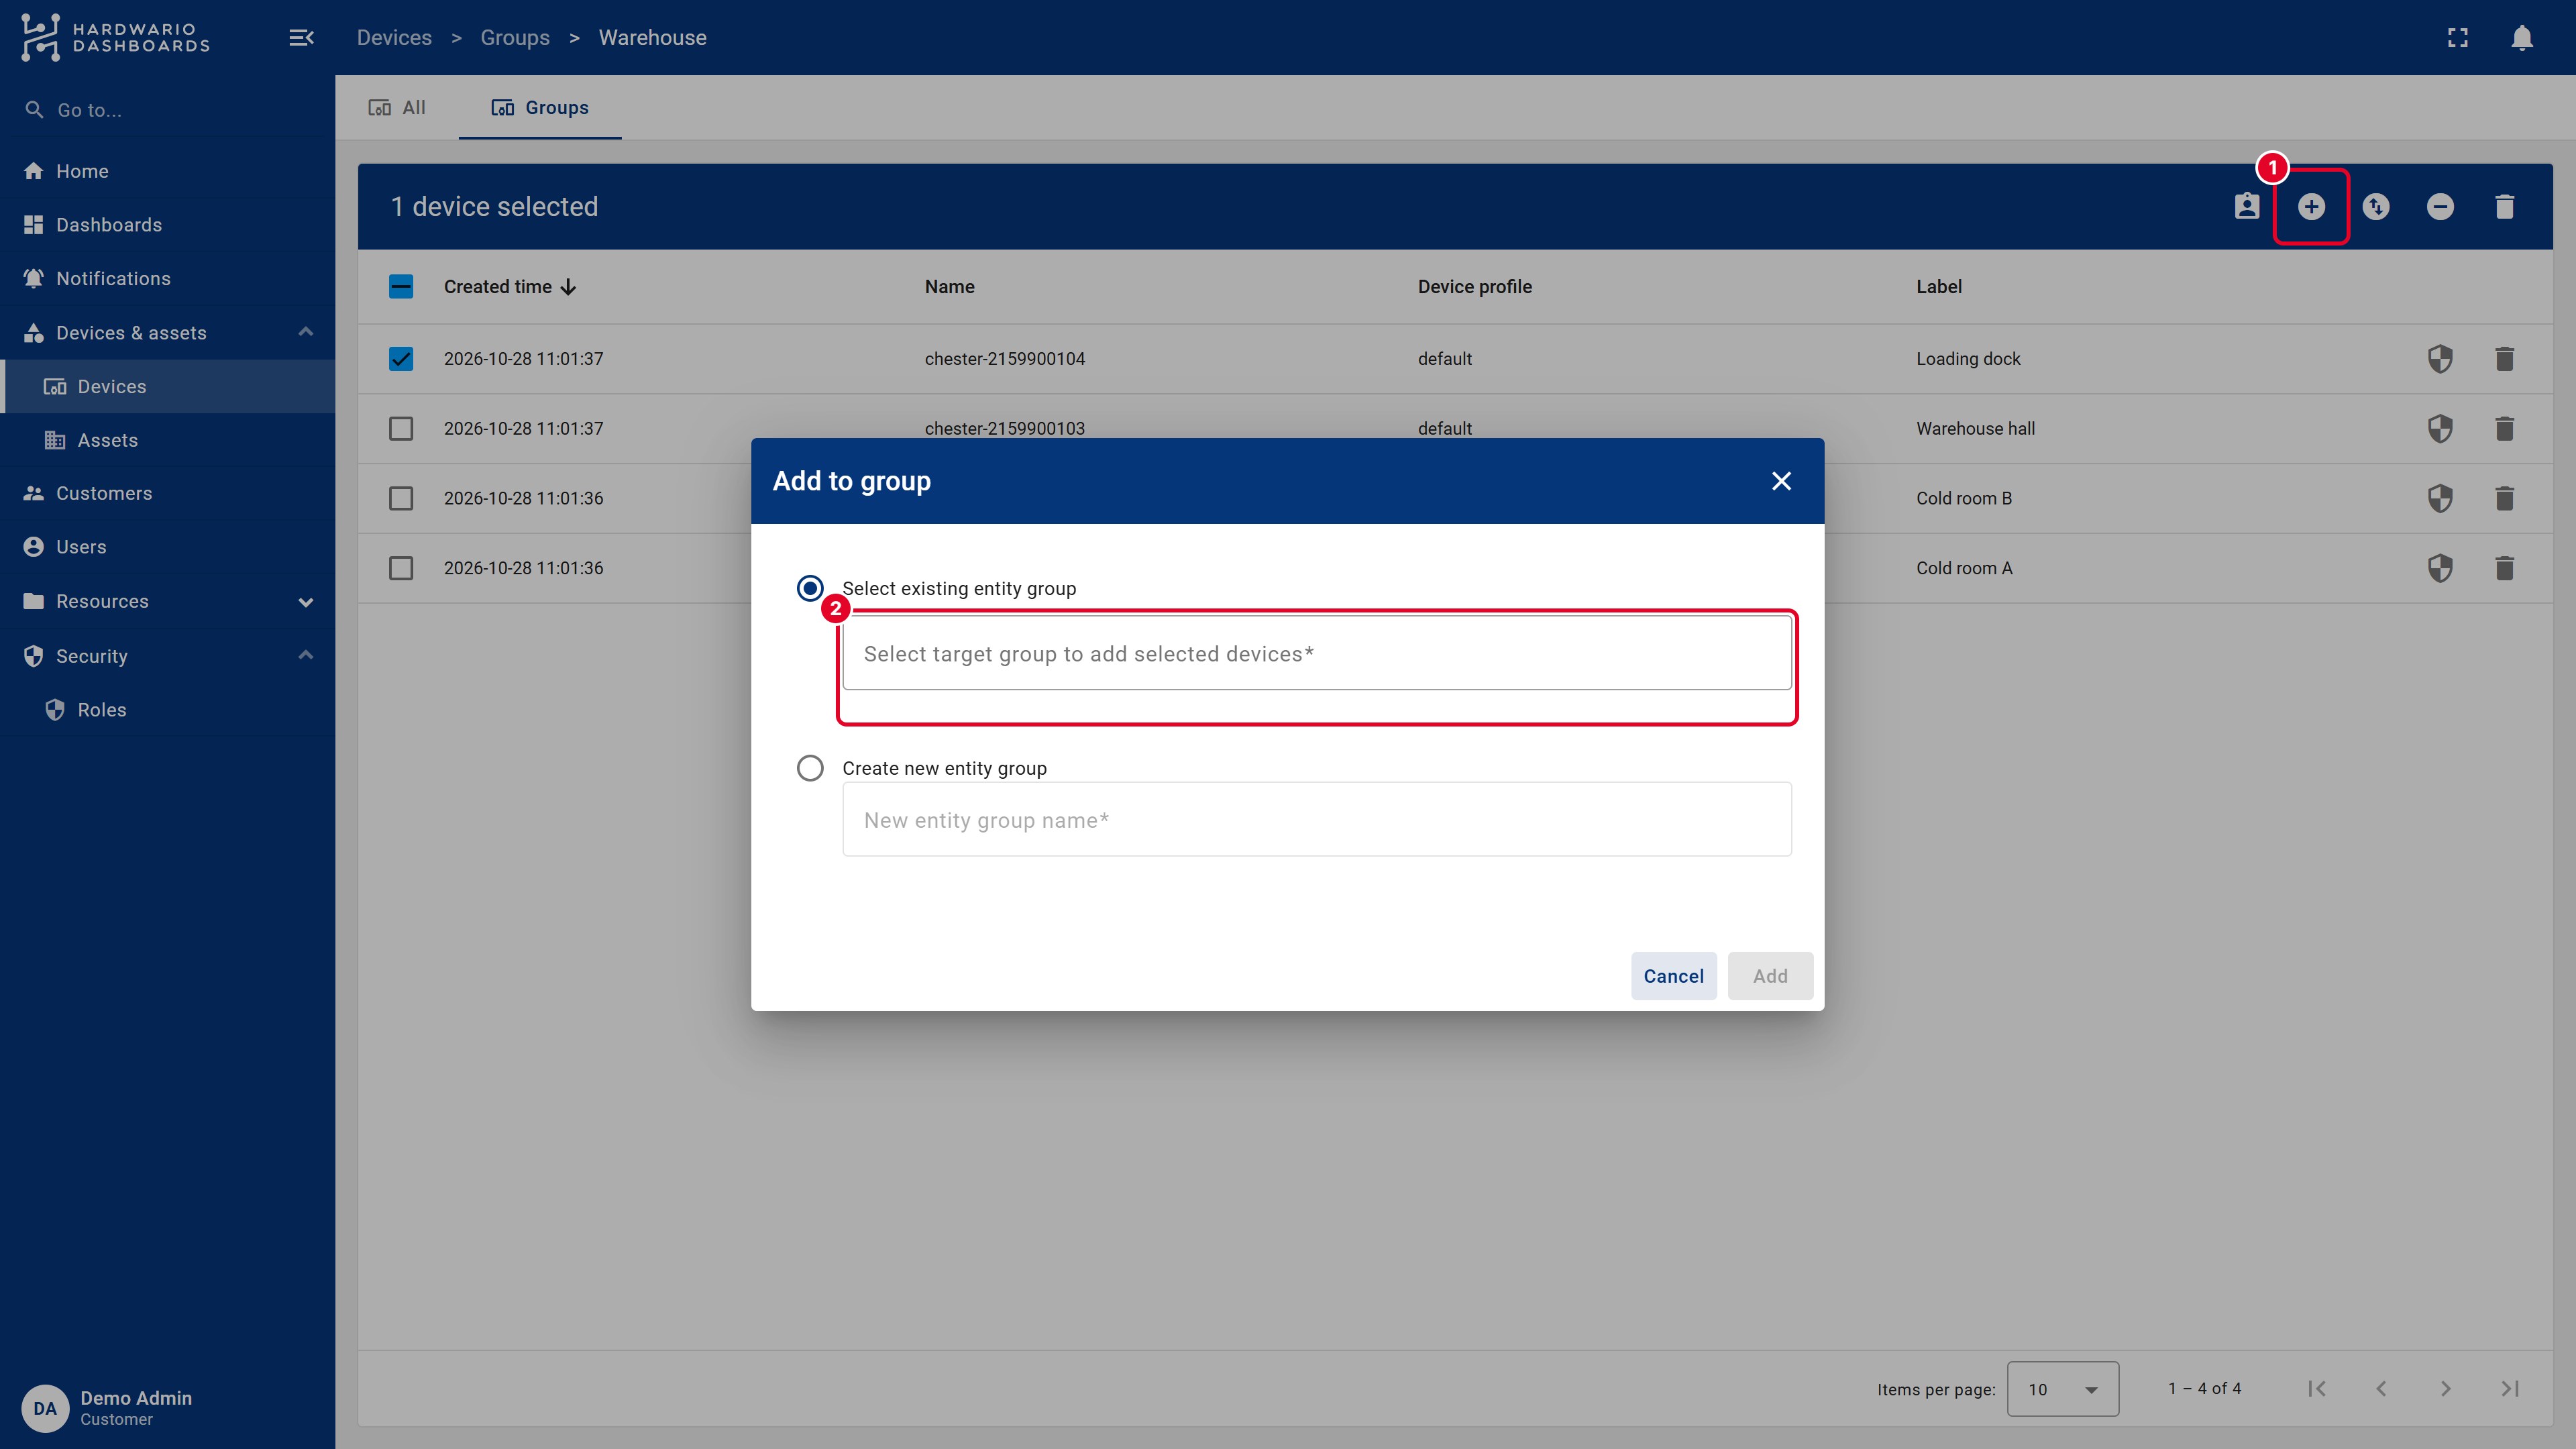
- Tick the devices you want to sort.
- In the blue bar at the top, click one of the actions:
- Add to group: the devices stay in the current group and are added to another one.
- Move to group: the devices leave the current group and move to another one.
- Remove from group: the devices leave the current group.
- Pick an existing group, or choose Create new entity group and type a name. Click Add.
With the automatic connection, new devices land in the group whose ID is in the connector. Use one connector per group to sort devices automatically.
Delete a device
Click the trash icon at the end of the device's row and confirm. The device is deleted with all its data.
If the device is still tagged in HARDWARIO Cloud, the automatic connection adds it again with its next message. First remove the tag in HARDWARIO Cloud, then delete the device here.
Add a device manually
With the automatic connection, devices create themselves, so you rarely need to add one by hand. If you do, for example for the manual connection, click Add device in the top-right corner of the devices list, fill in the Name and Label and finish the dialog. The Manual connection guide shows the steps.
Next steps
- Your first dashboard: show the data of your devices.
- Groups, roles & permissions: decide which users see which device groups.
HARDWARIO Dashboards is built on ThingsBoard. More details in the official ThingsBoard documentation: Devices · Entity groups.