Configure a CHESTER
Open CHESTER → Configuration. The app reads the device's configuration and then offers two views of it — a guided Quick Set-up and a full Advanced Configuration. Your edits carry between them, and nothing reaches the device until you save.
The screen is headed with the device it is working on, and the share action in the top bar exports the whole configuration as text.
Quick Set-up
The default view covers the settings most deployments need. Sections appear only if the device actually has them.
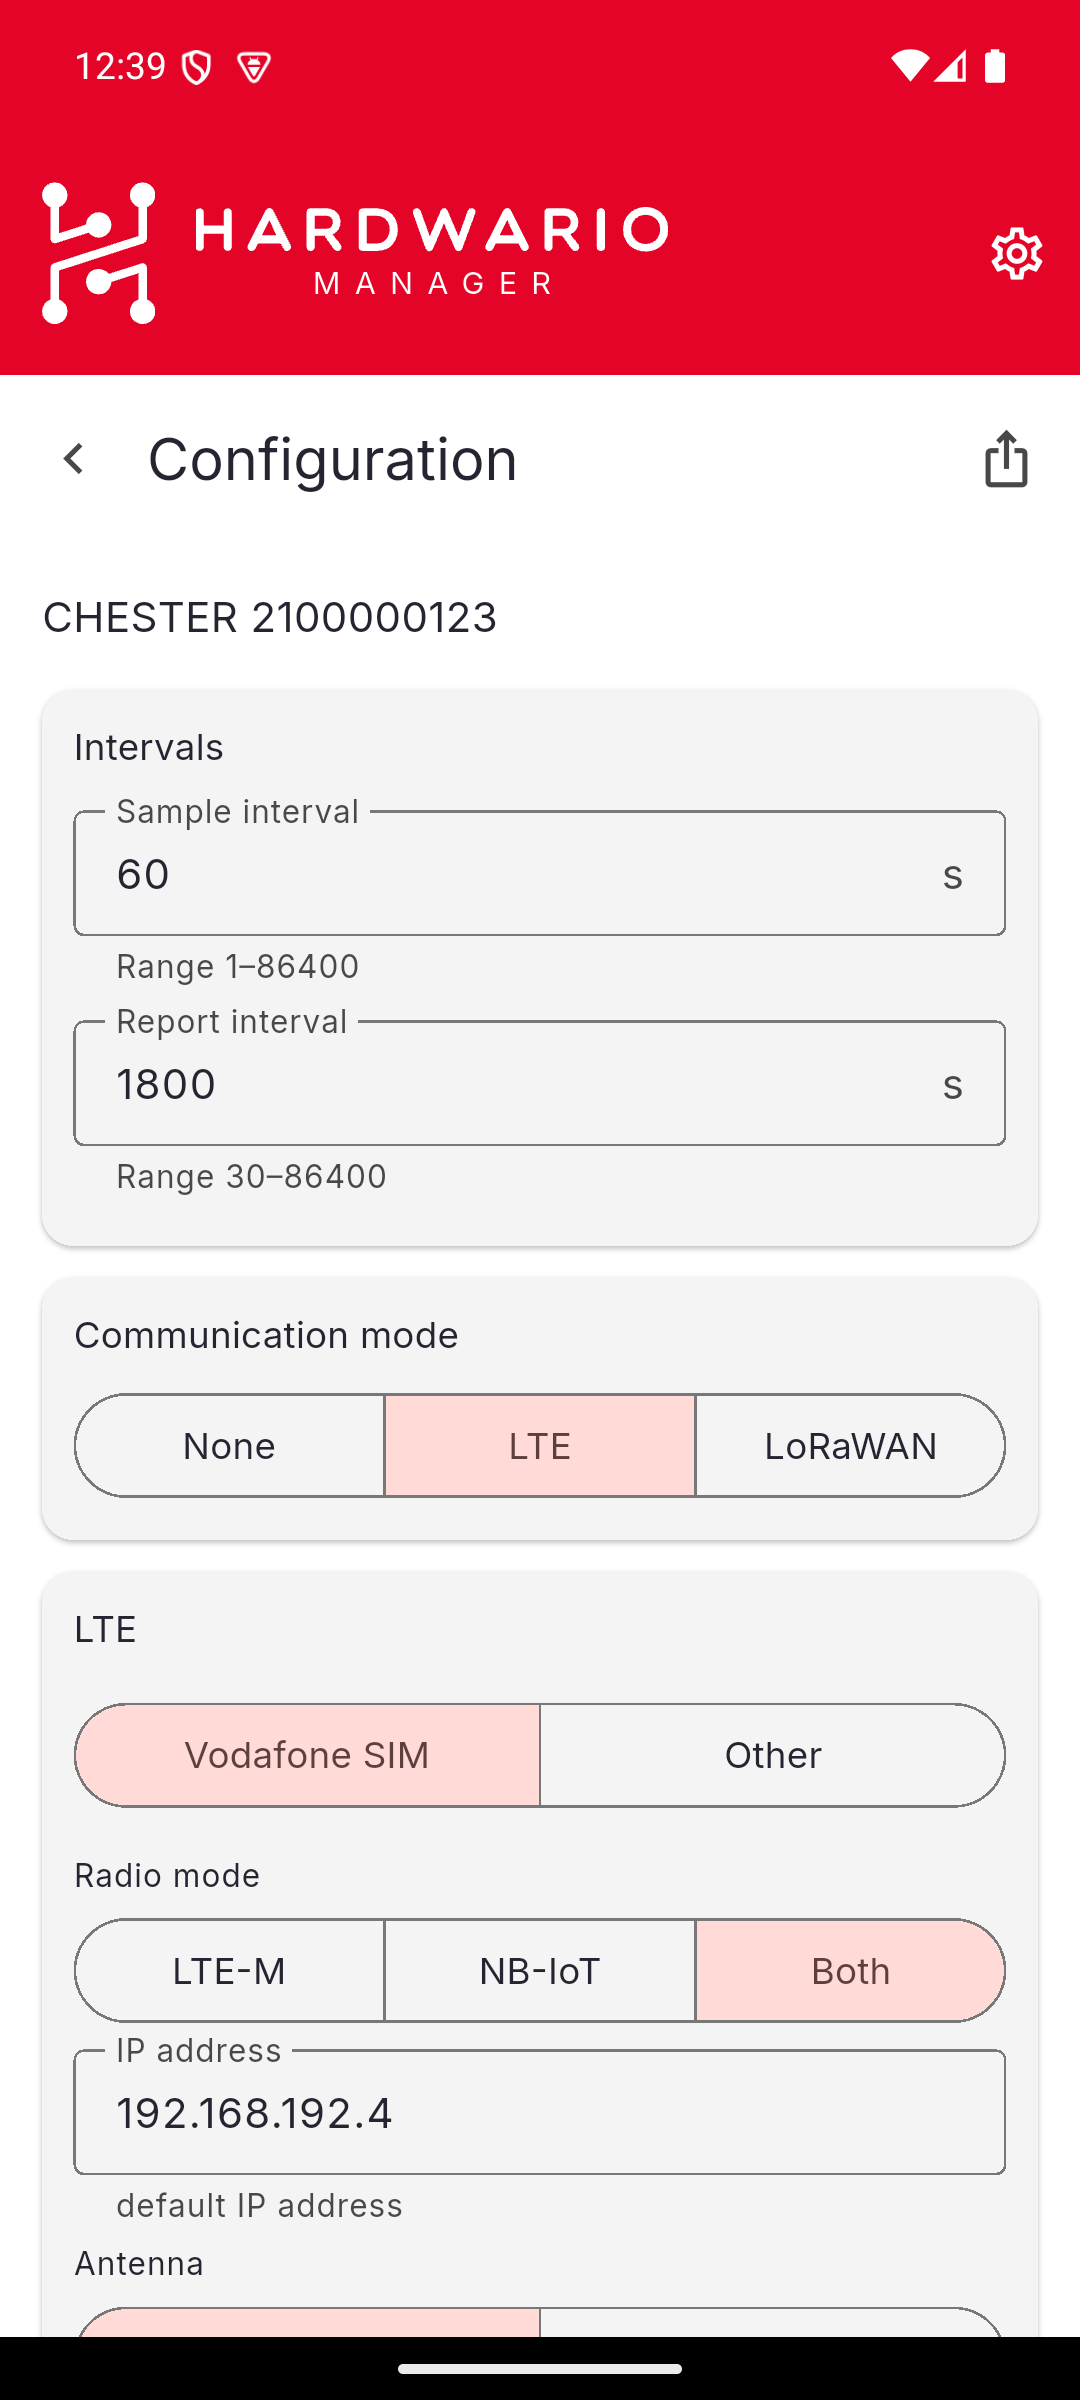
Intervals
Sample interval and Report interval, in seconds, each showing its allowed range beneath the field.
Communication mode
None, LTE, or LoRaWAN. The sections below follow this choice — pick LTE and the LTE section appears, pick LoRaWAN and you get the LoRaWAN one.
LTE
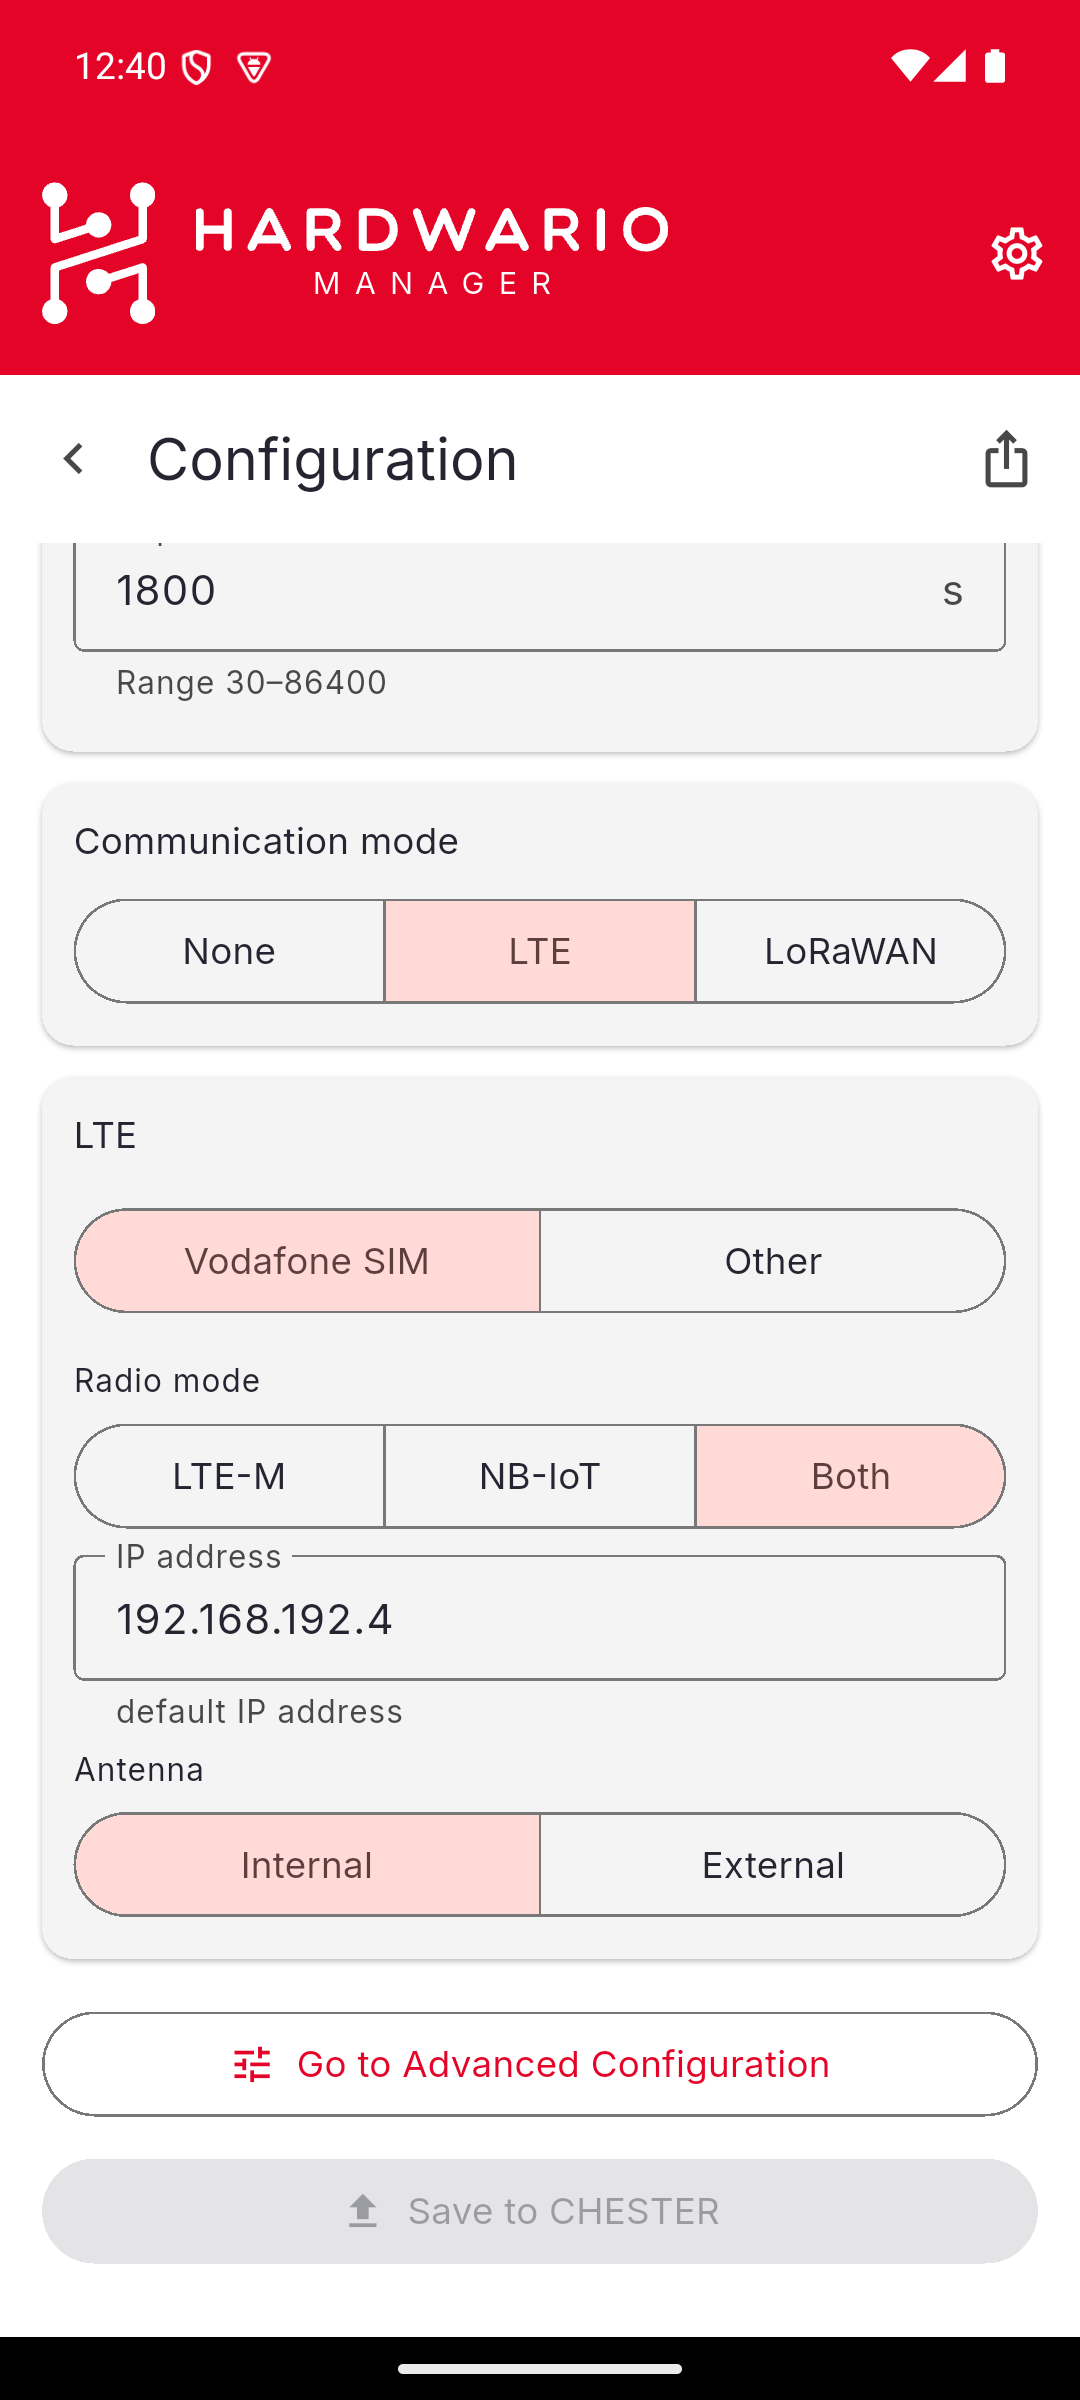
| Setting | Options |
|---|---|
| SIM | Vodafone SIM, or Other for a SIM from any other operator |
| Radio mode | LTE-M, NB-IoT, or Both |
| IP address | The address to report to; the hint marks the default |
| Antenna | Internal or External |
Quick Set-up does not carry an APN field. If your SIM needs a specific APN, set it under Advanced Configuration → LTE, where the full LTE parameter set lives — APN, network, authentication and the rest.
LoRaWAN
Choosing LoRaWAN as the communication mode gives you the activation mode (OTAA or ABP), the regional band, the device class, and the identifiers and keys for the activation mode you picked — DevEUI, JoinEUI and AppKey for OTAA; DevAddr and the session keys for ABP.
Key fields accept hex with or without separators and show how many characters are expected. Each has a copy button and a button that generates a random value.
Advanced Configuration
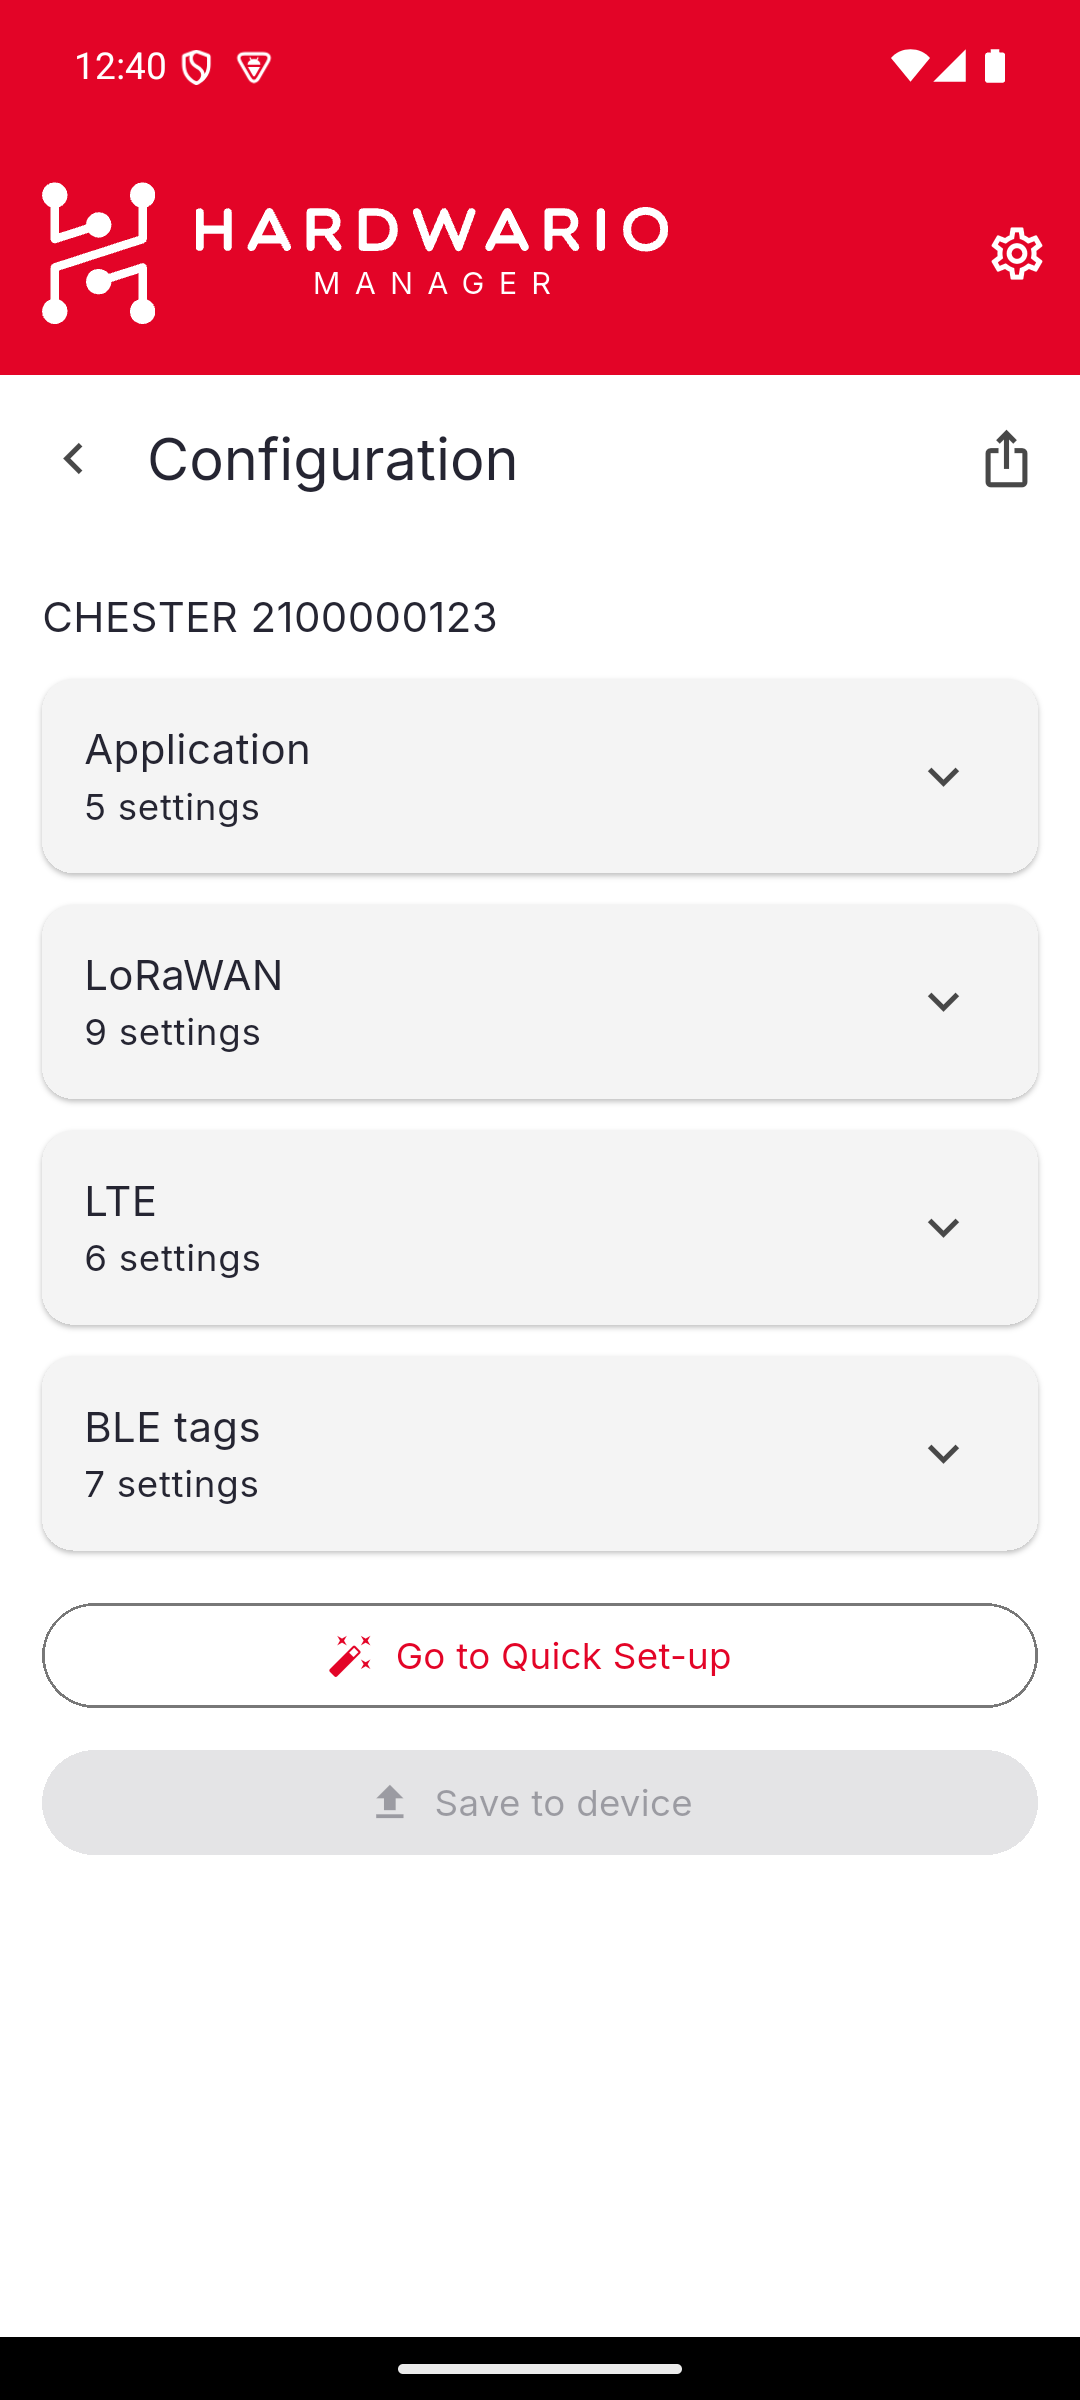
Go to Advanced Configuration shows every parameter the device reports, grouped into collapsible cards. Which groups appear depends on the device — the one below reports Application, LoRaWAN, LTE and BLE tags. Each card's subtitle counts the settings it holds.
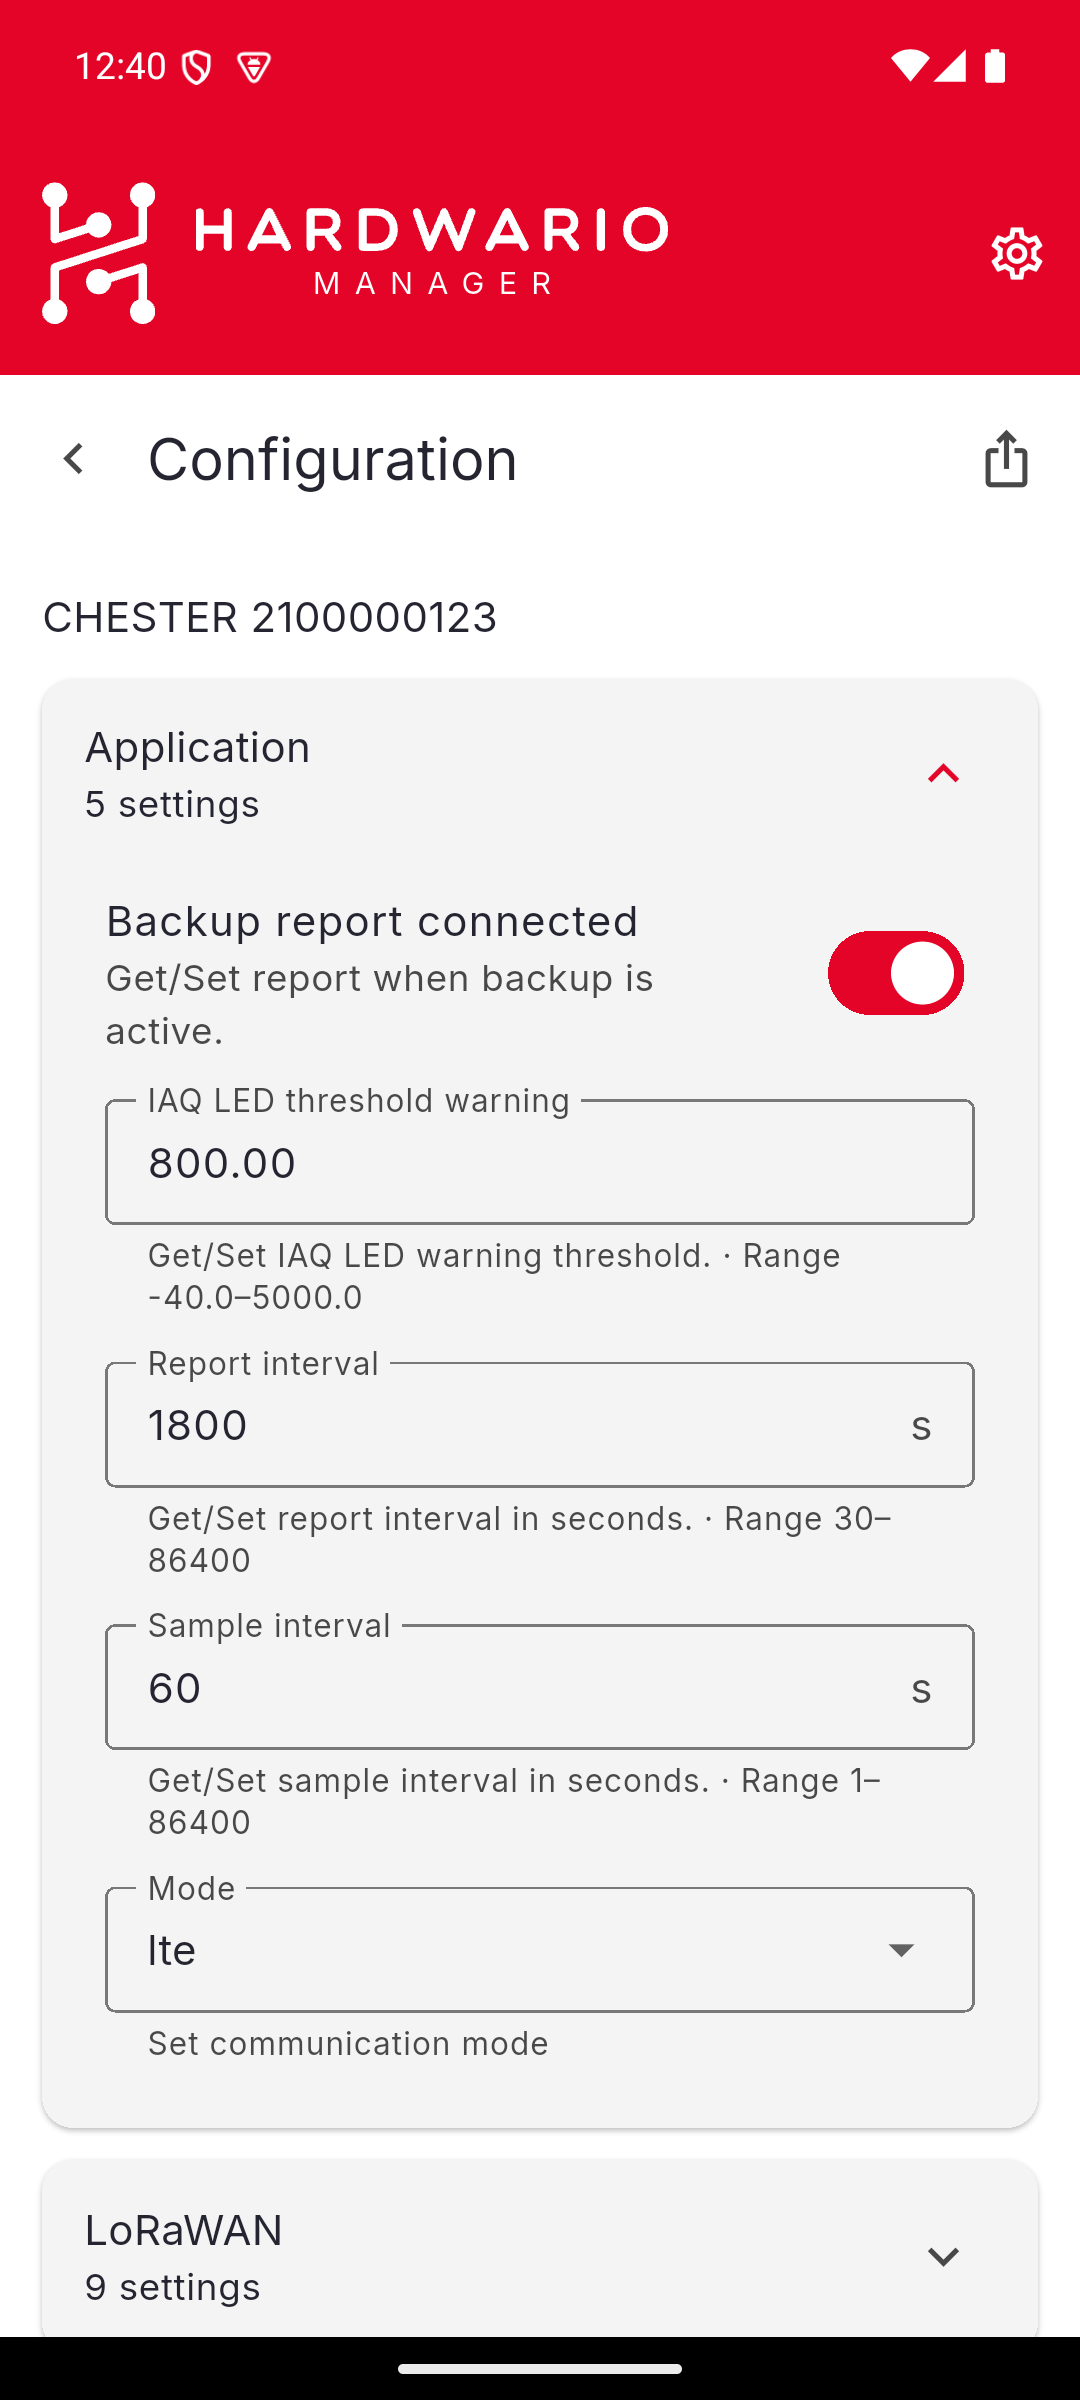
Expand a group and each setting is rendered to match its type — a switch for a boolean, a dropdown for a fixed set of choices, a number field with its unit and allowed range — with the firmware's own description underneath.
Go to Quick Set-up returns to the guided view.
Saving
Save to CHESTER — Save to device on the Advanced view — writes each changed setting and then commits them to the device's memory. The button stays disabled until something has changed and everything is valid; an out-of-range value is flagged and blocks the write.
The device's shell reports problems in words rather than status codes, so the app reads the reply and tells you what happened:
- if the device rejects a value, the save fails and quotes the device's own words;
- if a write fails partway, the app names the setting that failed and warns that the configuration was only partly saved — reload it to see the current state;
- if the writes land but the final commit fails, the app warns that the values will be lost on the next reboot.
Revert changes discards your edits.
If the read comes back empty
A device that does not answer, or whose firmware does not support the configuration shell commands, is reported as such rather than shown as an empty configuration. Keep the device close to the phone and try again; if it stays silent, reconnect. See Troubleshooting.