Managing User Visibility and Permissions
ThingsBoard is incredibly powerful because it allows us to completely determine what a customer can and cannot see, and precisely define what they can and cannot do within the system. This ensures a clean and secure environment for all your users.
Step 1: Creating User Roles
The first step is to define roles, which act as sets of permissions.
- Go to the Security section in the left menu (the last item).
- Expand it and select Roles.
- To create a new role, click the plus (+) icon in the top right corner.
- Enter the Role Name, Description, and choose the Role Type.
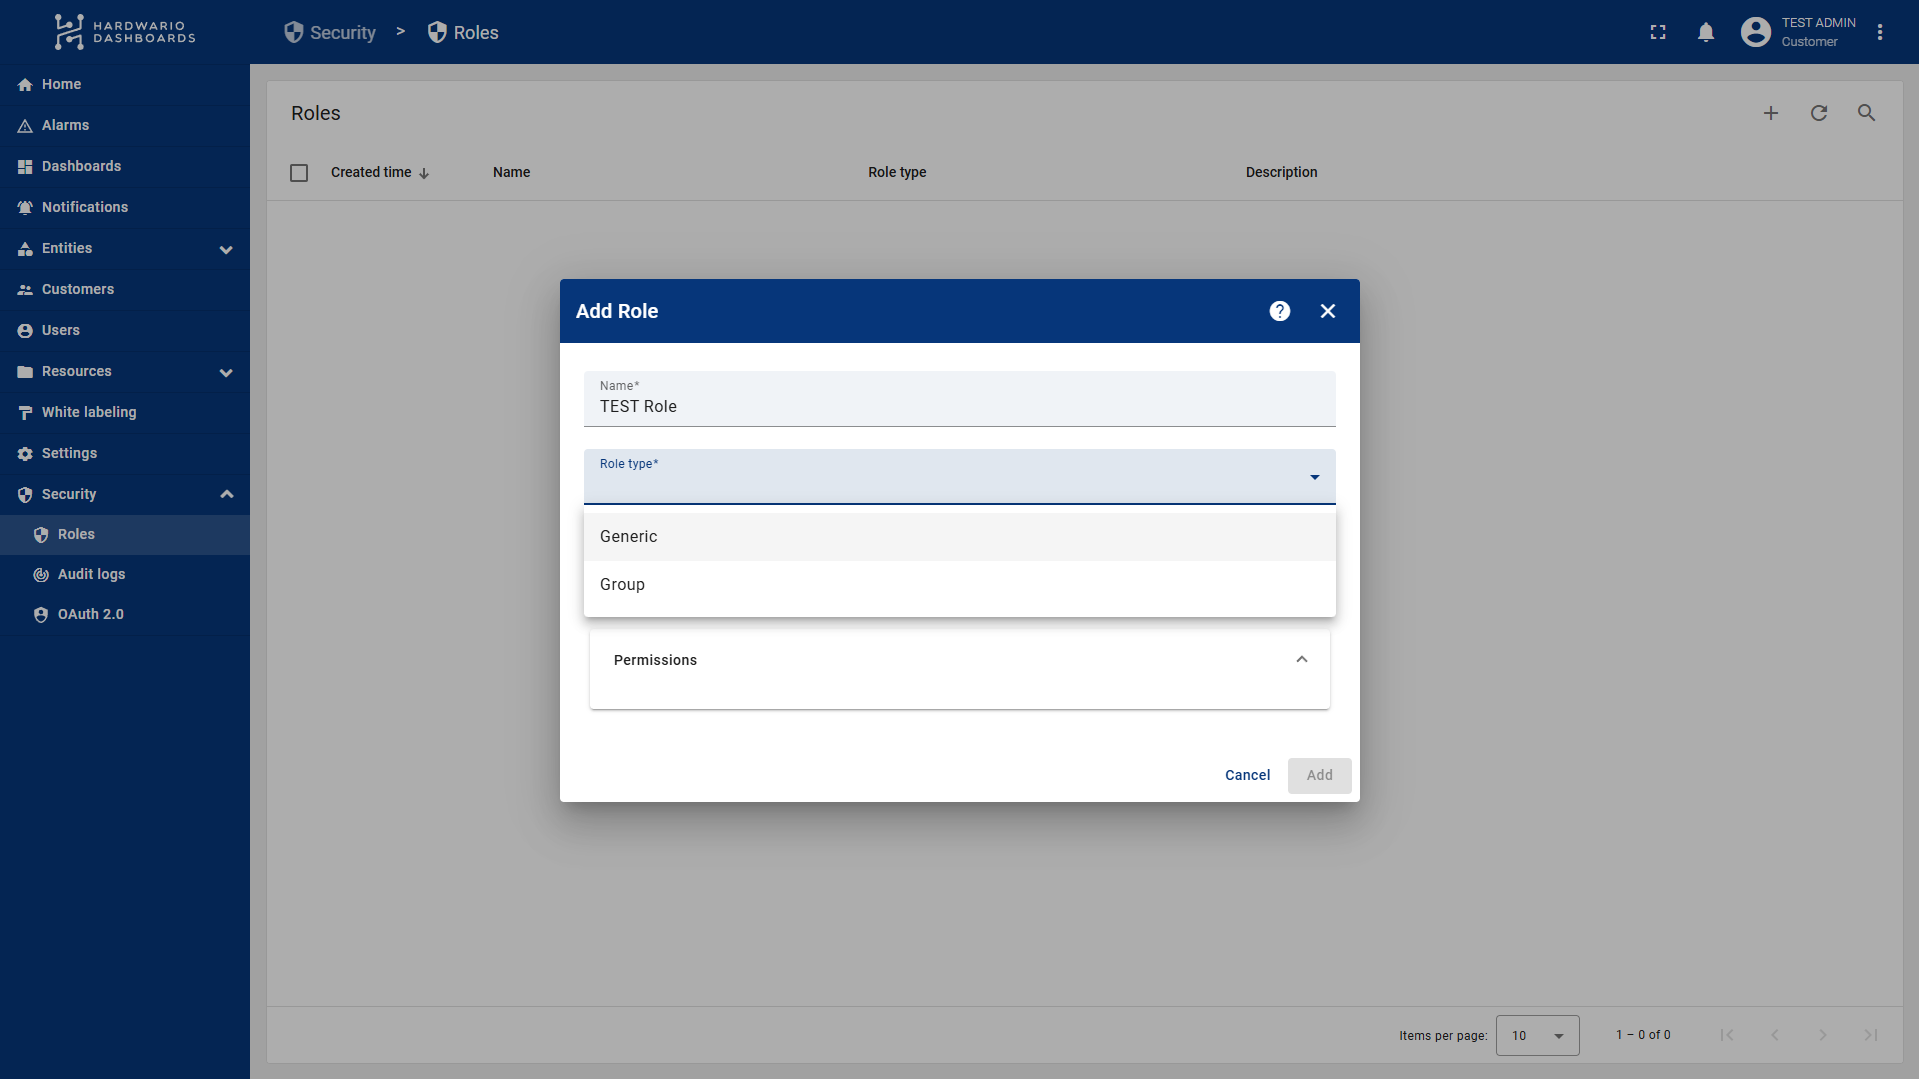
Difference between Role Types:
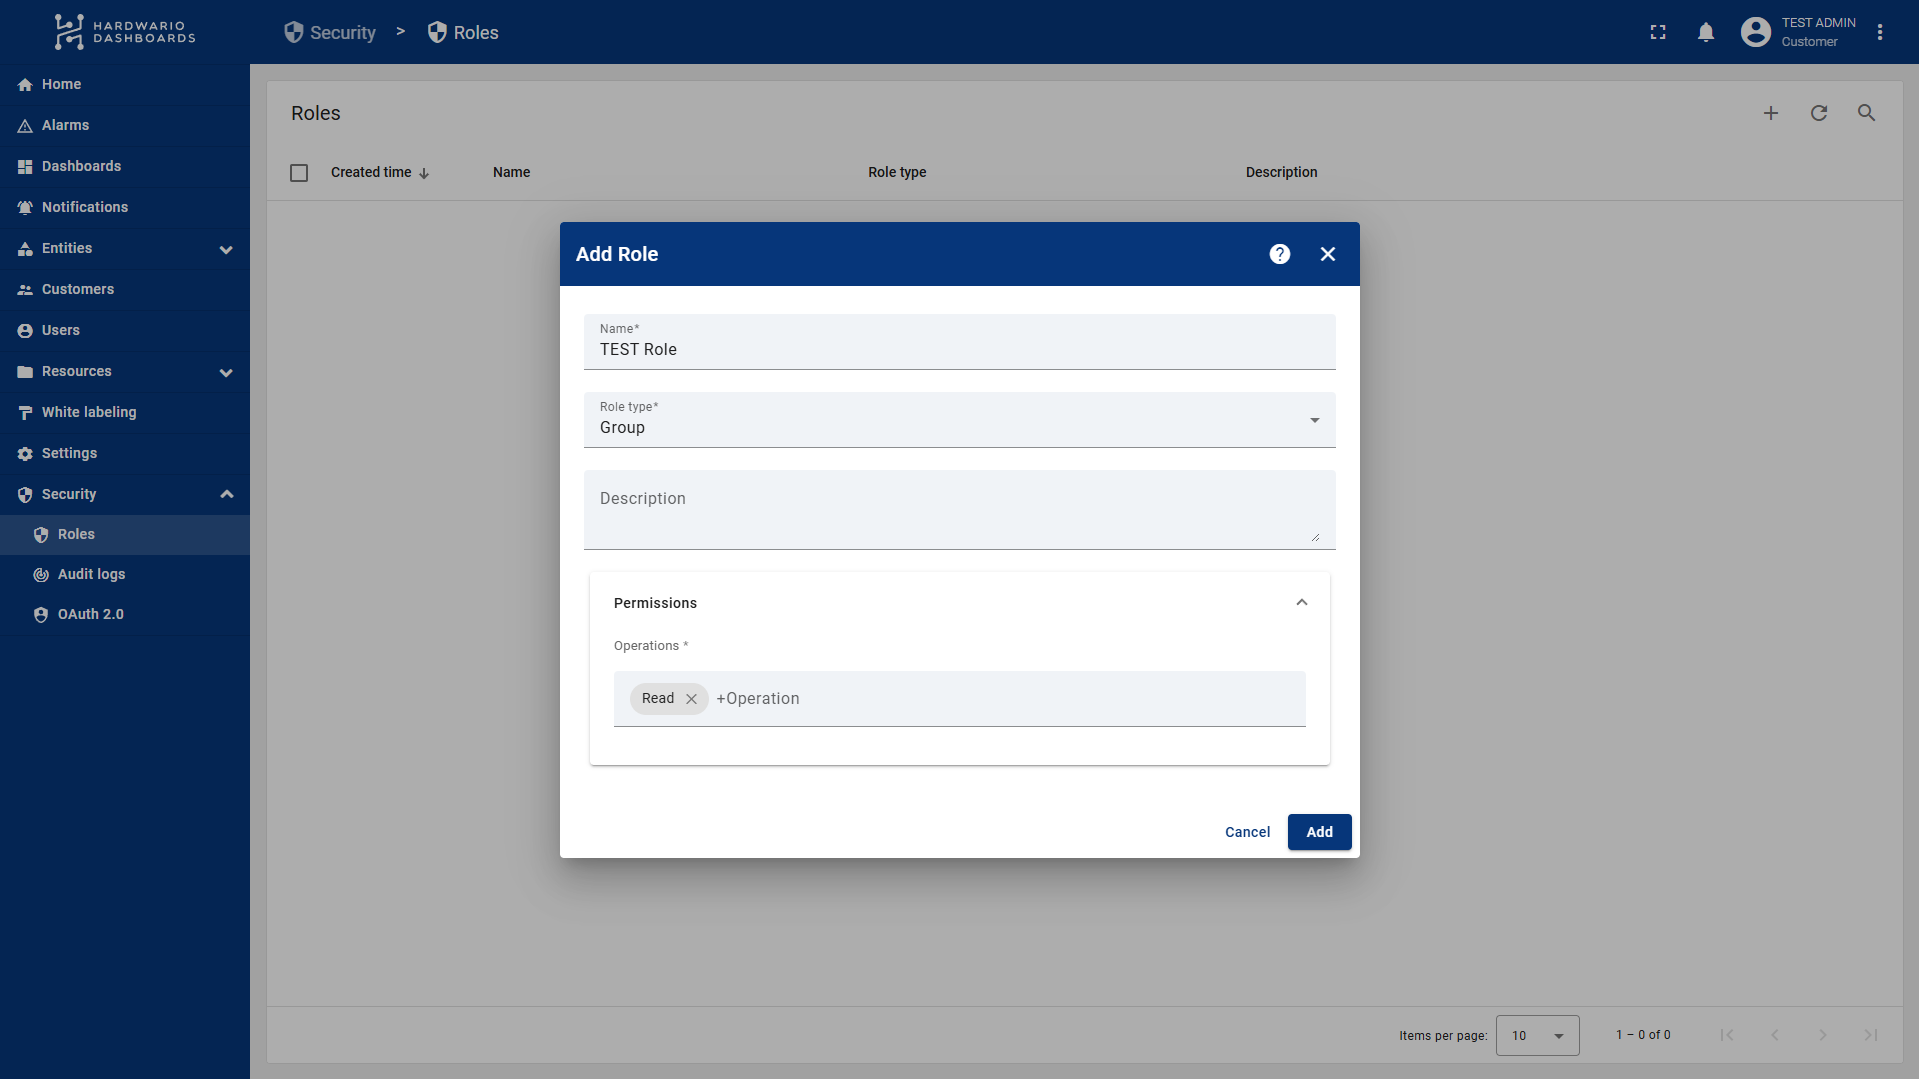
- Group: In this type, you only specify the operations (e.g., read, write) the user can perform. This role is linked to a specific entity (device, dashboard, etc.) later when setting up user groups.
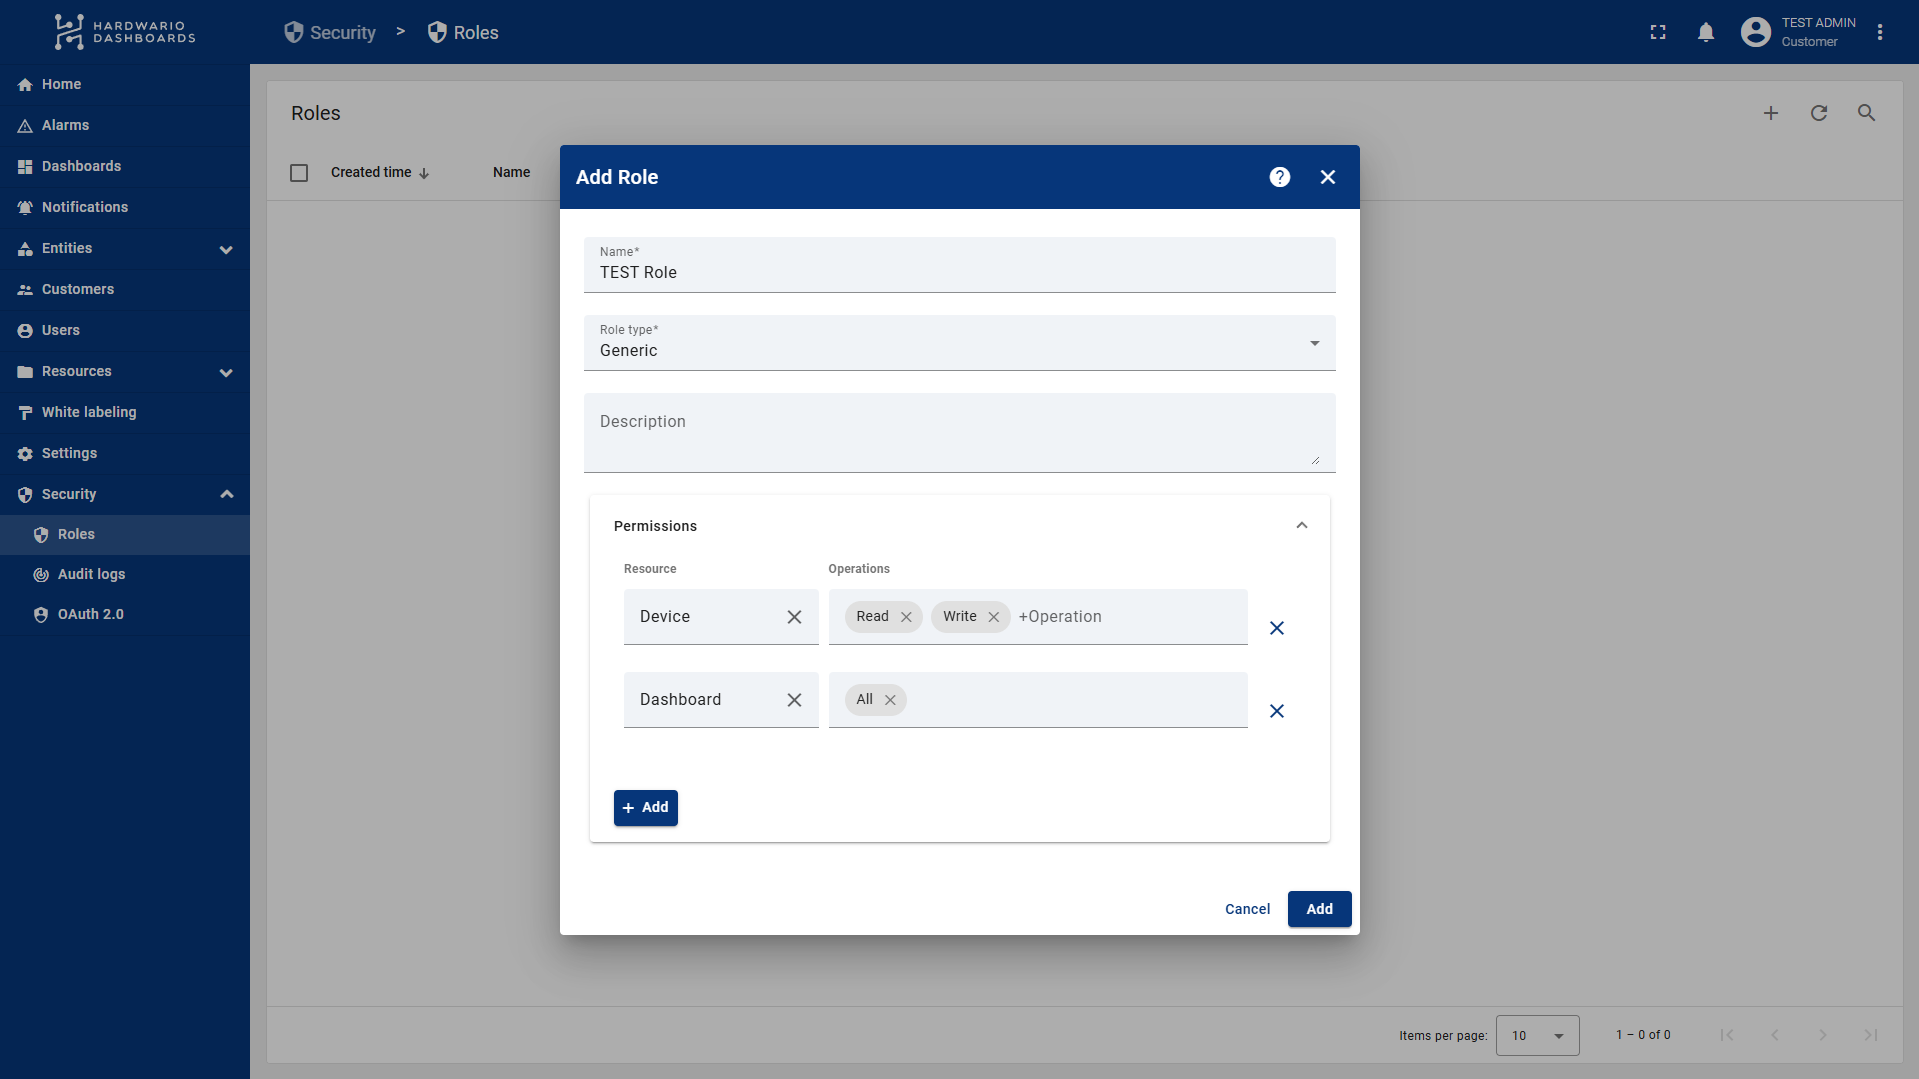
- Generic: Here, you define exactly what the user can and cannot do globally. Note: If you grant access to "Devices" here, the user will see all devices belonging to that customer, not just a specific group.
- Group
- Generic
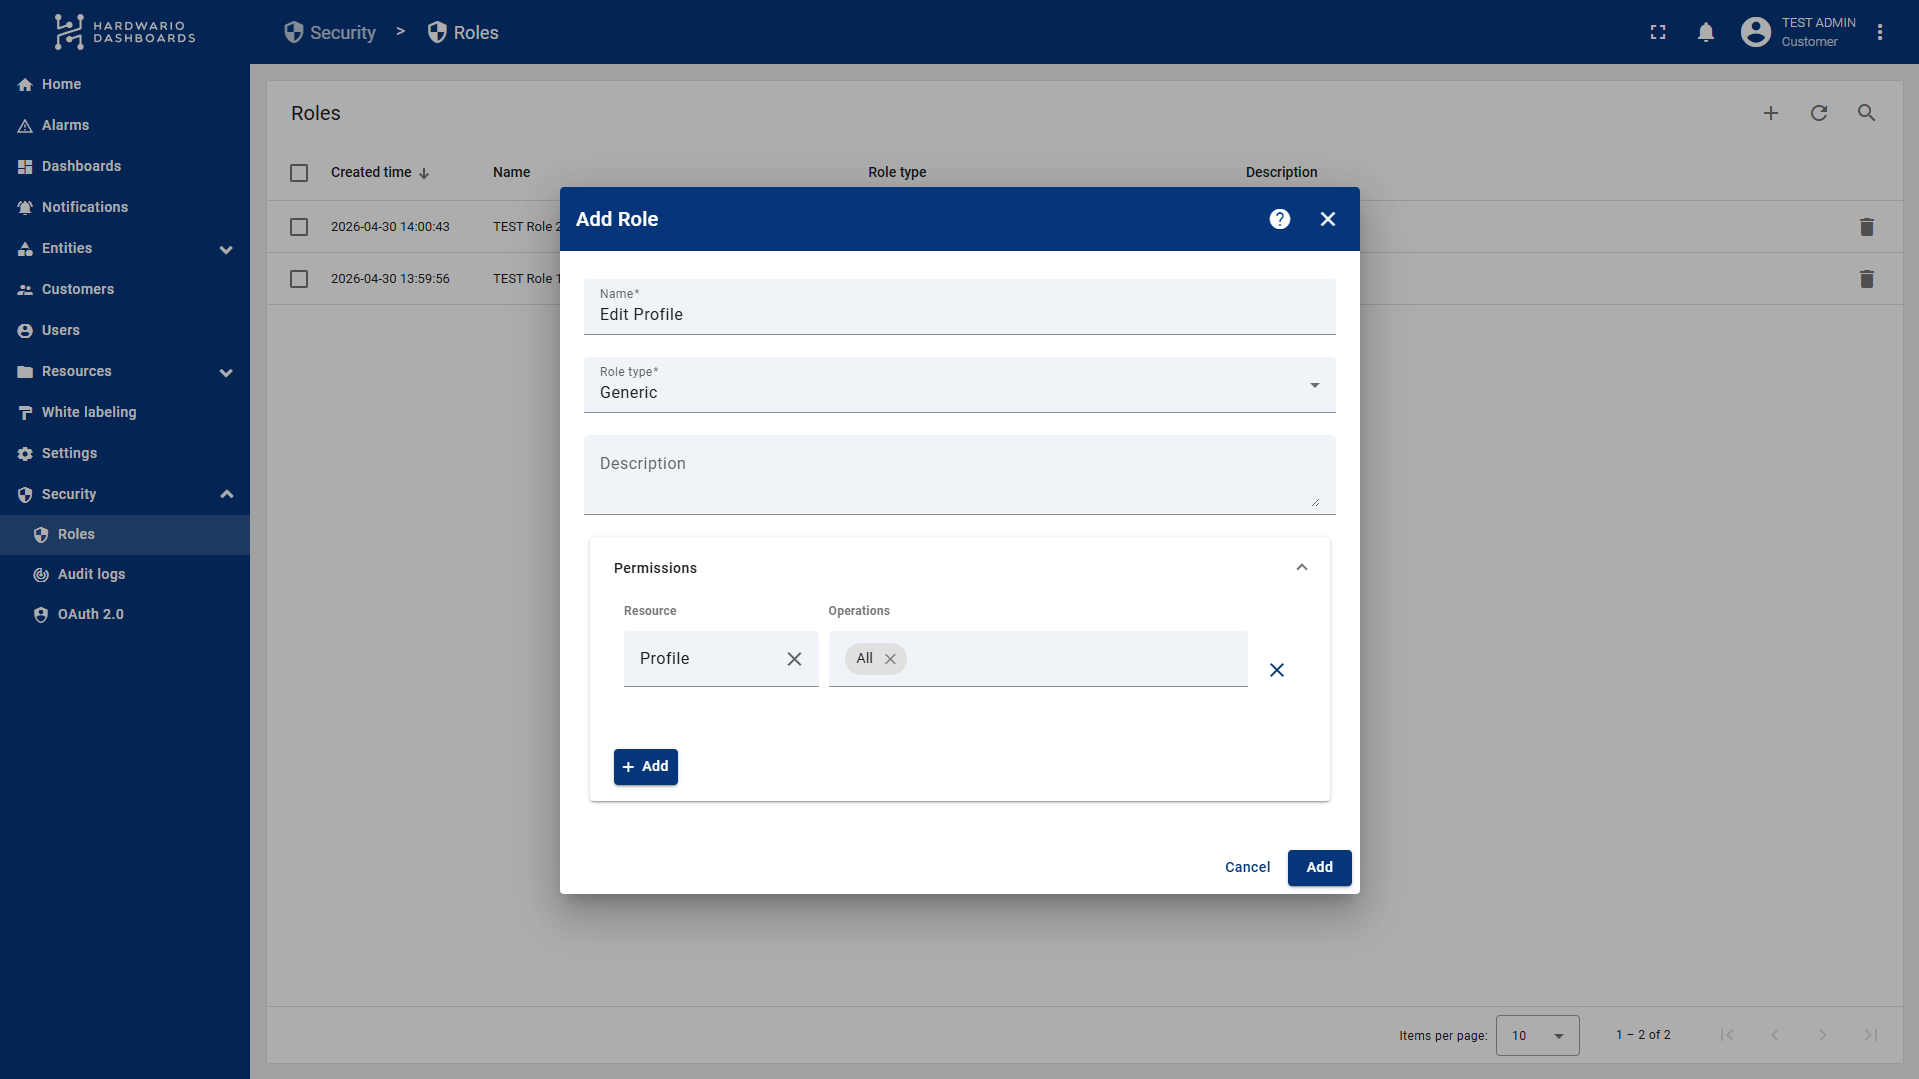
IMPORTANT (User Profile Management): For users with restricted access, it is recommended to create a Generic role where you allow All operations for the Profile resource. Adding this role to a user group allows users to change their own passwords and account details.
Step 2: Creating User Groups
Next, you need to create groups to which you will assign the roles created above.
- Go to the Users section and select the Groups tab.
- You will see default groups: Customer Administrators (full access) and Customer Users (read-only access to everything).
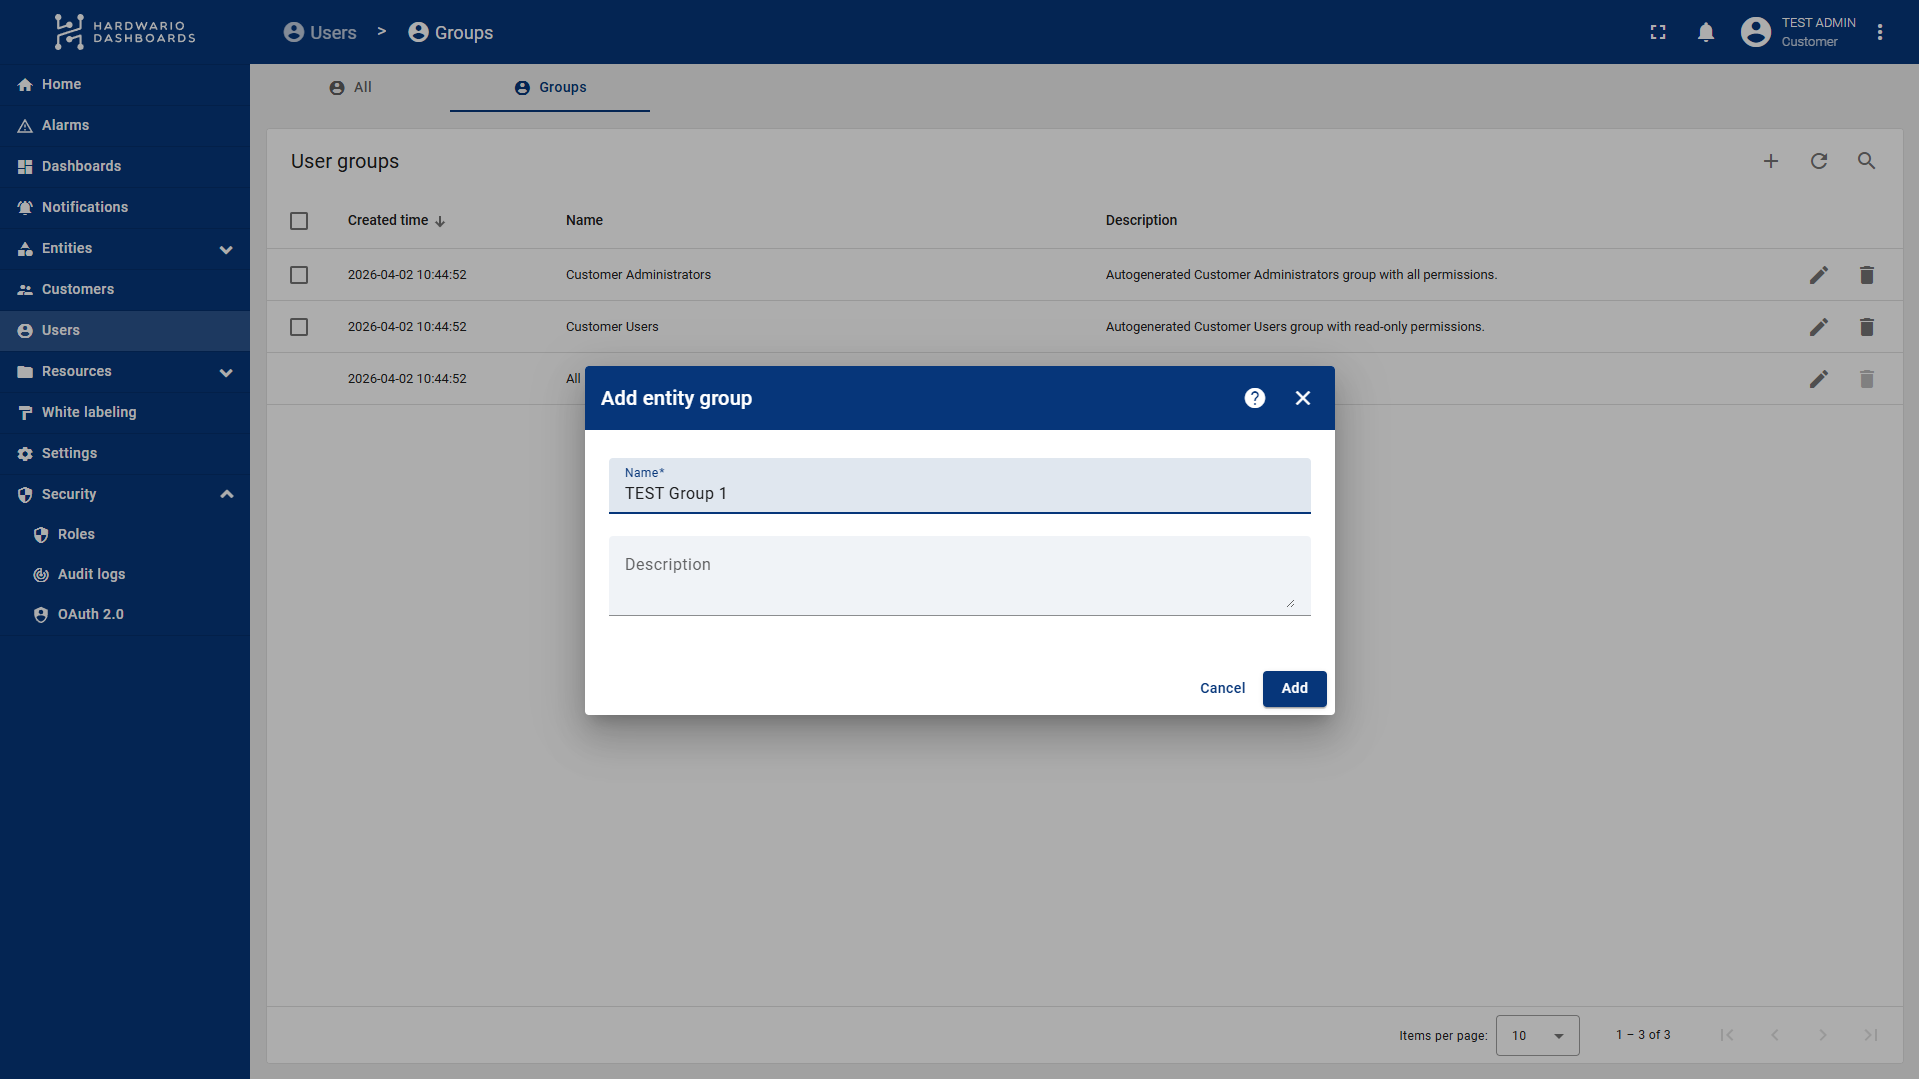
- Click the plus (+) icon in the top right, enter a name and description.
- Once created, click the arrow to the left of your group name to enter the group settings.
- Navigate to the Roles tab.
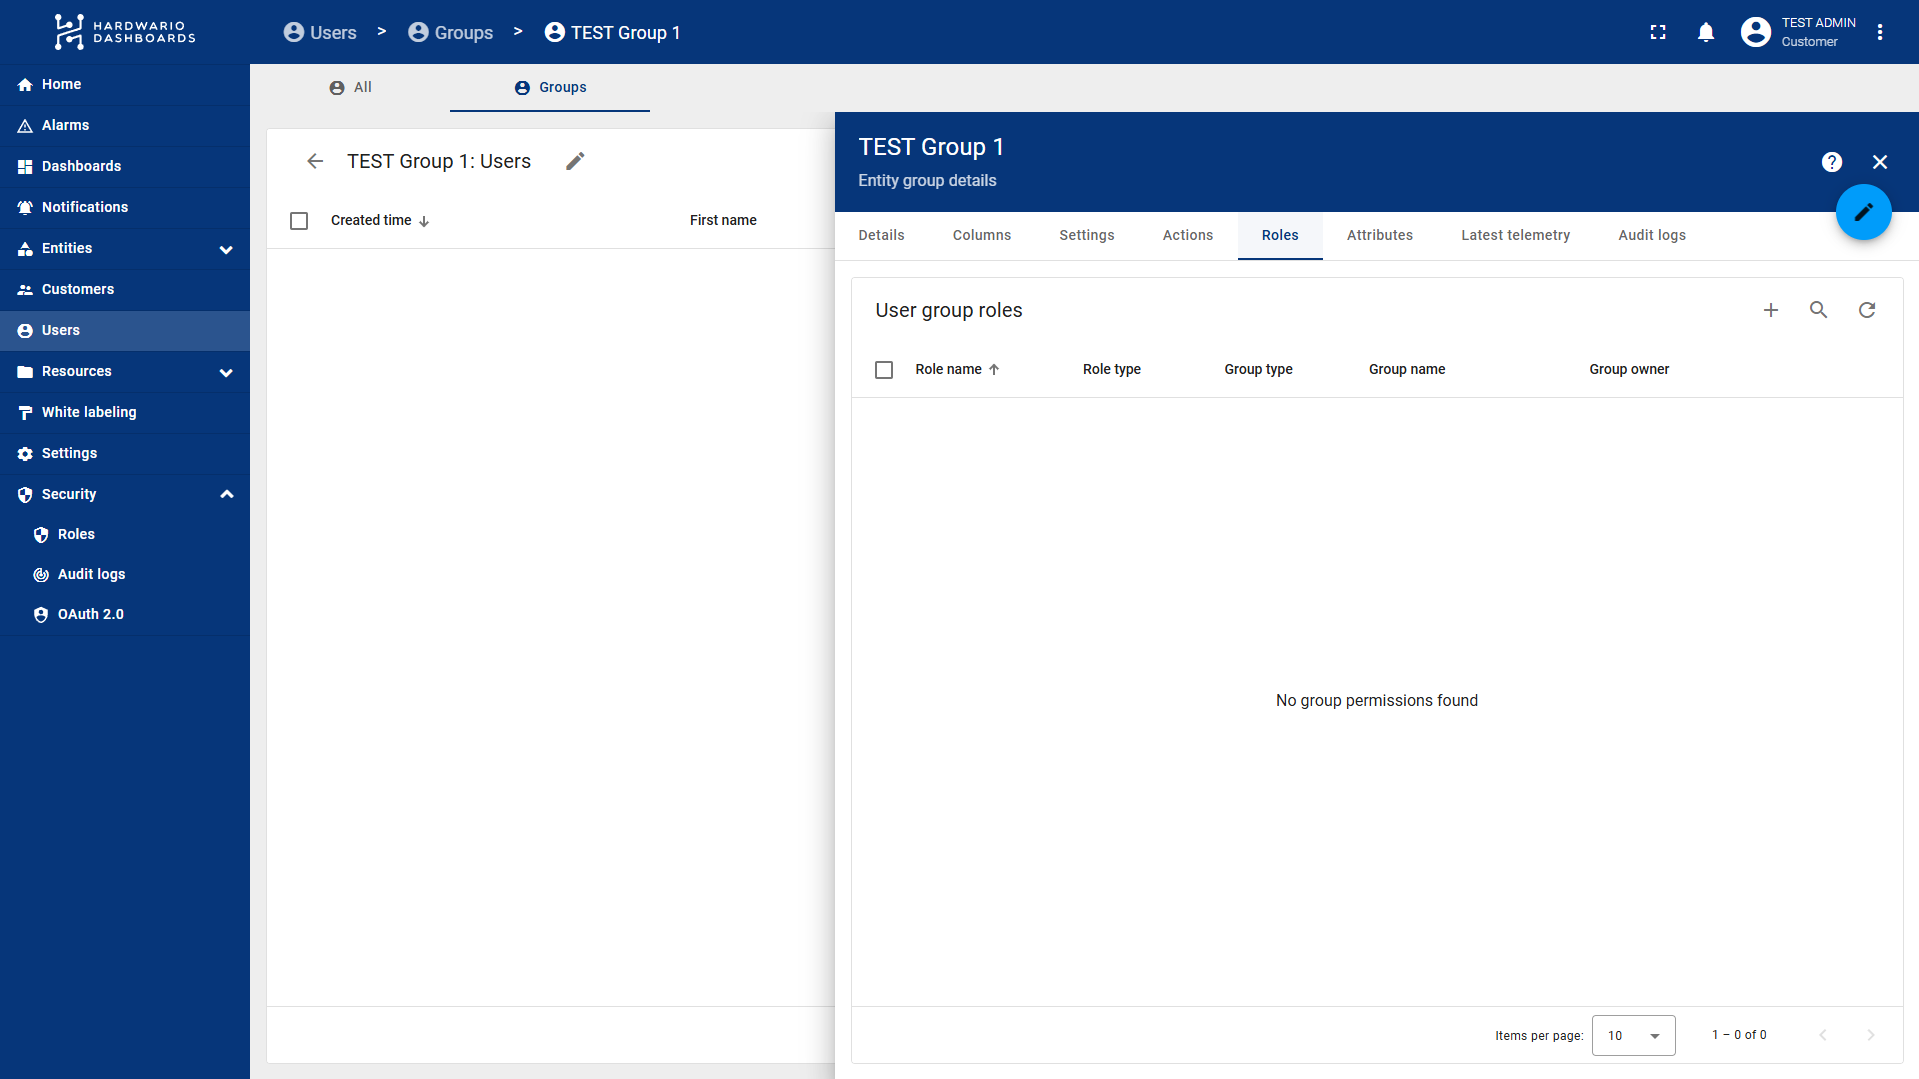
Adding Permissions to the Group:
- Click the plus (+) icon located to the left of the search bar.
- Select your Role Type and the specific role.
- If you selected Group role type, you must also specify:
- Group Owner: Usually yourself or the specific customer.
- Type: Define what the rules apply to (e.g., Device or Dashboard).
- Entity Group: The specific group of entities the user should have access to.
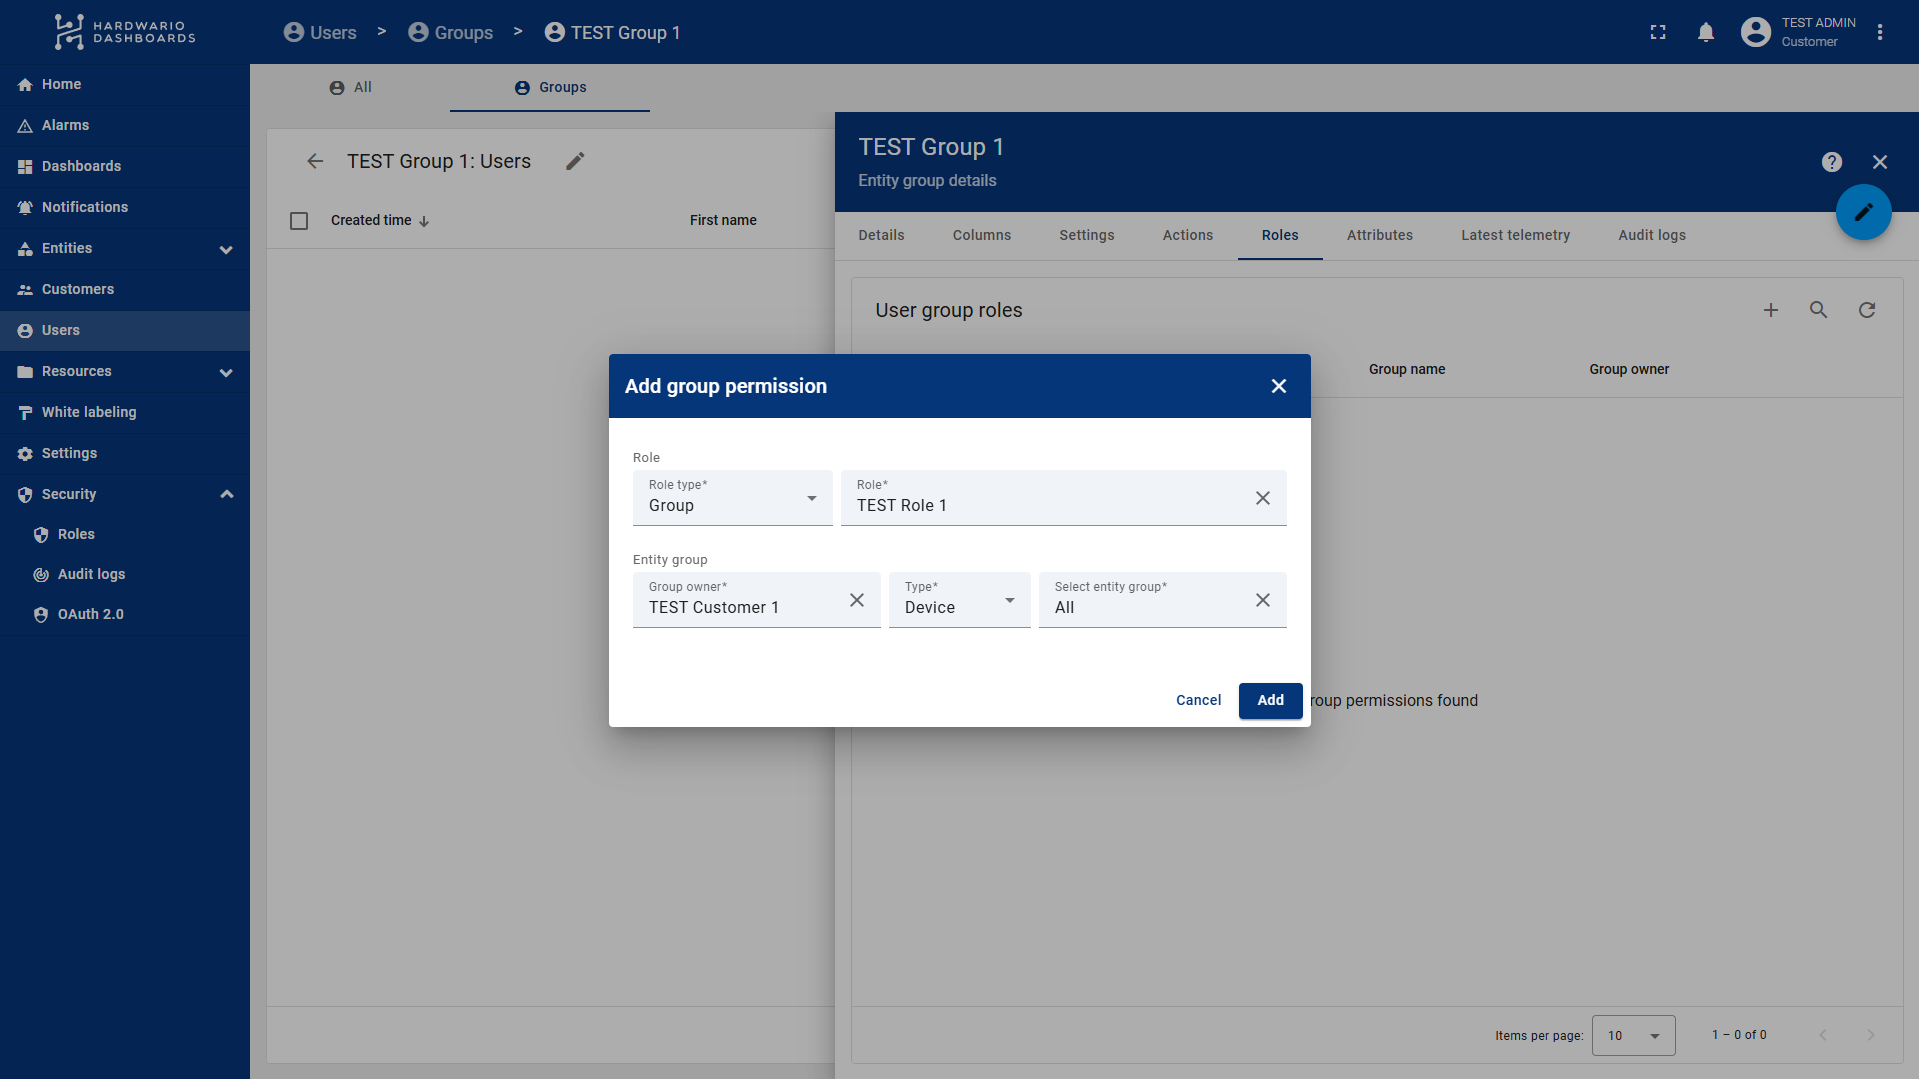
You must have your Entity Groups ready beforehand. This means your devices or dashboards should already be organized into groups. You will pair these groups with the user group in this step. Creating groups for devices/dashboards is similar to creating user groups.
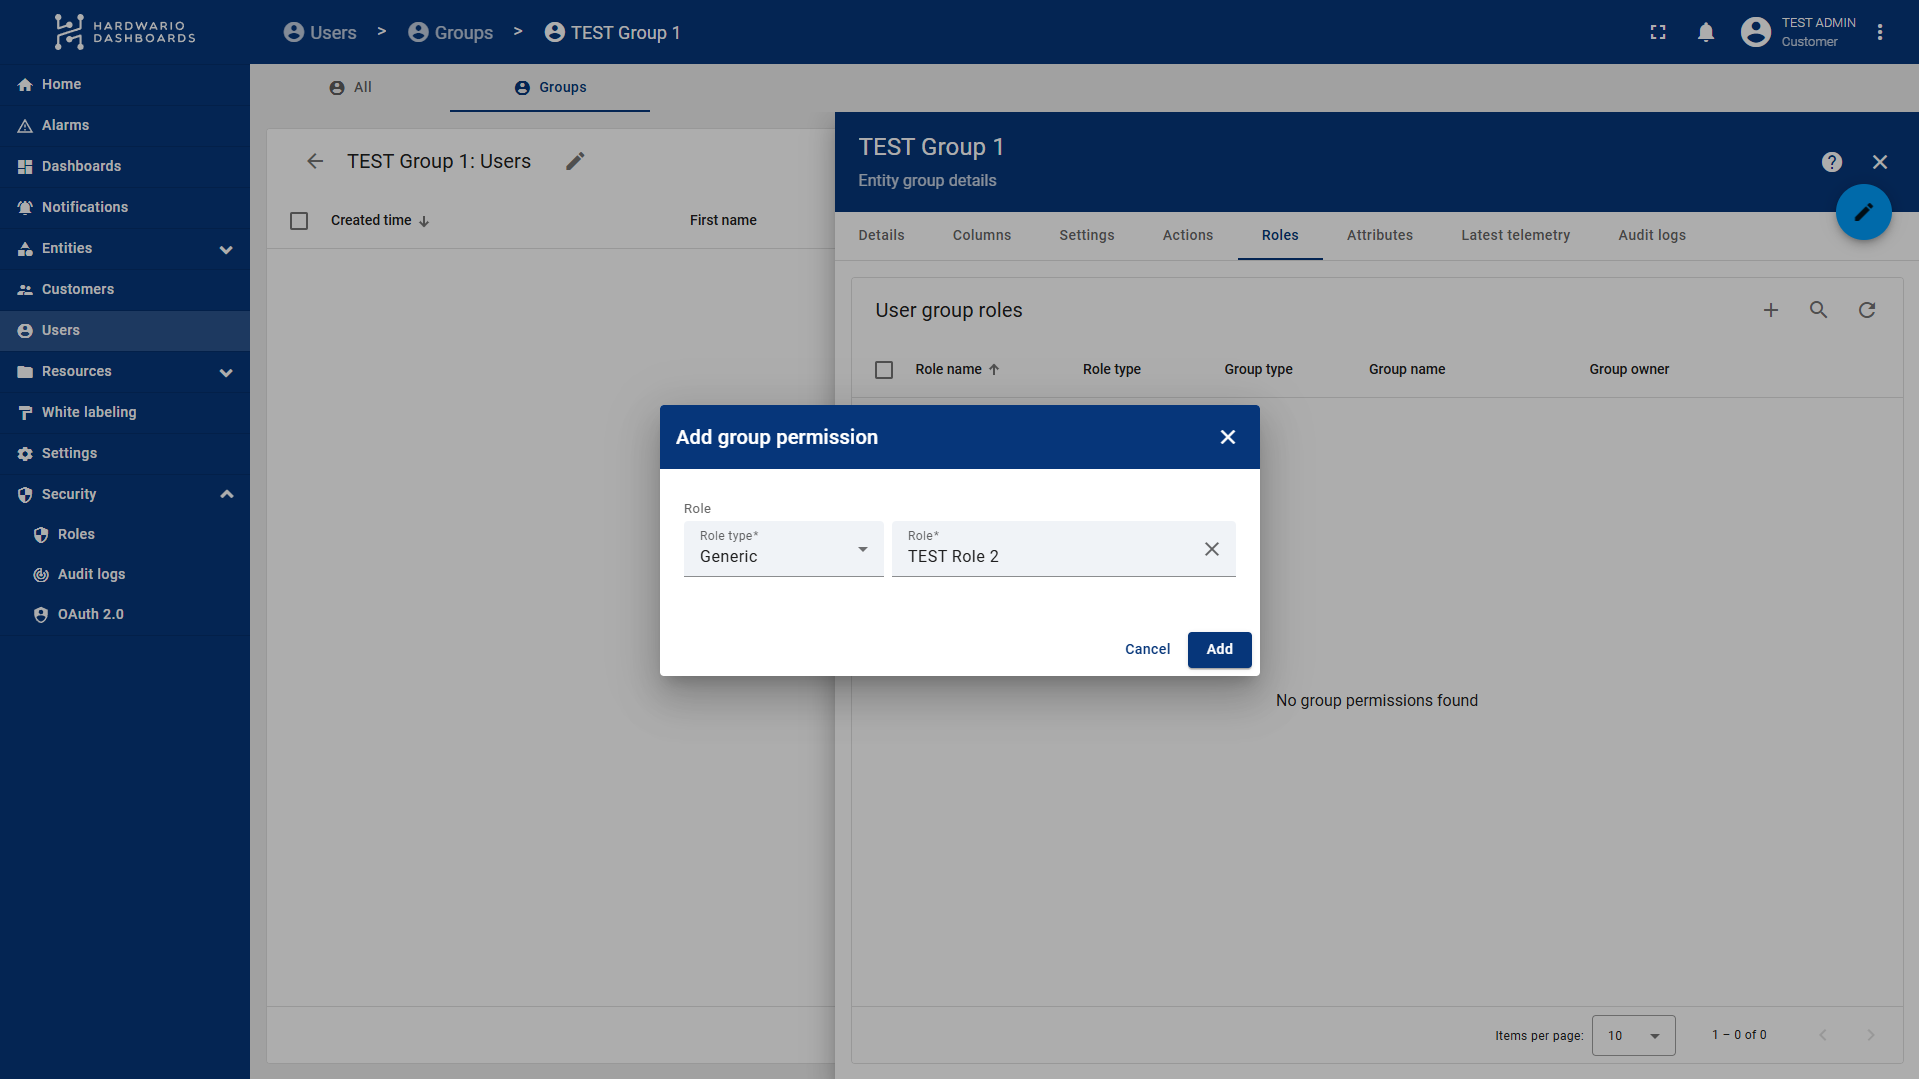
If you are adding a Generic role (like the profile editing role), you only need to select the role, and it will apply globally to the user's account permissions.
Step 3: Adding Users to the Group
You can add users to your newly configured group in two ways:
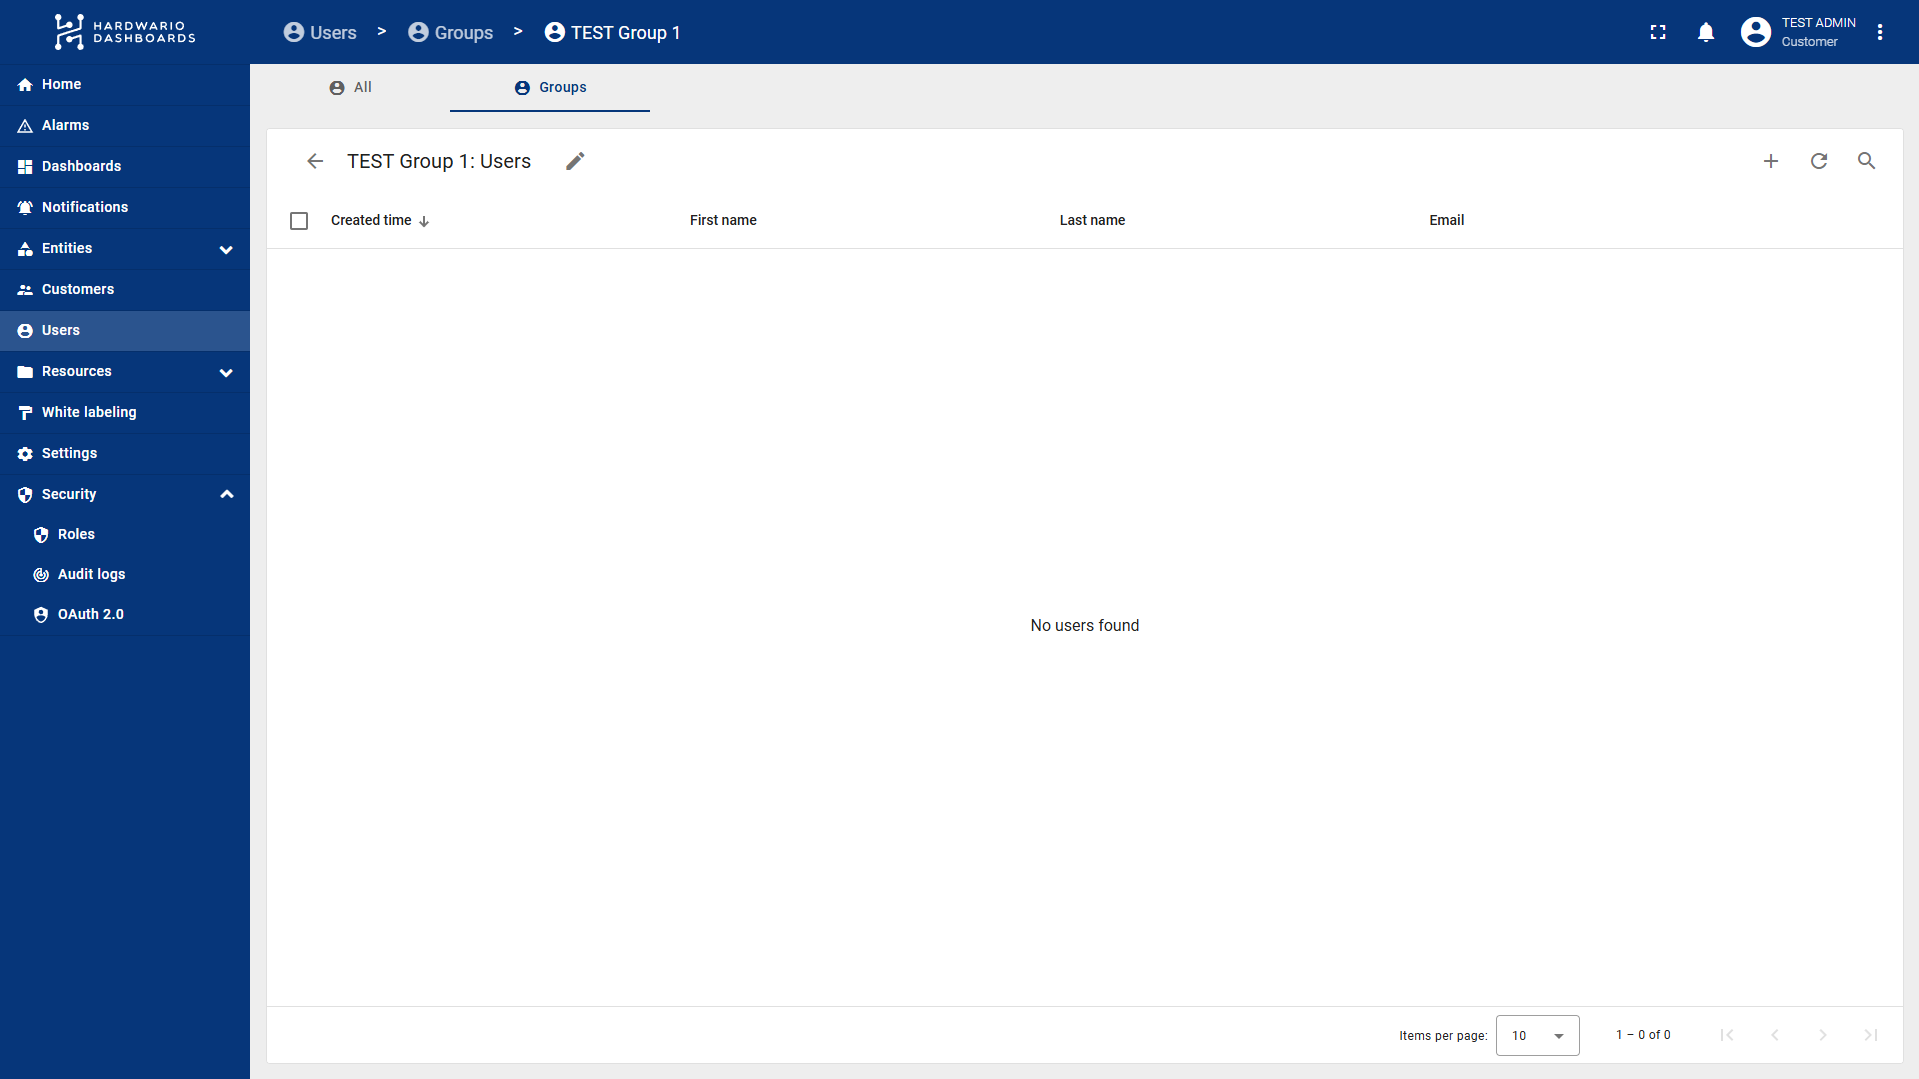
- New Users: Directly within your group (under the Users tab), click the plus (+) icon.
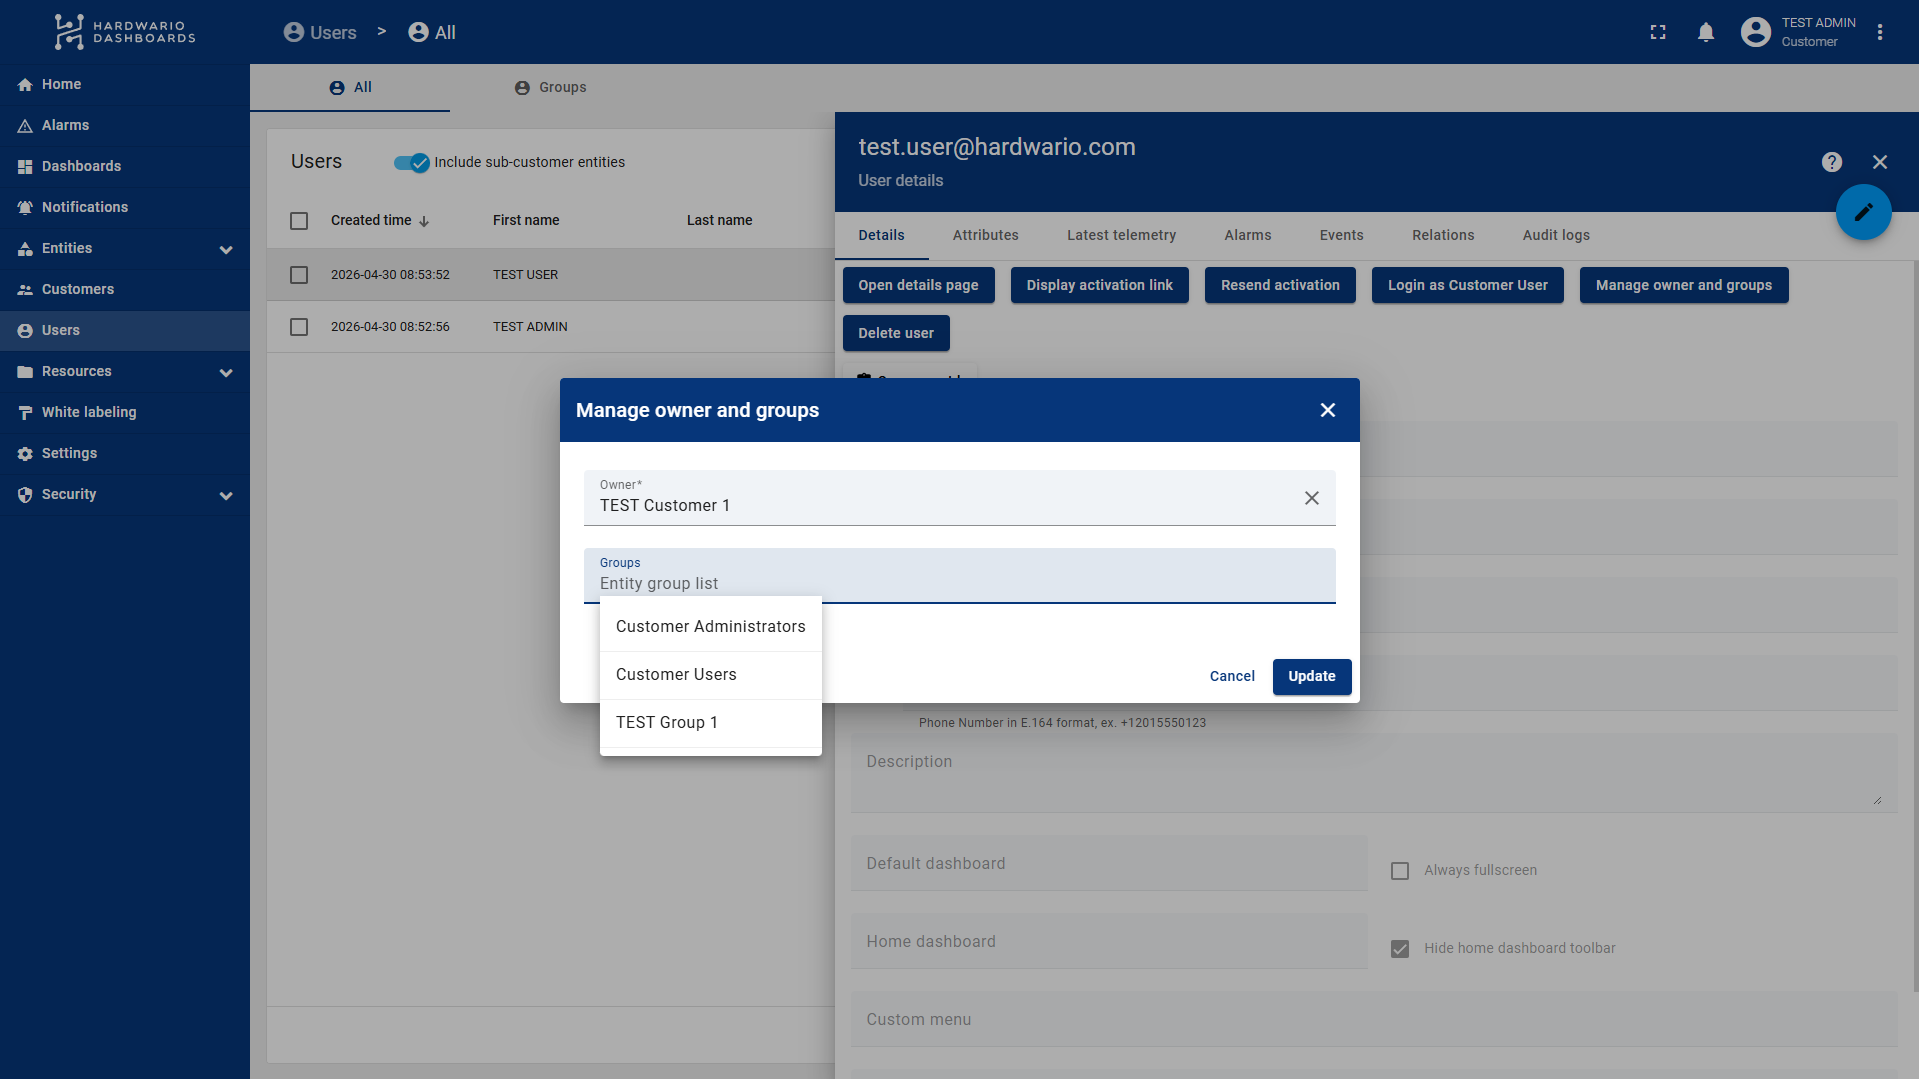
- Existing Users: * Go to the main Users -> Users section.
- Click on a specific user.
- In the Details tab, click the Manage owner and groups button.
- Select the desired user group and click Update.
Step 4: Creating and Sharing Device Groups
As mentioned in the previous steps, to give users access to specific devices without showing them everything, you need to use Device Groups. ThingsBoard allows a flexible structure where a single device group can be shared with multiple user groups (for example, allowing both the end customer and your internal maintenance team to see the same devices).
Creating a Device Group
- Go to the Entities section in the left menu and select Devices.
- Switch to the Groups tab.
- Click the plus (+) icon in the top right corner to create a new group.
- Enter a Name and Description for the group, then save it.
Adding Devices to the Group
- Click on your newly created device group to open it.
- Go to the Entities tab inside the group.
- Click the plus (+) icon and select the specific devices you want to include. (Note: A single device can belong to multiple groups at the same time).
Sharing the Device Group with Users
Once your device group is populated, you need to grant users access to it by linking it to the user groups created in Step 2.
- Go back to Users -> Groups and open your specific user group.
- Navigate to the Roles tab and click the plus (+) icon.
- Select a Group role type (e.g., a role that grants read-only or read/write access).
- Set the Type to Device and select your newly created Entity Group (the Device Group).
- Click Add.
You can repeat this sharing process across as many user groups as needed. The exact same device group can be shared with "Customer A" (with read-only rights) and your "Service Team" (with full access rights) simultaneously!