How to Create a Read-Only Public Link
This tutorial explains how to share a ThingsBoard dashboard via a public URL. This allows external users to view the dashboard and its telemetry data without needing a ThingsBoard account. By default, this public access is strictly read-only, ensuring your data remains secure.
⚠️ Important Note: Working with Sub-customers
If you are configuring this public link for a specific sub-customer, you might not see their specific Device or Dashboard groups while logged in as a Tenant Administrator.
To resolve this, you must log in as a Customer Administrator for that specific customer:
- Navigate to Customers in the left menu.
- Find the customer, click the Manage customer users icon, and log in as one of their administrators.
- Workaround: If the sub-customer does not have any Customer Administrator accounts yet, you can create a temporary test profile. You do not need to use a real email address (e.g.,
test@temp.local). Create the user, log in as them to complete this tutorial, and delete the temporary user account afterward.
(Alternatively, if you only need to grab the public link without logging in as the sub-customer, check out the Pro Tip below!)
Step 1: Make the Device Group Public
For the dashboard to display data properly, the public user needs read access to the devices feeding the dashboard.
(Optional) How to create a new Device Group: If you do not have a specific group yet, you can create one:
- Navigate to Devices -> Groups in the left-hand menu.
- Click the "+" (plus) icon in the top right corner.
- Enter a name for your new group and click Add.
Make the Device Group public:
- Navigate to Devices -> Groups in the left-hand menu.
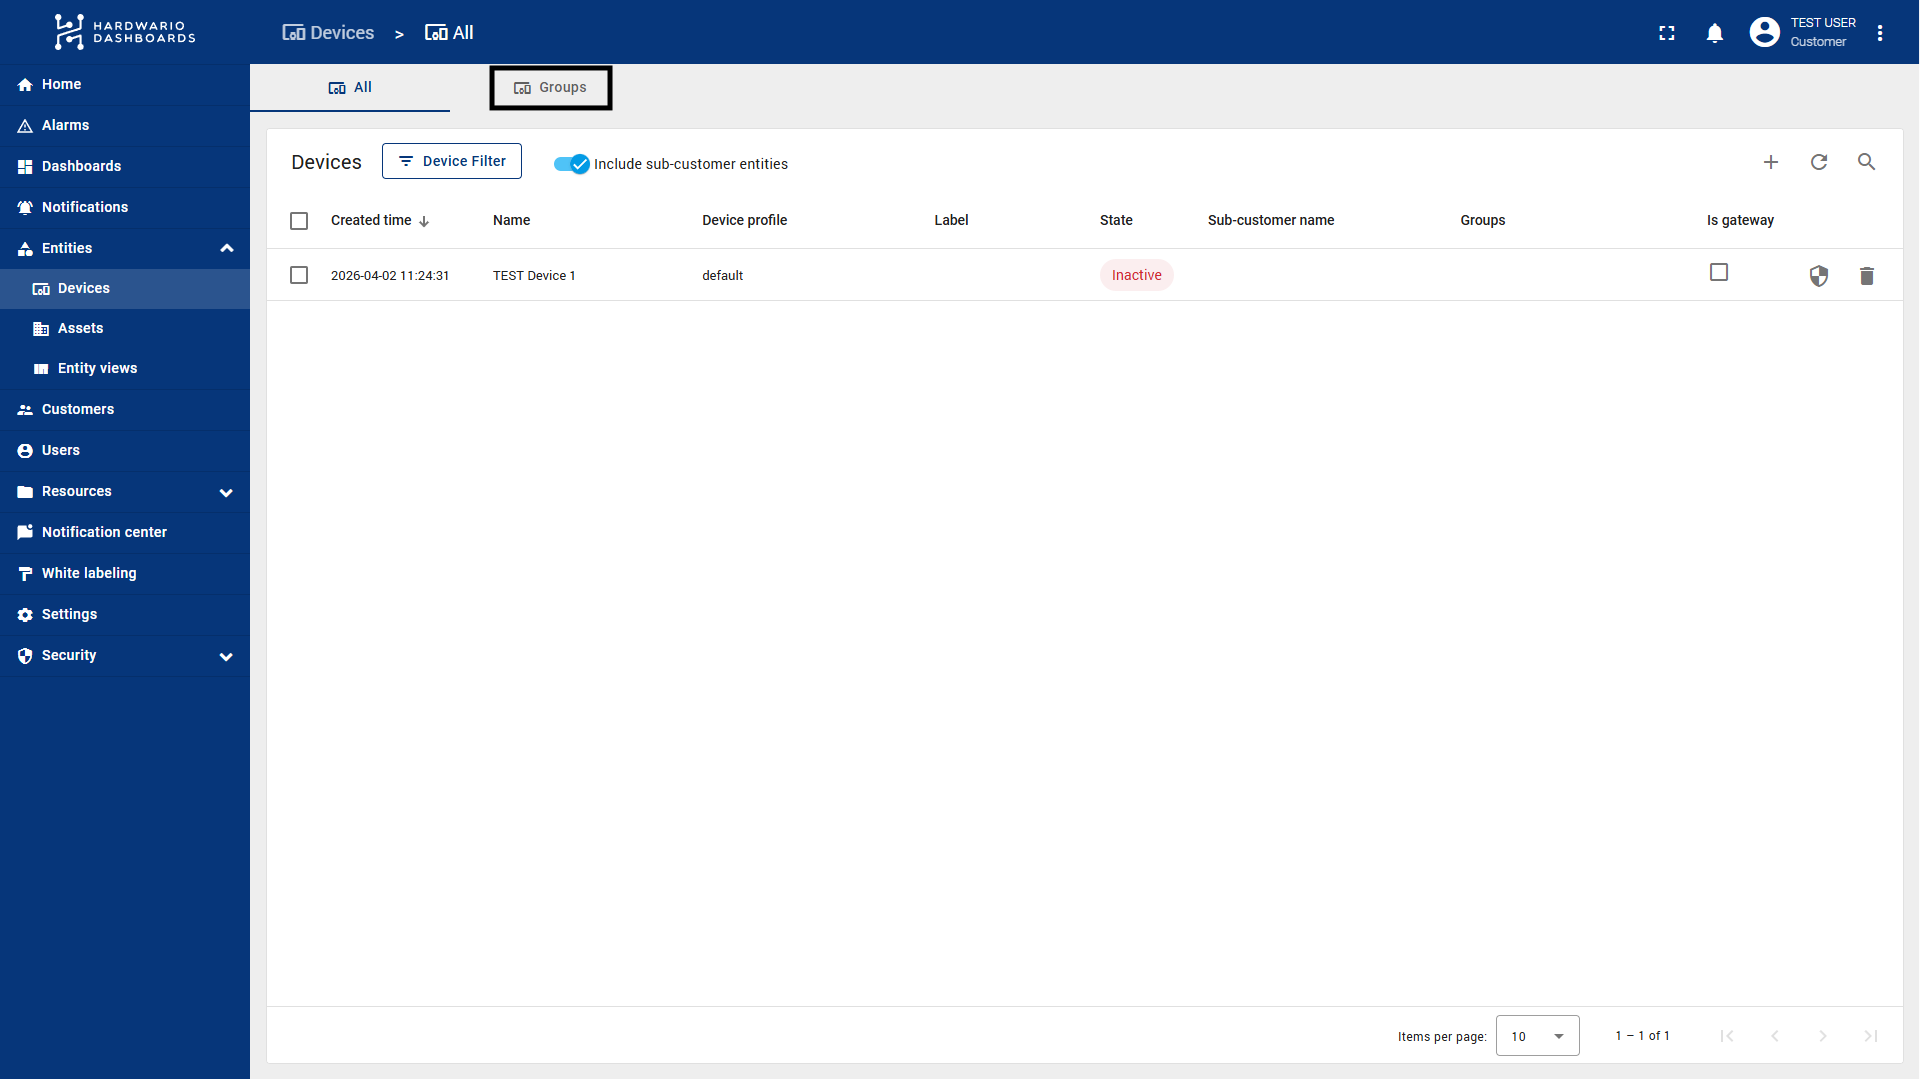
- Locate the Device Group containing the devices you want to display on the dashboard.
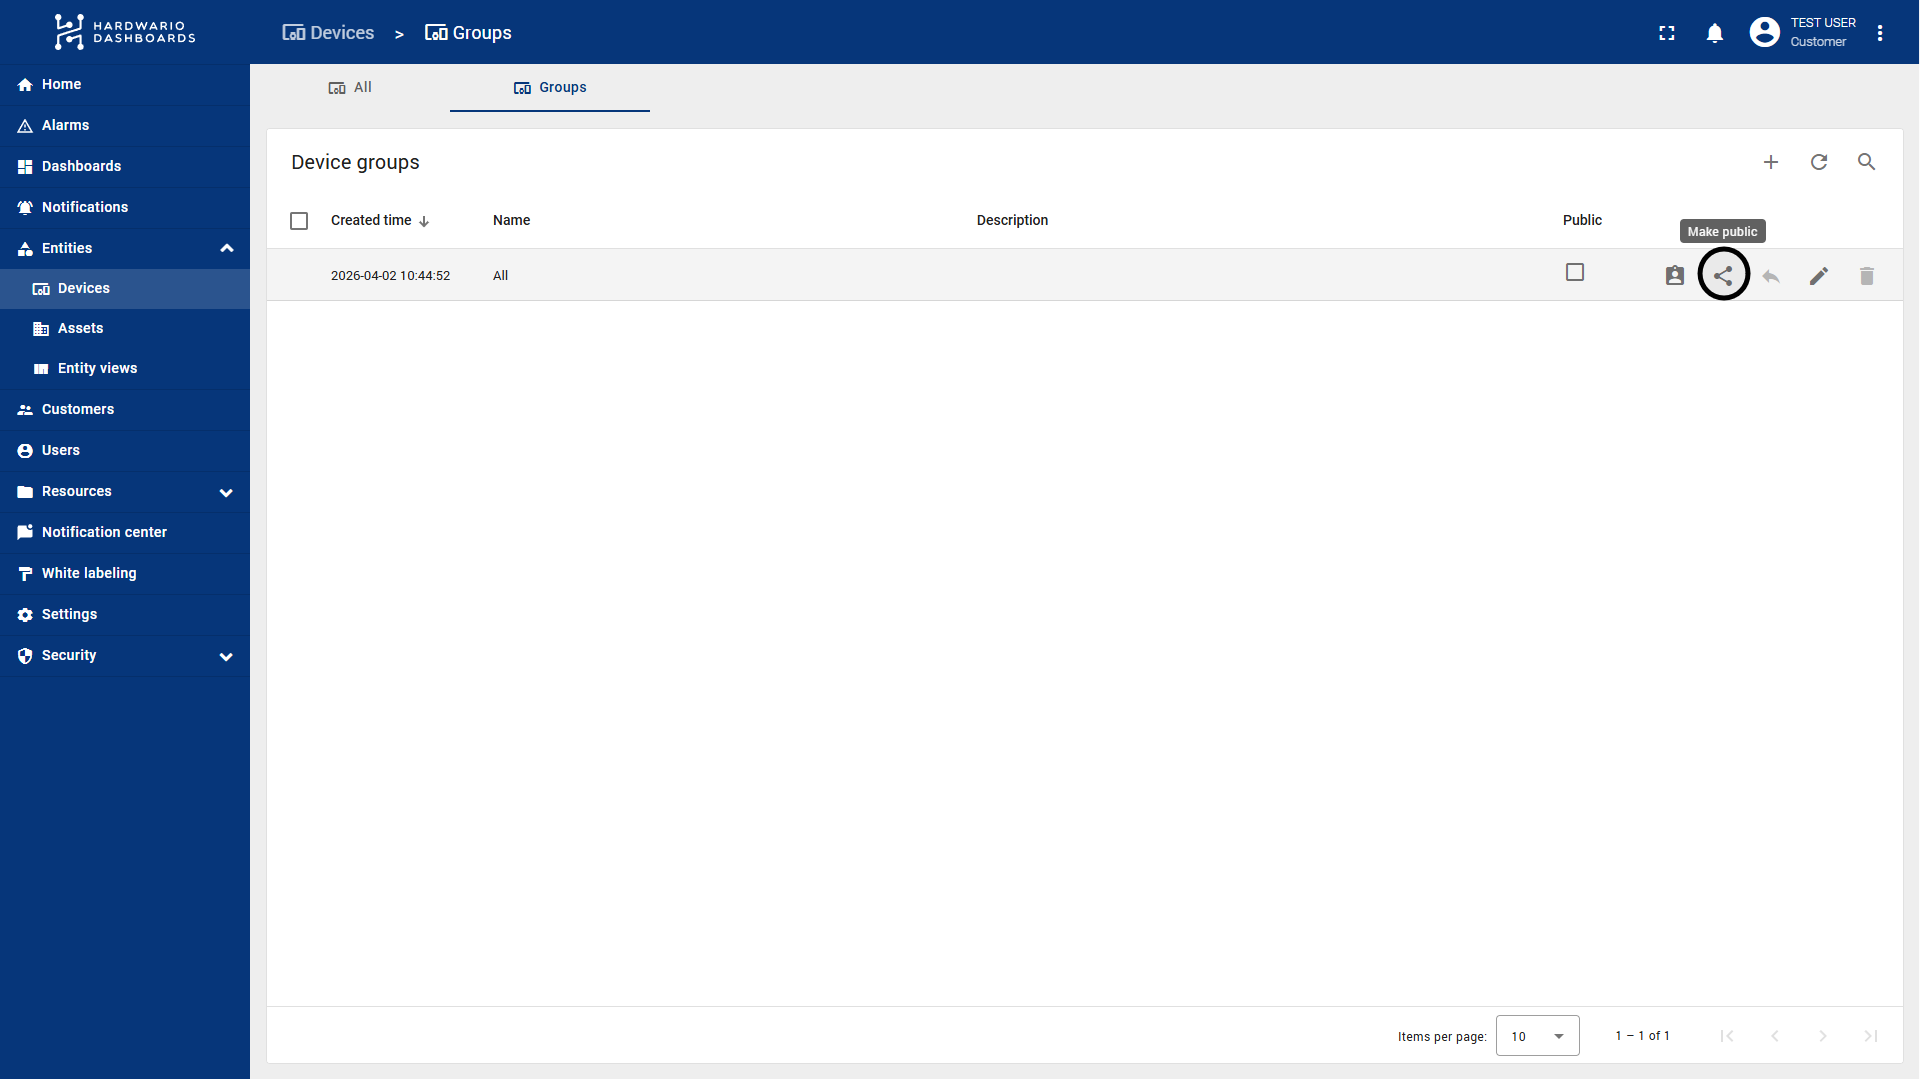
Tip: You can use a custom group, or you can use the default "All" group. If you make the "All" group public, any new devices added to this customer in the future will automatically become visible to the public link without requiring further configuration.
- Click the Share icon (the icon with three connected dots) on the right side of the group's row. Alternatively, click the arrow/edit icon on the row and select "Make entity group public".
- Result: ThingsBoard will automatically assign read-only permissions for this device group to the system's public user.
Step 2: Make the Dashboard Group Public
Next, you need to share the dashboard itself.
(Optional) How to create a new Dashboard Group: If you do not have a specific group for your dashboards yet:
- Navigate to Dashboards -> Groups in the left-hand menu.
- Click the "+" (plus) icon in the top right corner.
- Enter a name for your new group and click Add.
Make the Dashboard Group public:
- Navigate to Dashboards -> Groups in the left-hand menu.
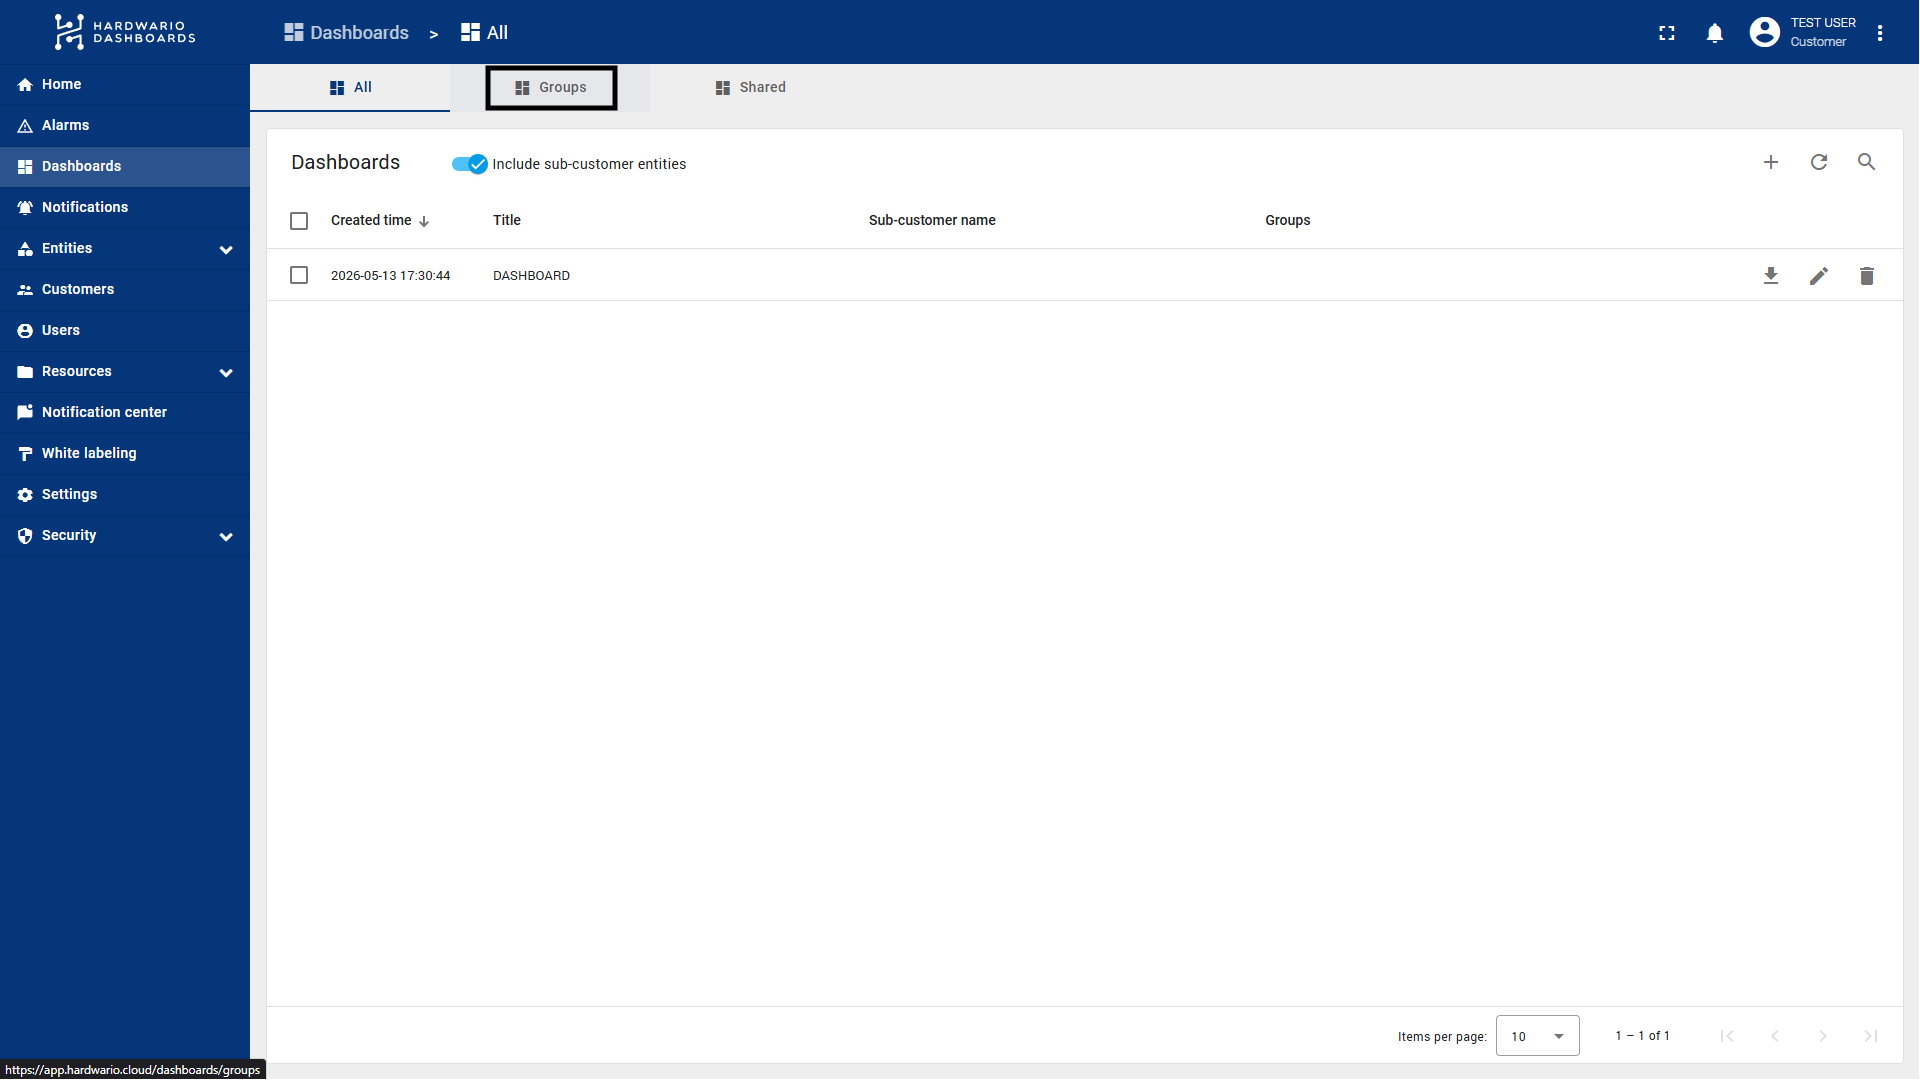
- Locate the Dashboard Group that contains the dashboard you want to share.
- Click the Share icon (the icon with three connected dots) on the right side of the group's row. Alternatively, click the arrow/edit icon on the row and select "Make entity group public".
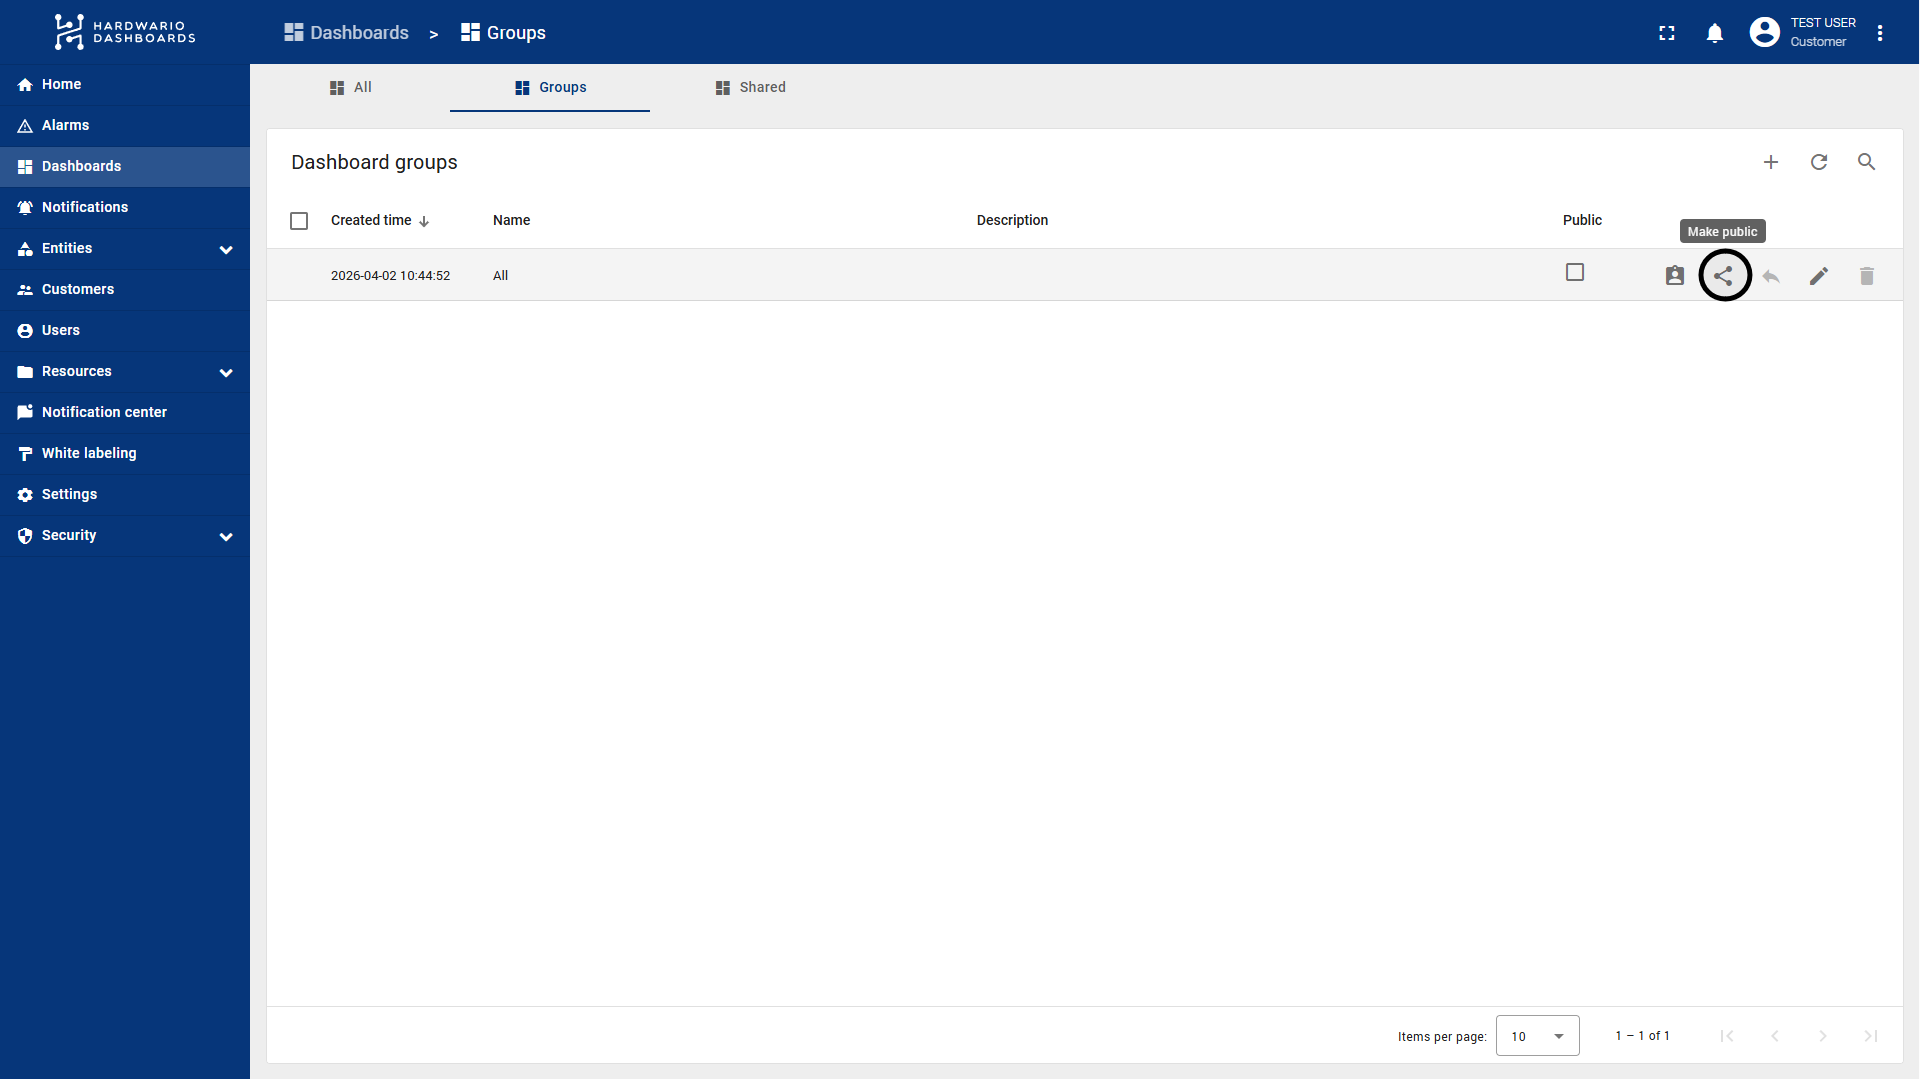
Step 3: Obtain the Public Link
Now that both the devices and the dashboard are public, you can generate and share the working URL.
- Stay in the Dashboards -> Groups section.
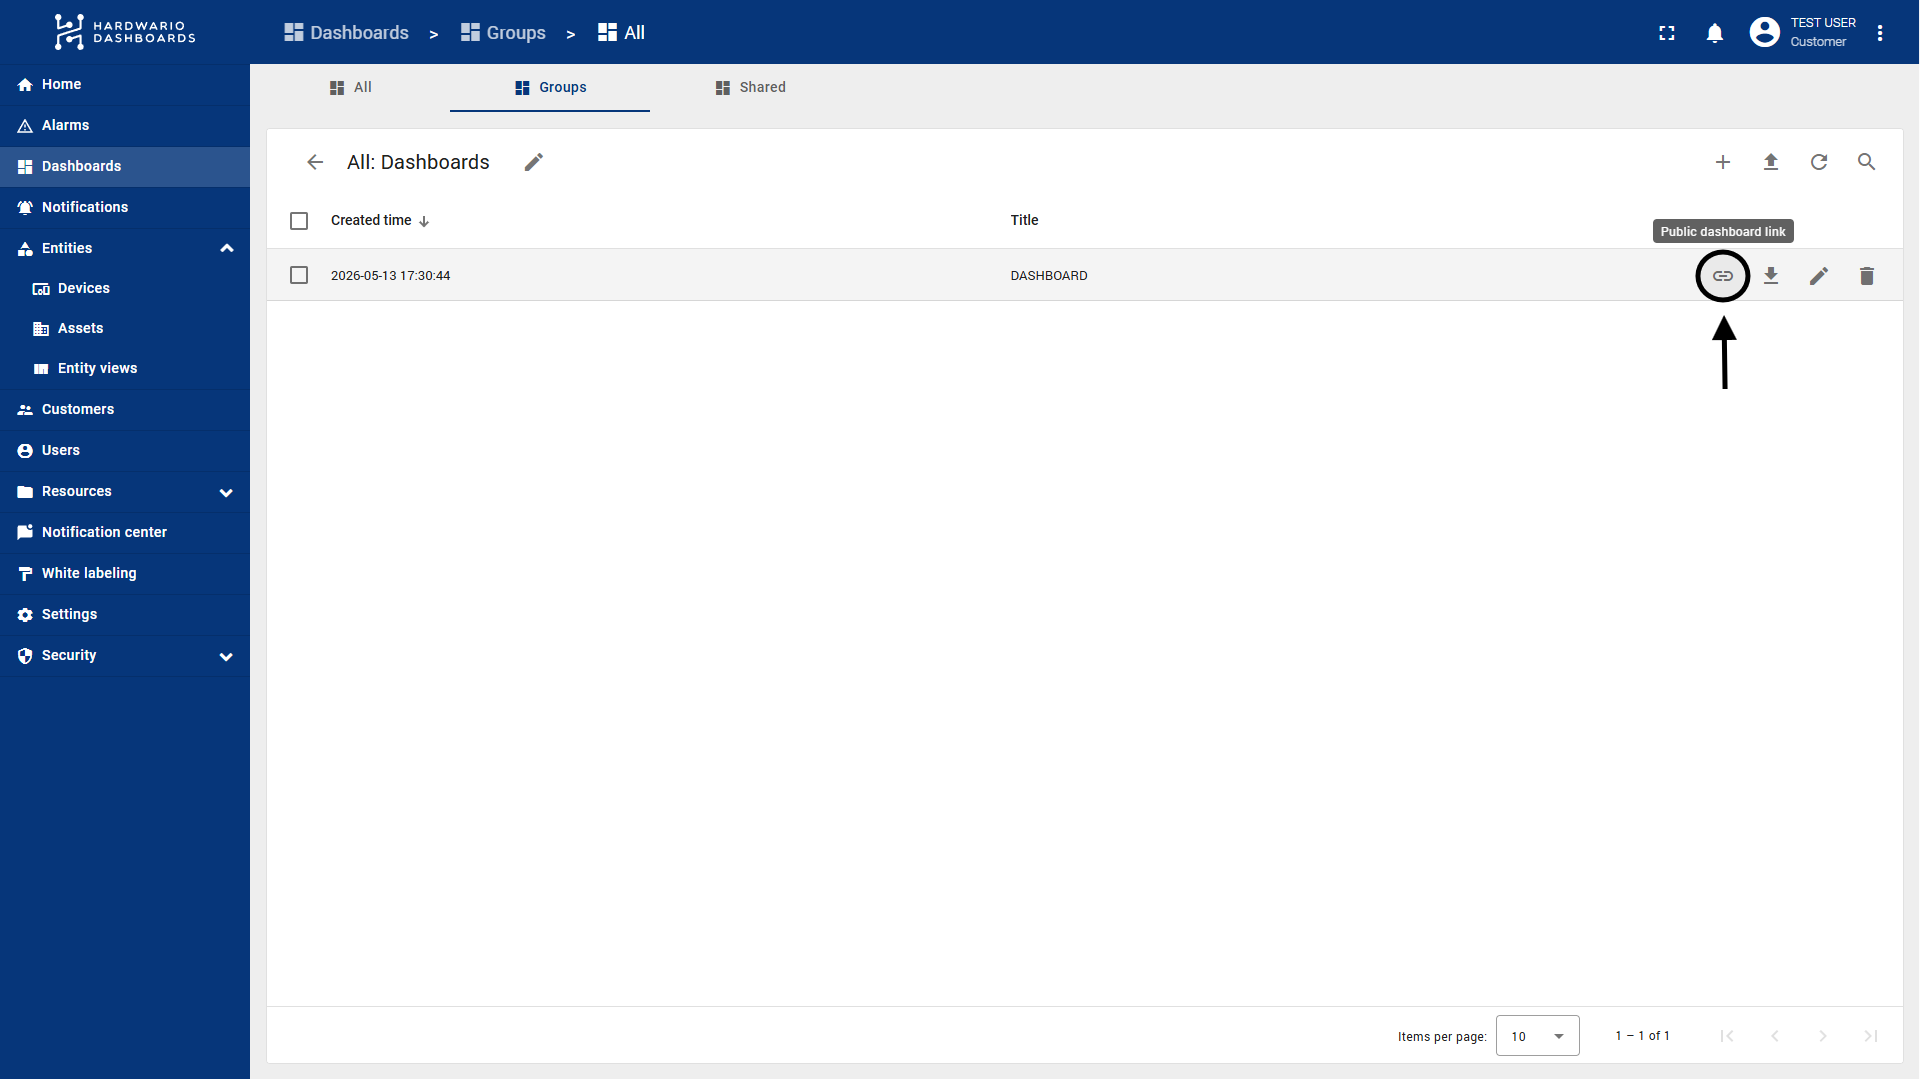
- Click directly on the name of the Dashboard Group you just made public. This will open the group and display a list of all dashboards inside it.
- Locate the specific dashboard you want to share.
- Click the very first icon on the right side of the dashboard's row—the Chain link icon (🔗) titled "Public dashboard link".
- Result: The URL is now copied to your clipboard.
You can now send this link to your clients or users. Anyone with this link can view the dashboard and its real-time data directly in their browser without needing to log in.
💡 Pro Tip: How to Get the Link Without Logging in as a Sub-customer
If you are operating at the parent customer level (Tenant Administrator) and want to grab the public link without the hassle of logging in as the sub-customer's administrator, you can use this shortcut:
- Navigate to your main Dashboards (or Devices) list where you can see all dashboards/devices across your entire system, including those belonging to sub-customers.
- Locate the specific dashboard you want to share.
- Find the Groups column in the row of that dashboard.
- Click directly on the name of the group in that column.
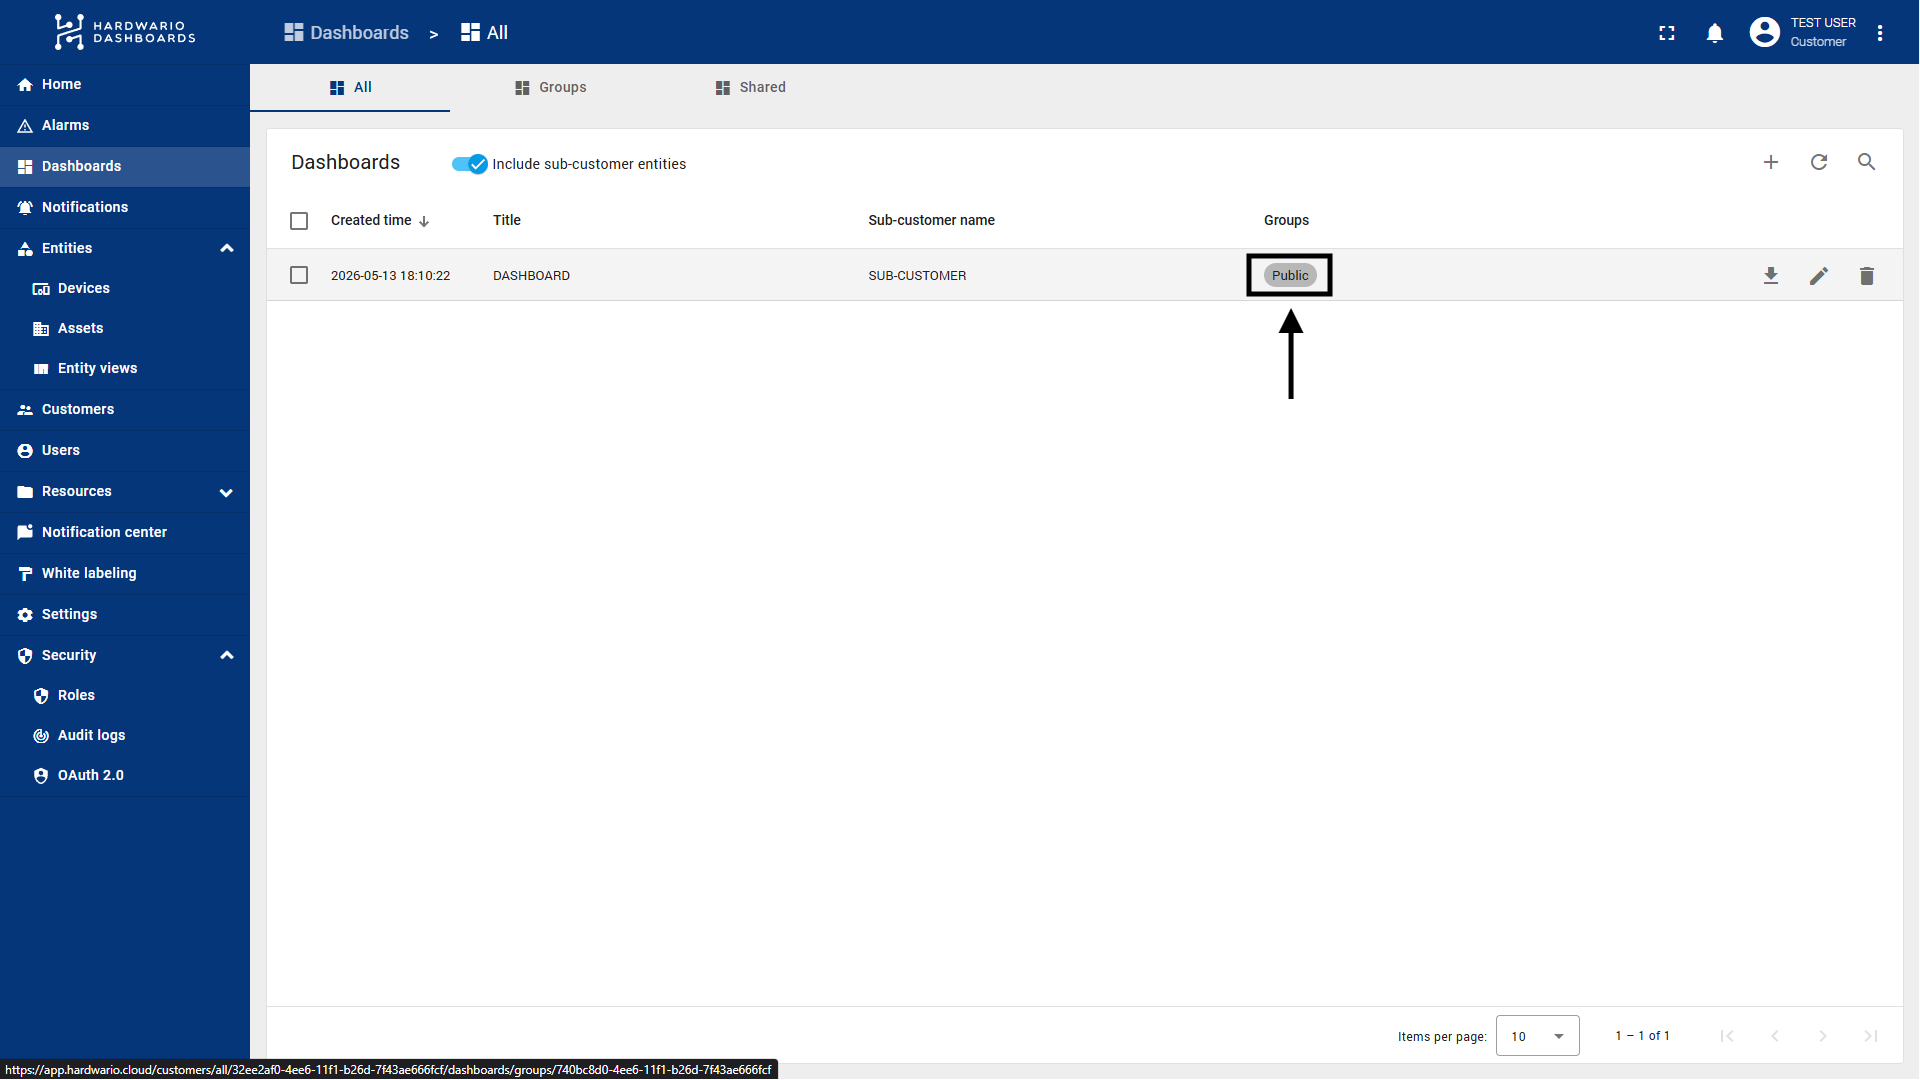
- Result: This will redirect you straight to the group's content page. From here, you can easily click the Chain link icon (🔗) to copy the public link, just as described in Step 3 above.