ChirpStack v4 – OTAA
This page explains how to register HARDWARIO STICKER as a LoRaWAN end device in ChirpStack v4 using OTAA (Over-The-Air Activation), including the recommended device-profile settings and how to add a payload decoder.
Useful HARDWARIO docs:
- ChirpStack v4 Installation
https://docs.hardwario.com/apps/chirpstack/chirpstack-installation - ChirpStack v4 – End Devices
https://docs.hardwario.com/apps/chirpstack/chirpstack-configuration/chirpstack-end-devices - ChirpStack v4 – Data Decoding (STICKER codec example)
https://docs.hardwario.com/apps/chirpstack/chirpstack-configuration/chirpstack-decoding - STICKER Decoder - https://github.com/hardwario/sticker-firmware/blob/main/app/decoder/ttn.js
Before registering your STICKER, make sure ChirpStack v4 is installed and running.
Installation instructions:
https://docs.hardwario.com/apps/chirpstack/chirpstack-installation
Prerequisites
- A working LoRaWAN gateway connected to ChirpStack v4 and configured for your region / frequency plan.
- A ChirpStack v4 tenant with the gateway visible and online.
- Your STICKER powered and within gateway coverage.
1) Collect the required LoRaWAN identifiers & keys
Use the HARDWARIO Manager to get the required identifiers and keys for your STICKER.
You will need:
- DevEUI
- AppEUI / JoinEUI
- AppKey
2) Create a Device Profile for STICKER (recommended)
In ChirpStack v4:
Tenant → Device Profiles → Add Device Profile
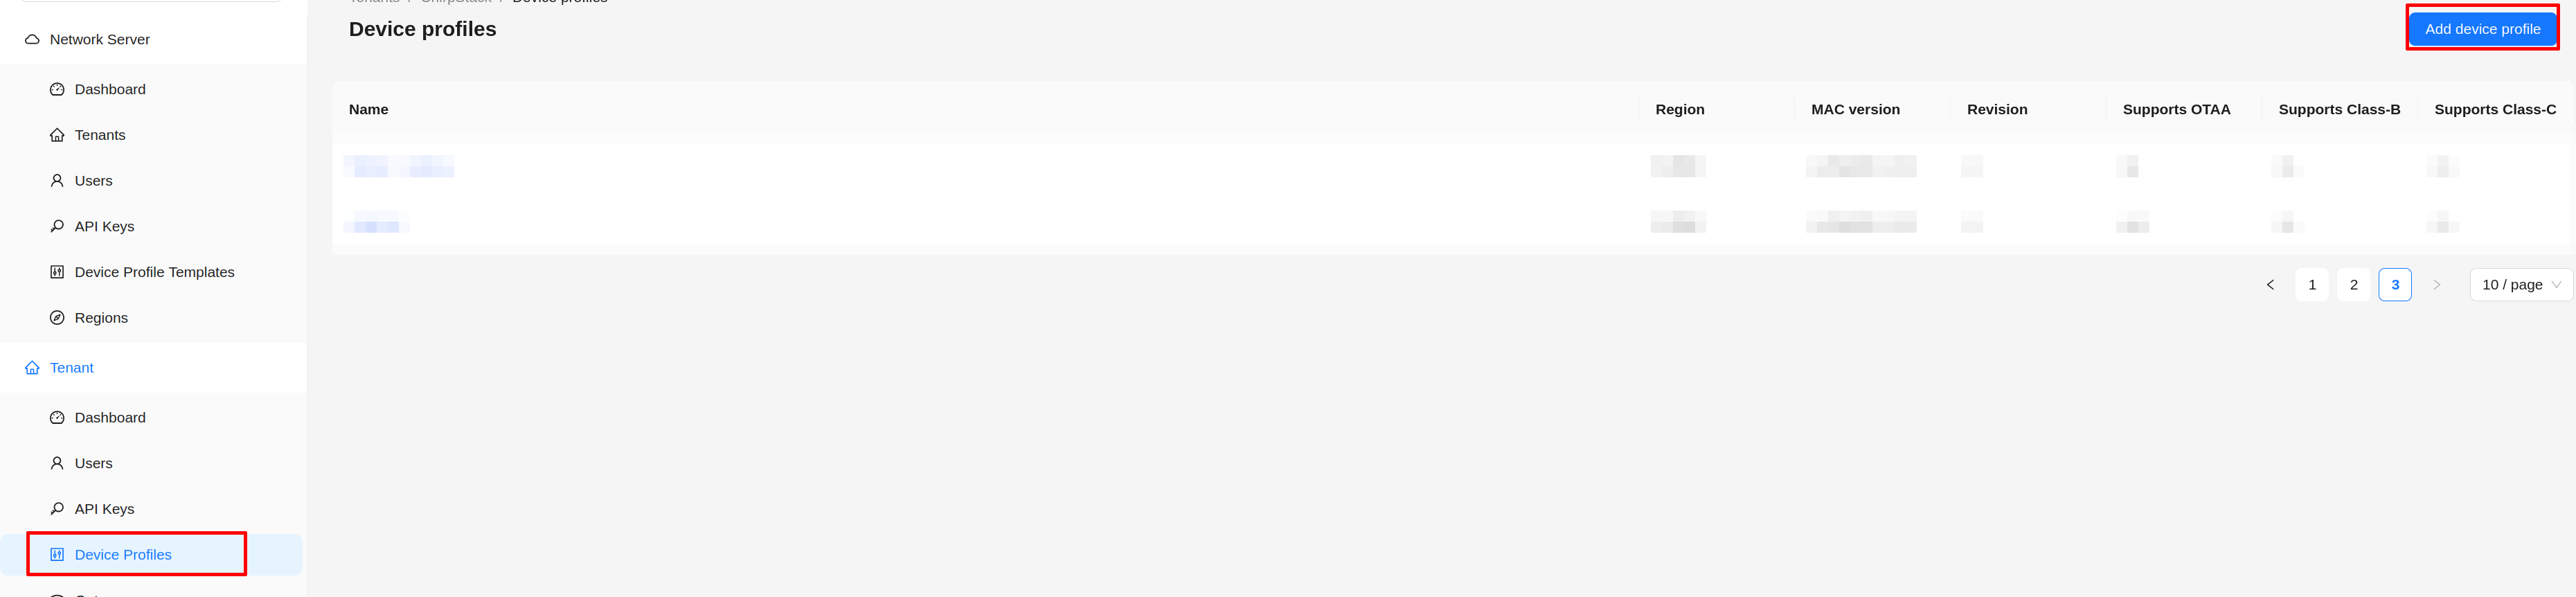
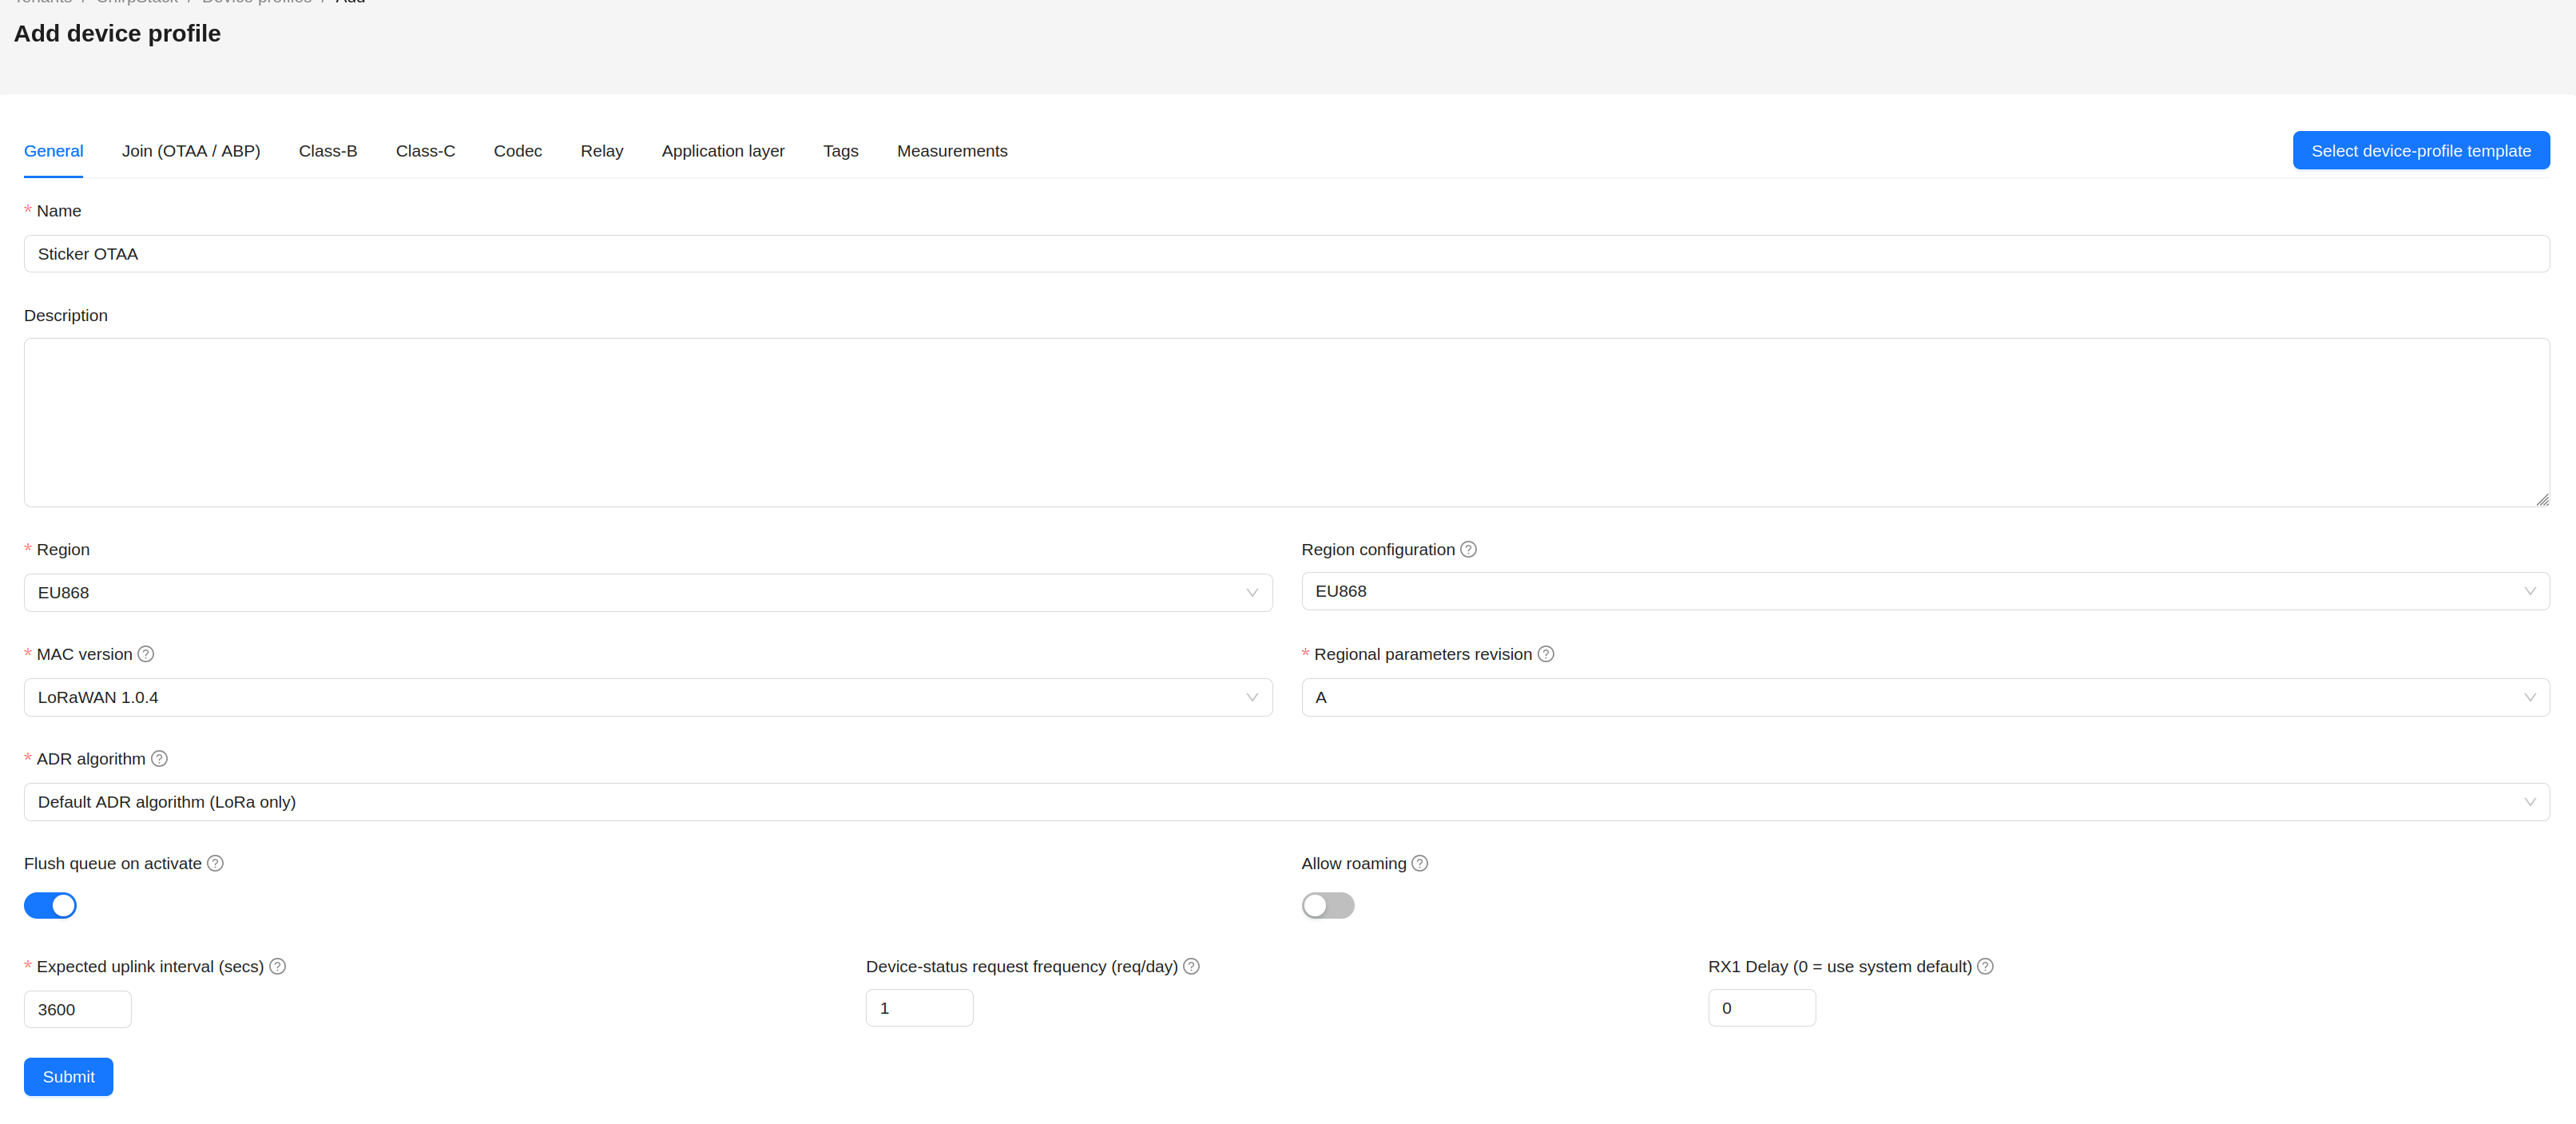
Next, configure the following parameters:
- Name: STICKER - OTAA (or your chosen identifier for the device)
- MAC Version: LoRaWAN 1.0.4
- Region: EU866 (or US915 if you are outside the EU)
- Expected uplink interval: X (according to your STICKER firmware configuration)
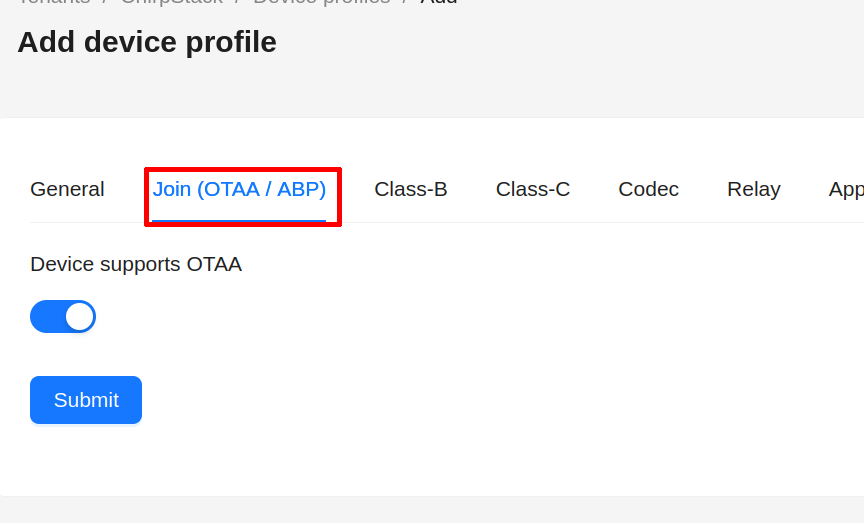
Go to the Join (OTAA / ABP) tab and verify that Device supports OTAA is toggled on.
As the final step, add a codec to the device profile. Switch to the Codec tab, select JavaScript functions in the Payload codec dropdown, and paste the codec linked below into the input field:
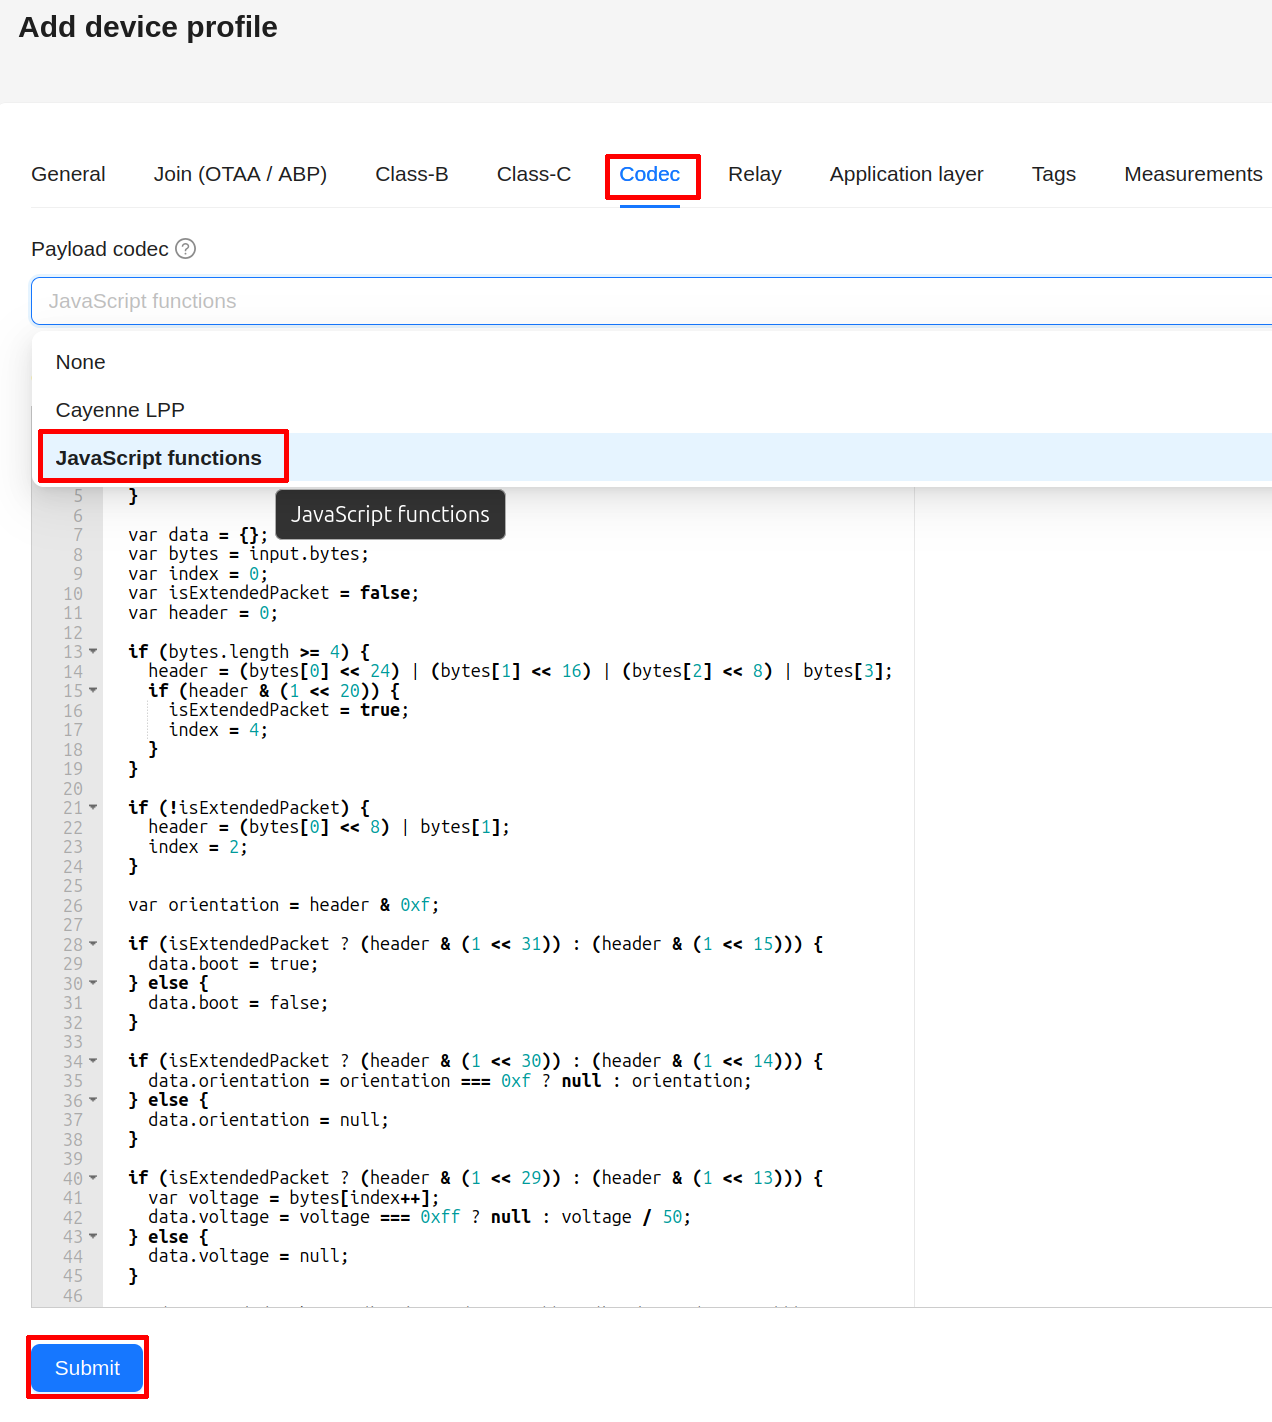
Save the device profile by clicking Submit.
Downlink command encoding is part of the upcoming STICKER firmware v1.4.0 (not in v1.3.x).
This codec also encodes downlink commands (via its encodeDownlink function), so no extra setup is needed. To send a command to the device, for example to force a report, change a setting, or set an alarm rule, enqueue it on the device's Queue tab as a JSON object on fPort 85 and ChirpStack runs the codec to produce the byte payload. Use the Downlink Commands Generator to build a command and get its JSON and hex.
3) Create an Application in ChirpStack
In ChirpStack, go to Applications → Add Application and fill in the fields:
- Name: STICKER (or any name of your choice)
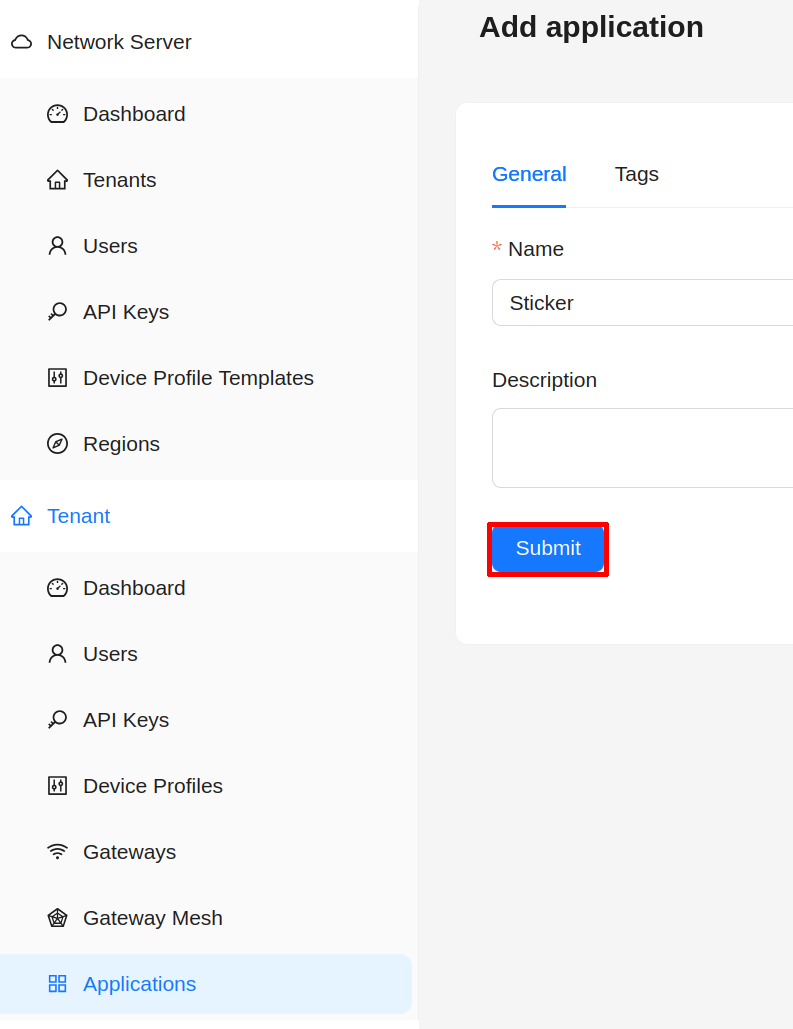
Save by clicking Submit.
4) Register the STICKER end device
In your application:
Application → End Devices → Add End Device
Fill:
- Name (human-readable)
- Device EUI (DevEUI)
- Device Profile → select the STICKER profile you created
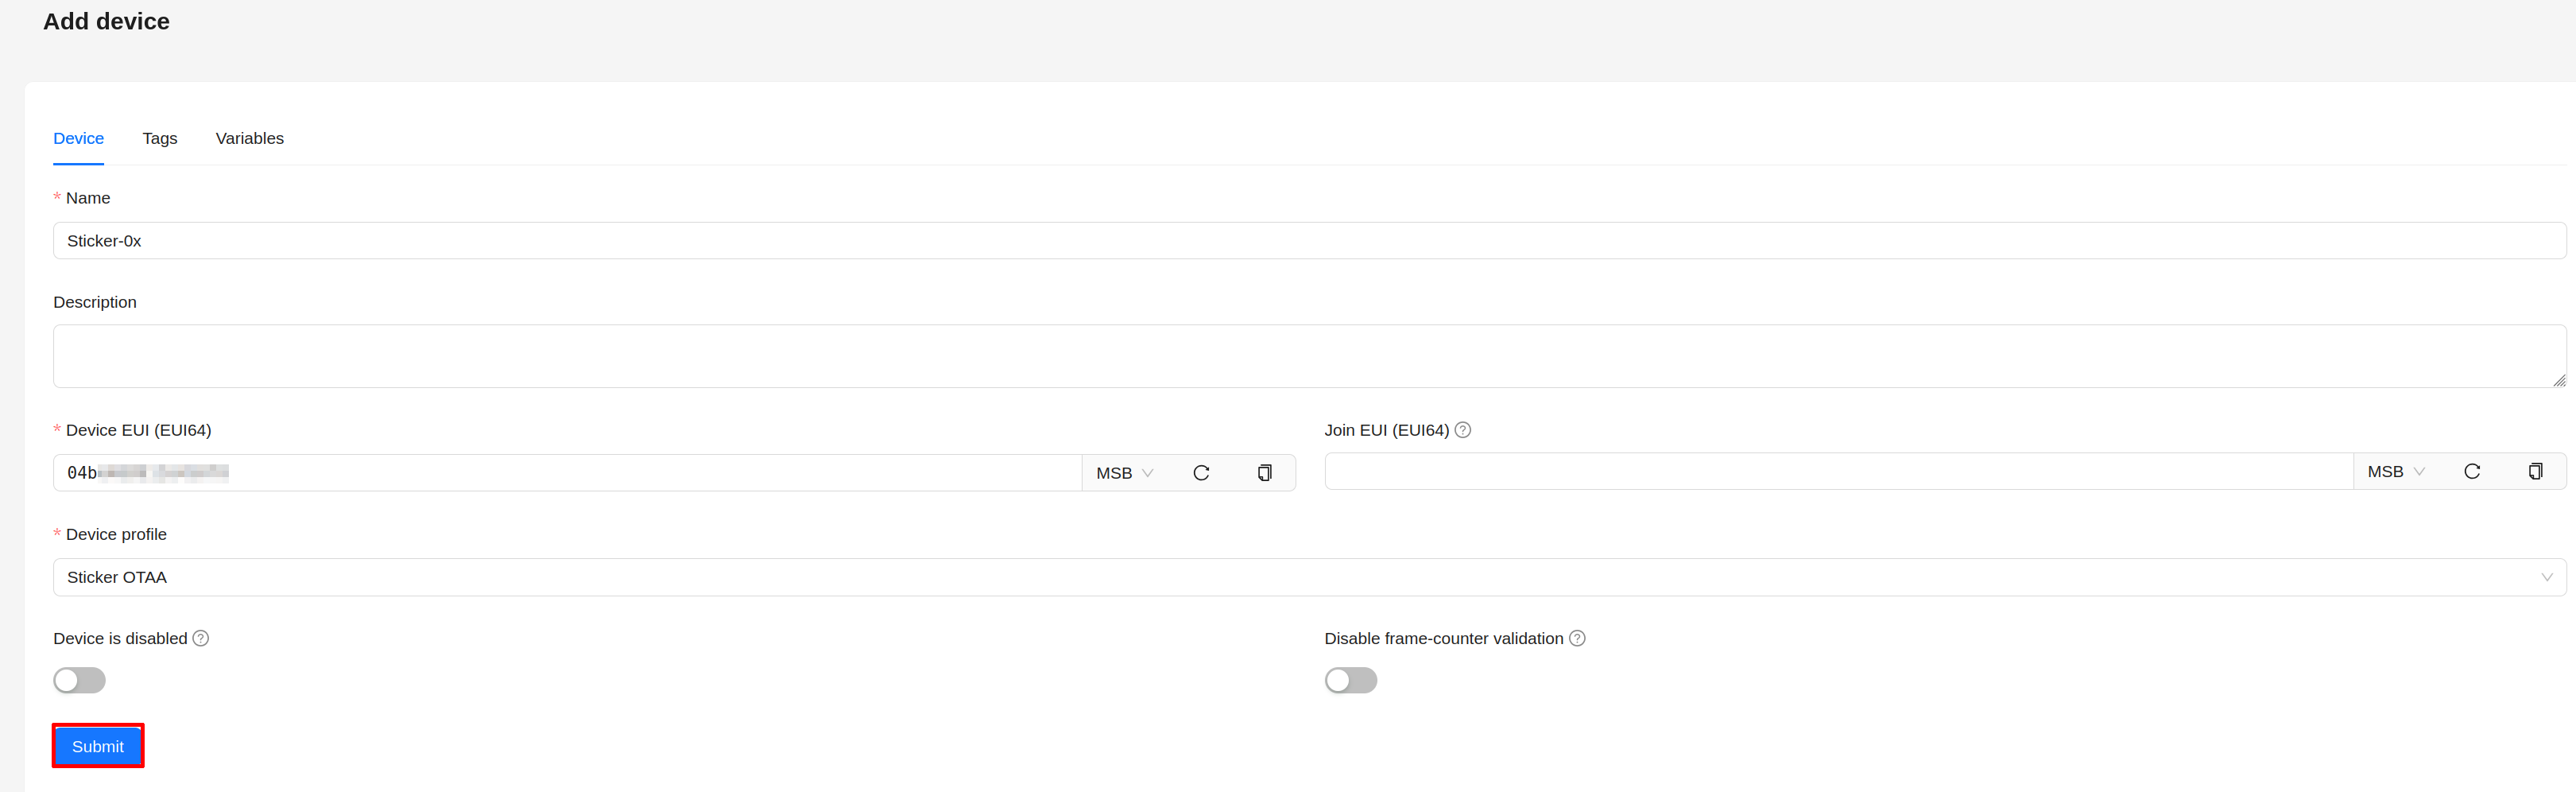
Save by clicking Submit.
New window will pop up. In Application key fill the App Key of your device.
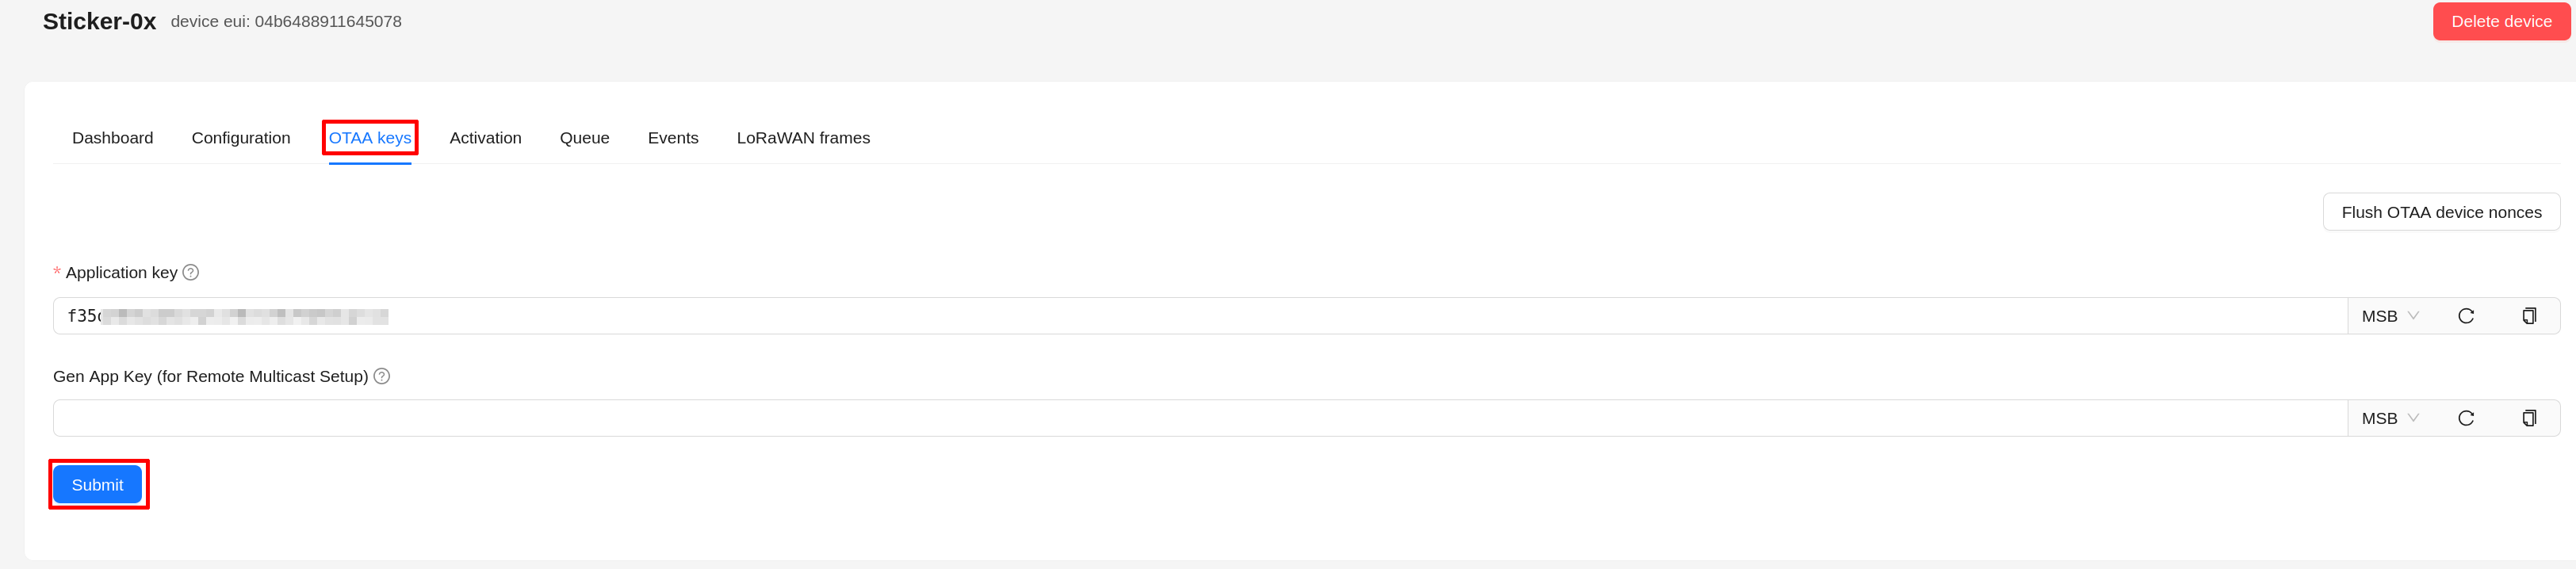
5) Verify uplinks
- Go to Applications → (your application) → Events
- Check Up events
- You should see:
- raw payload bytes
- decoded JSON fields (if the codec is correct)