End Devices Configuration Guide
This tutorial guides you through the process of creating device profiles and adding end devices in ChirpStack v4.
1. Device Profiles
After adding gateways, the next step is to create device profiles in ChirpStack.
-
In the navigation bar, click Device Profiles.
-
Click Add Device Profile (top right).
-
Enter the required information such as:
- Name
- Region
- MAC Version
- ADR Algorithm
- Expected Uplink Interval
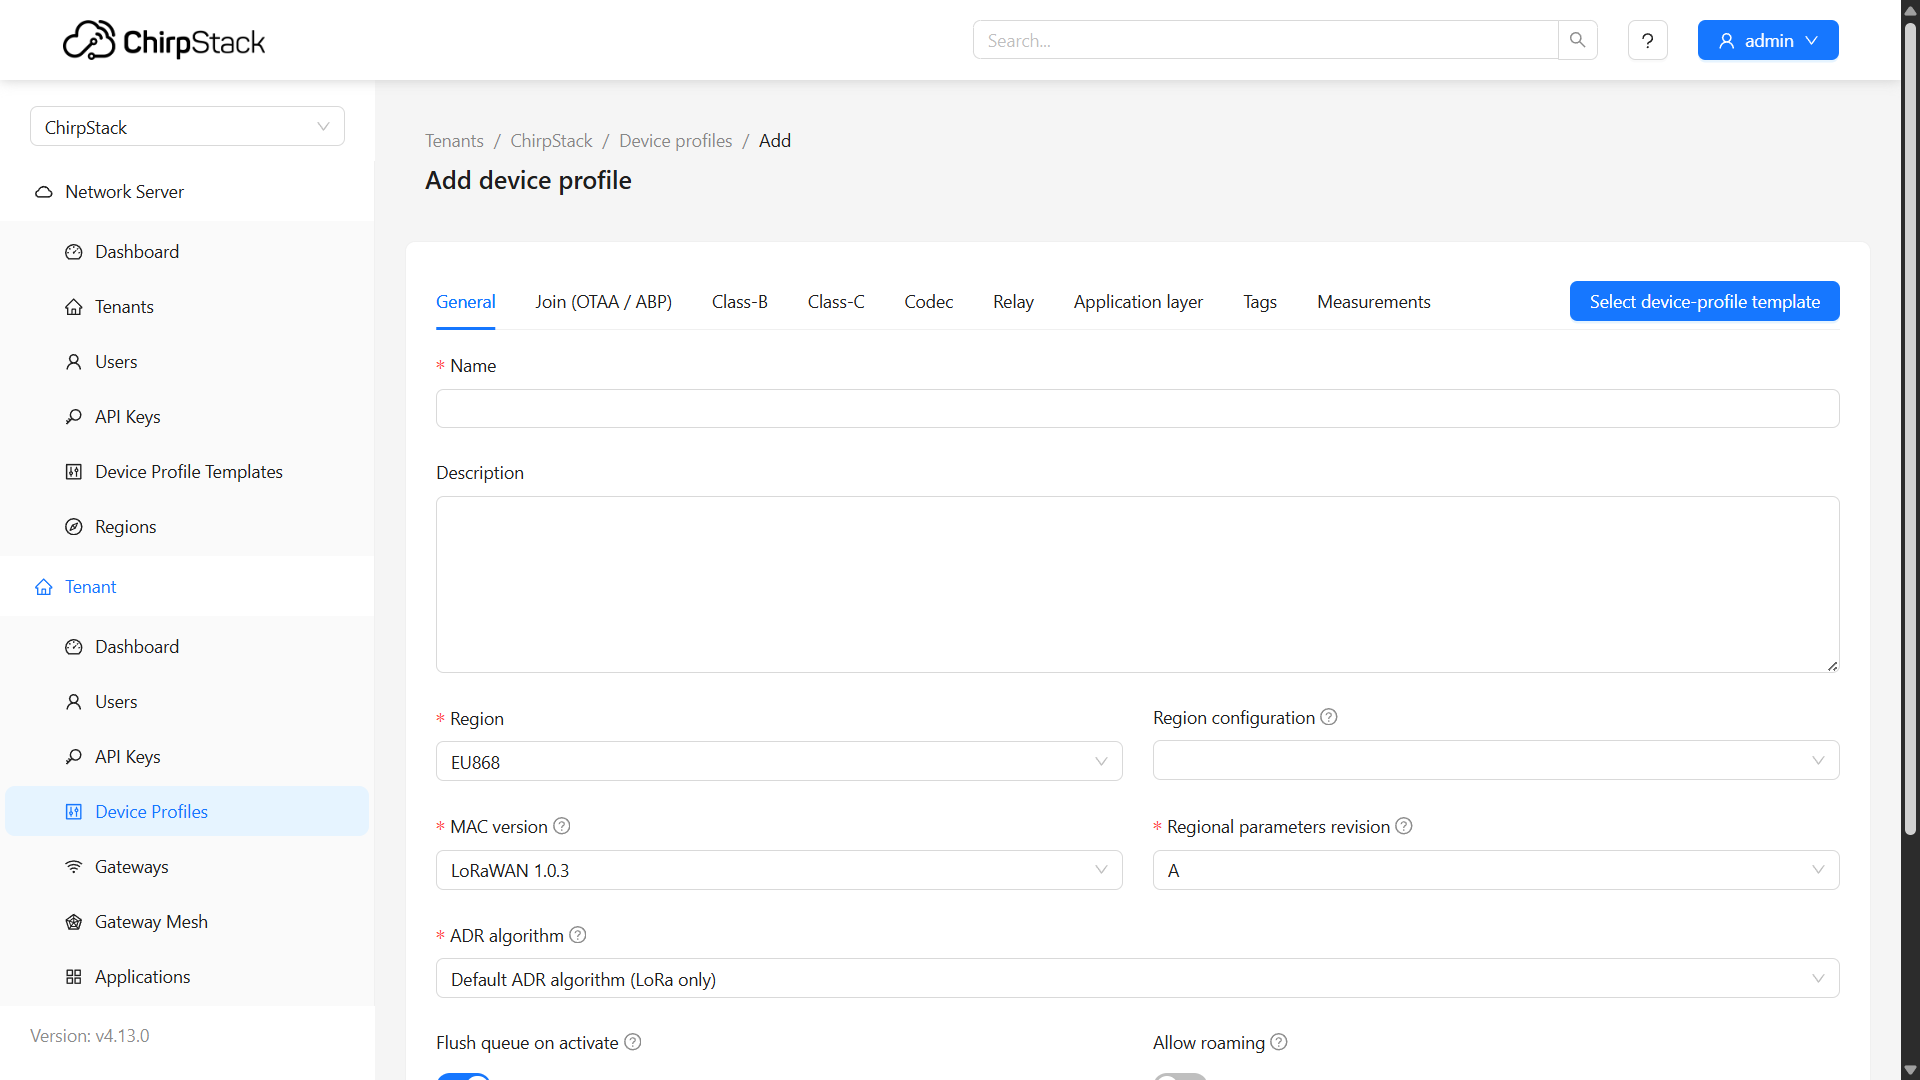
Example for HARDWARIO devices
If you are using CHESTER or STICKER as an end device, you can find examples of device profile configurations in the following links:
| Device | Documentation Link |
|---|---|
| CHESTER | https://docs.hardwario.com/chester/platform-connectivity/lorawan-radio#chirpstack-configuration |
| STICKER | https://docs.hardwario.com/sticker/connectivity/lorawan-chirpstack |
2. Applications – Adding End Devices
Next, create an application:
-
In the navigation bar, select Applications (bottom of the menu).
-
Create a new application and open it.
-
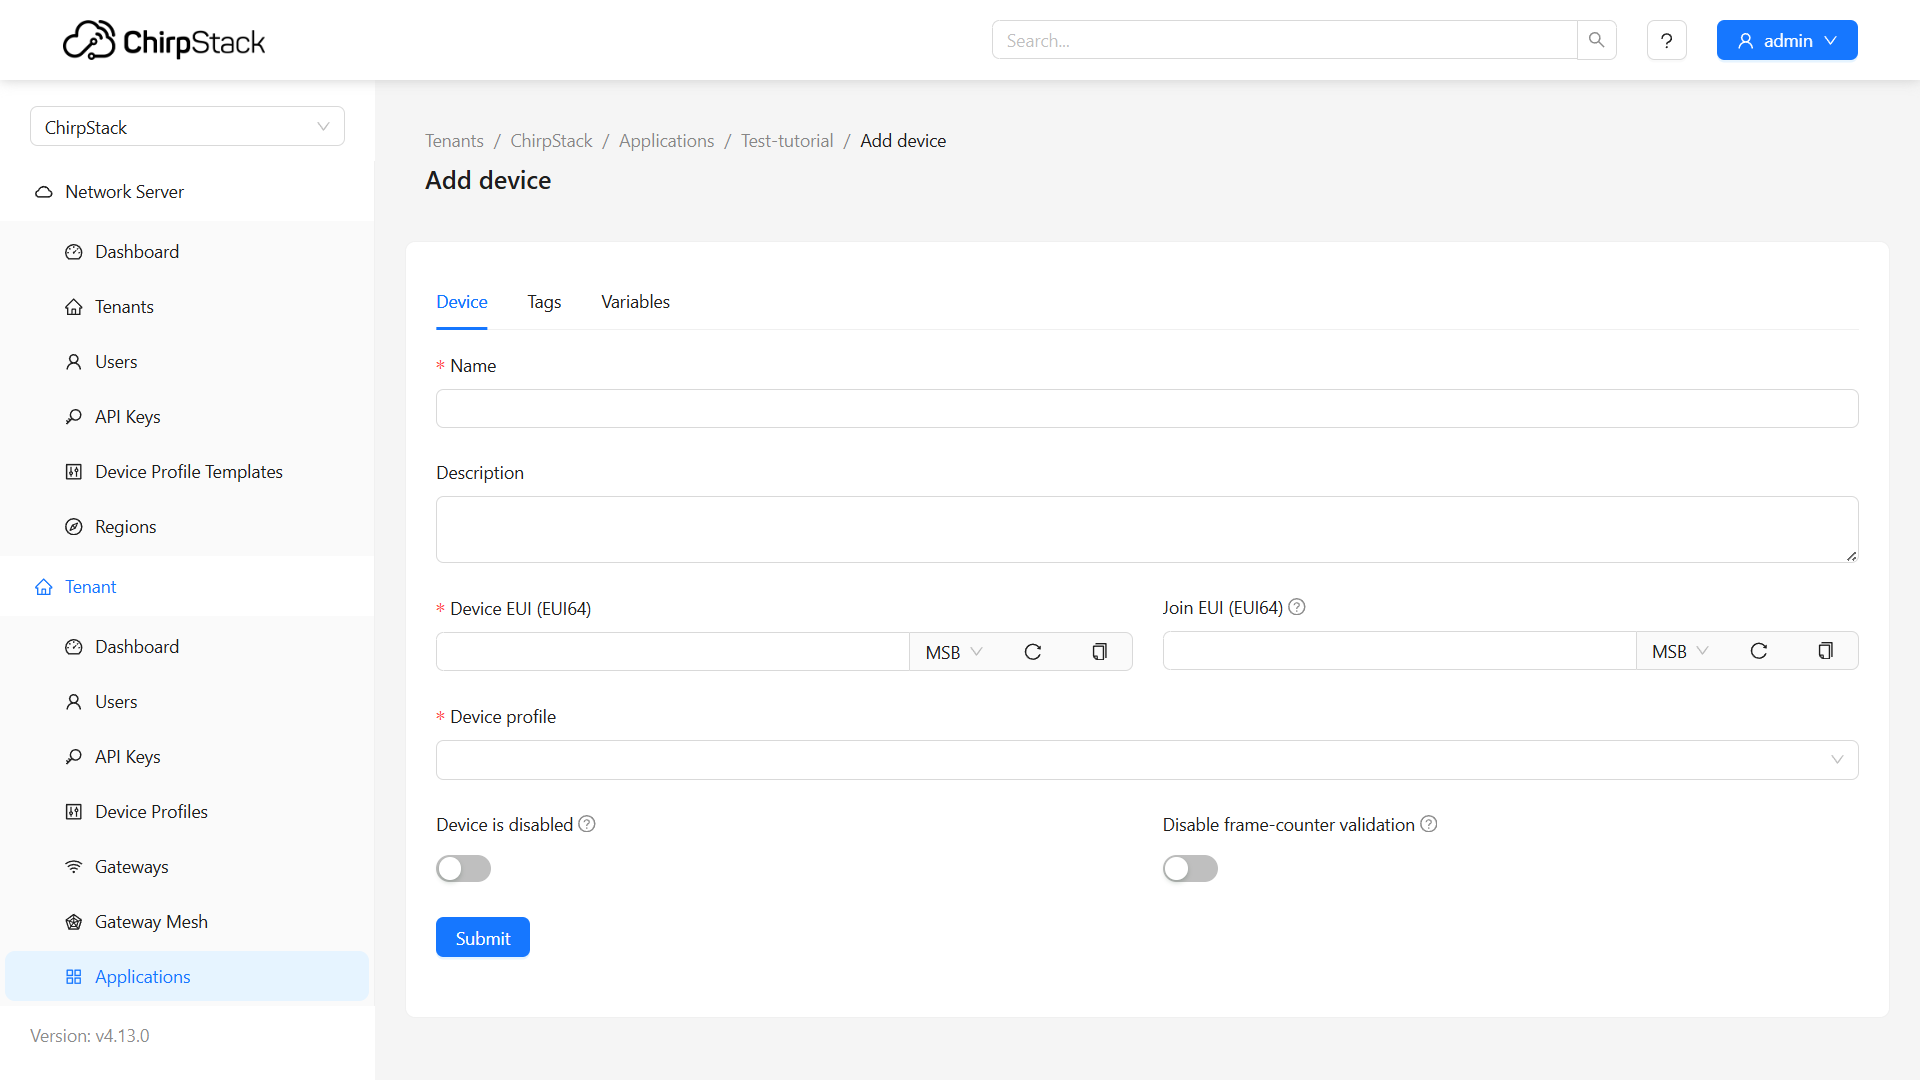
Add devices by providing details such as:
- Name
- Device EUI
- Join EUI / AppEUI
- Device Profile
Click Submit.
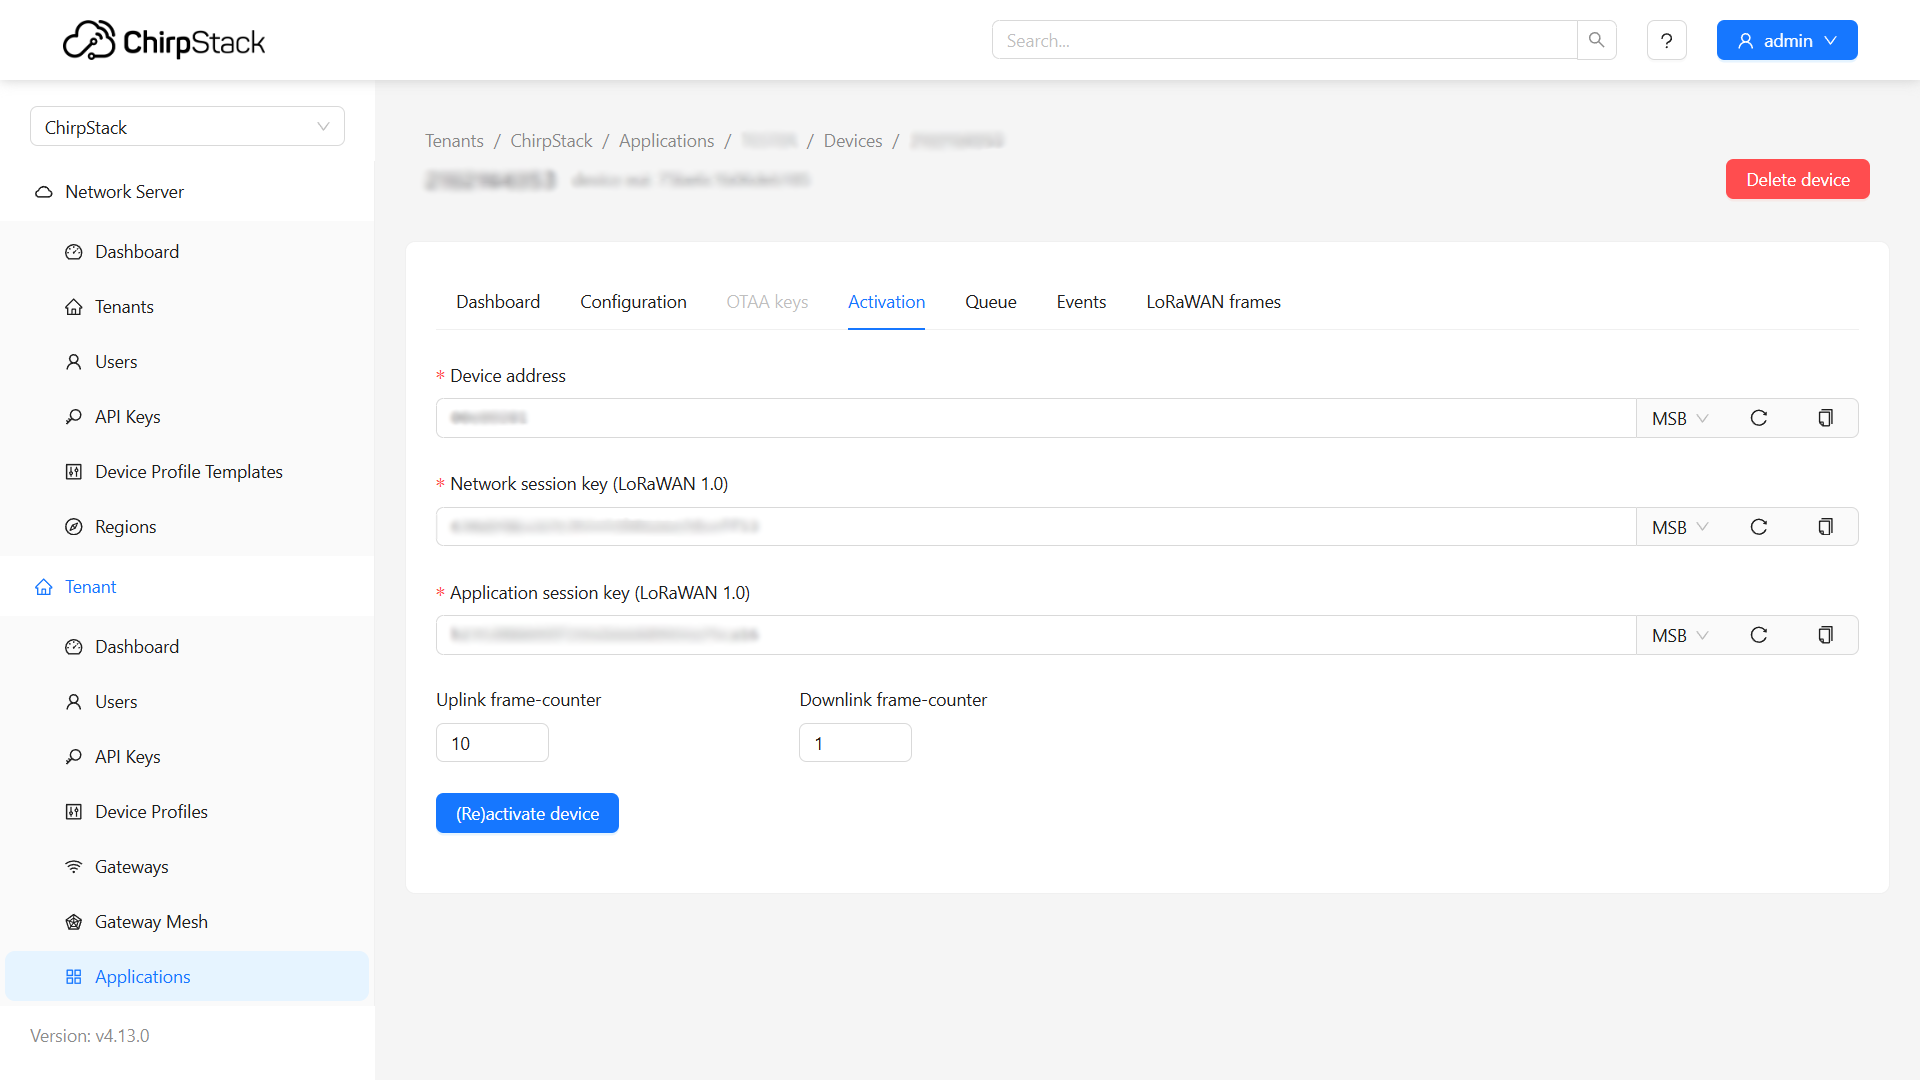
After creating the device, go to the Activation tab and enter:
- Device Address
- Network Session Key
- Application Session Key
Finally, click (Re)activate Device.
Video Tutorial
If you need further assistance or a visual demonstration of the process described in this guide, consult the Video Guide.