HARDWARIO Terminal
The HARDWARIO Terminal is a Google Chrome-based terminal tool that allows users to interact directly with HARDWARIO devices and modules through their browser, all without the need to install additional software.
Available here: https://terminal.hardwario.com/
Please note: HARDWARIO Terminal works only in Google Chrome.
HARDWARIO Google Chrome Terminal App Tutorial
This guide will walk you through using the HARDWARIO Terminal App, a web-based tool for managing your CHESTER devices directly from your Google Chrome browser.
1. Connecting CHESTER
To get started, you need to establish a Bluetooth connection between your computer and the CHESTER device.
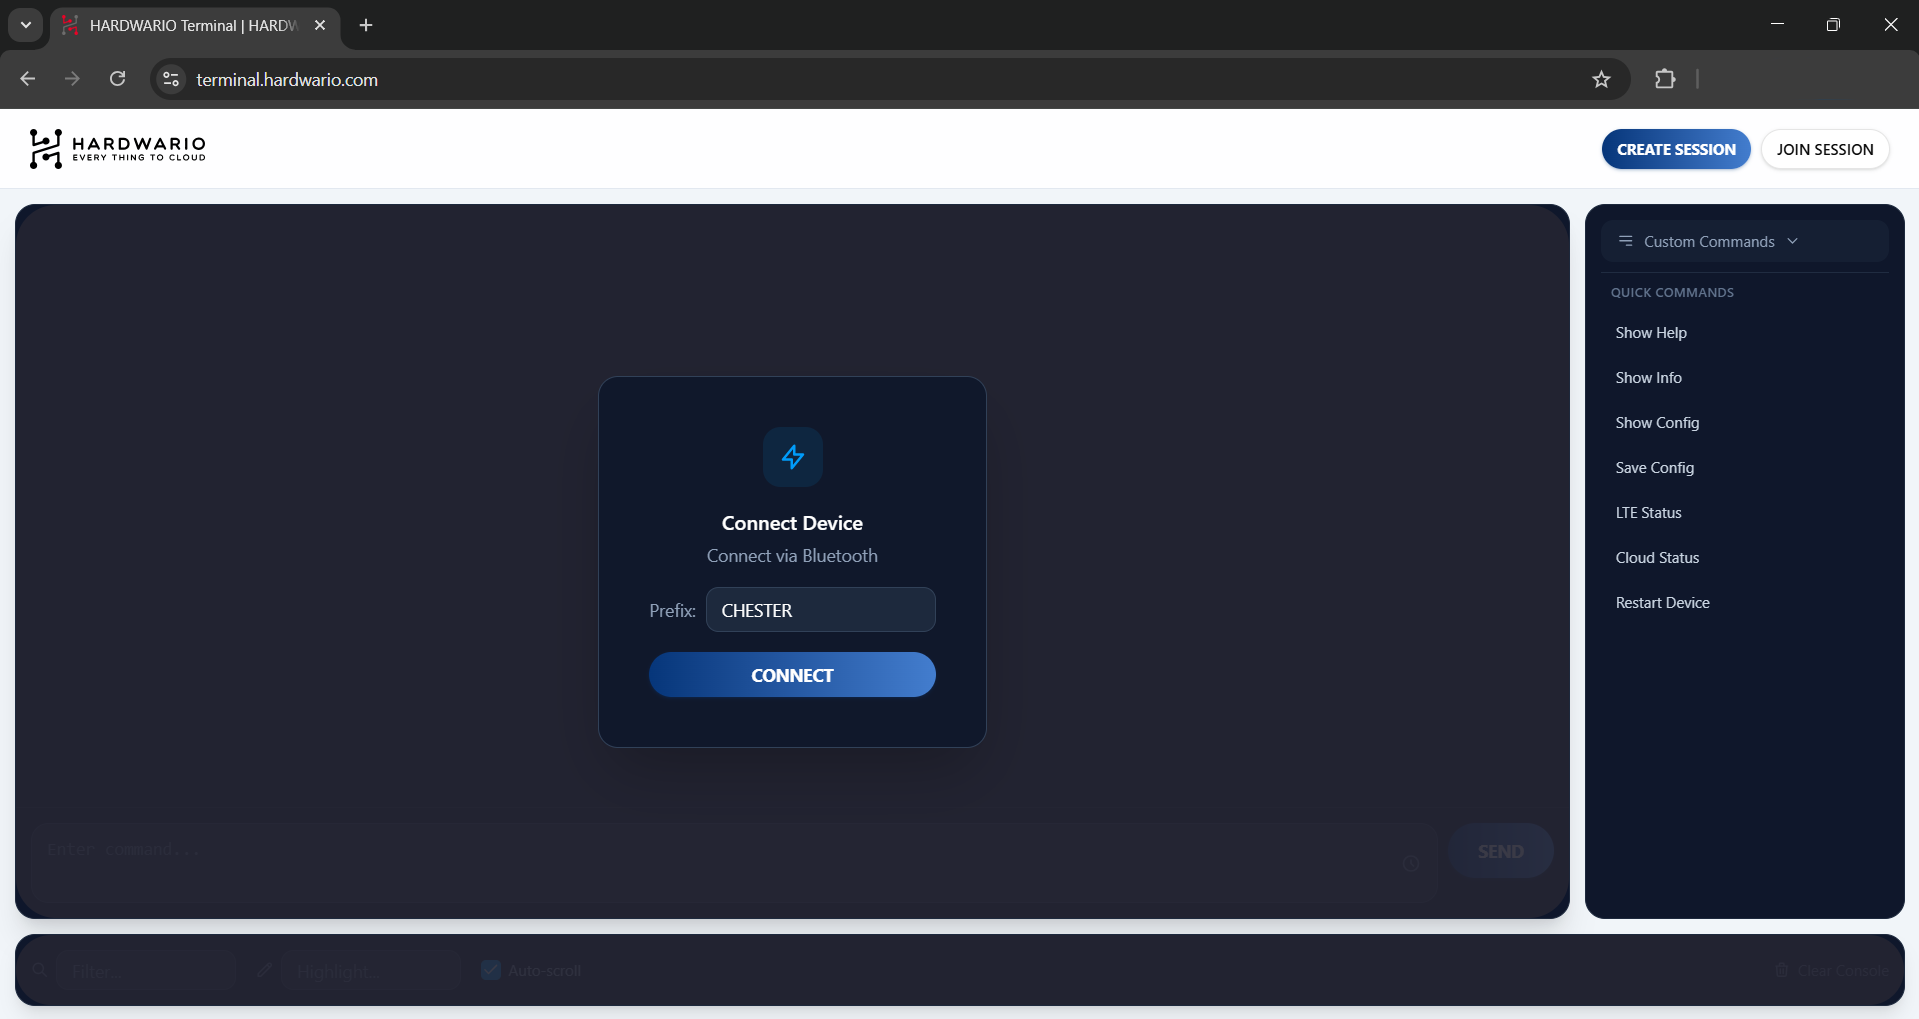
- Step 1: Open Google Chrome and navigate to https://terminal.hardwario.com/.
- Step 2: Click the Connect button located in the center of the screen.
- Step 3: A browser pop-up will appear displaying available nearby Bluetooth devices. The
CHESTERprefix is automatically filtered, so you will only see compatible CHESTER devices. - Step 4: Select your specific device from the list and click Pair.
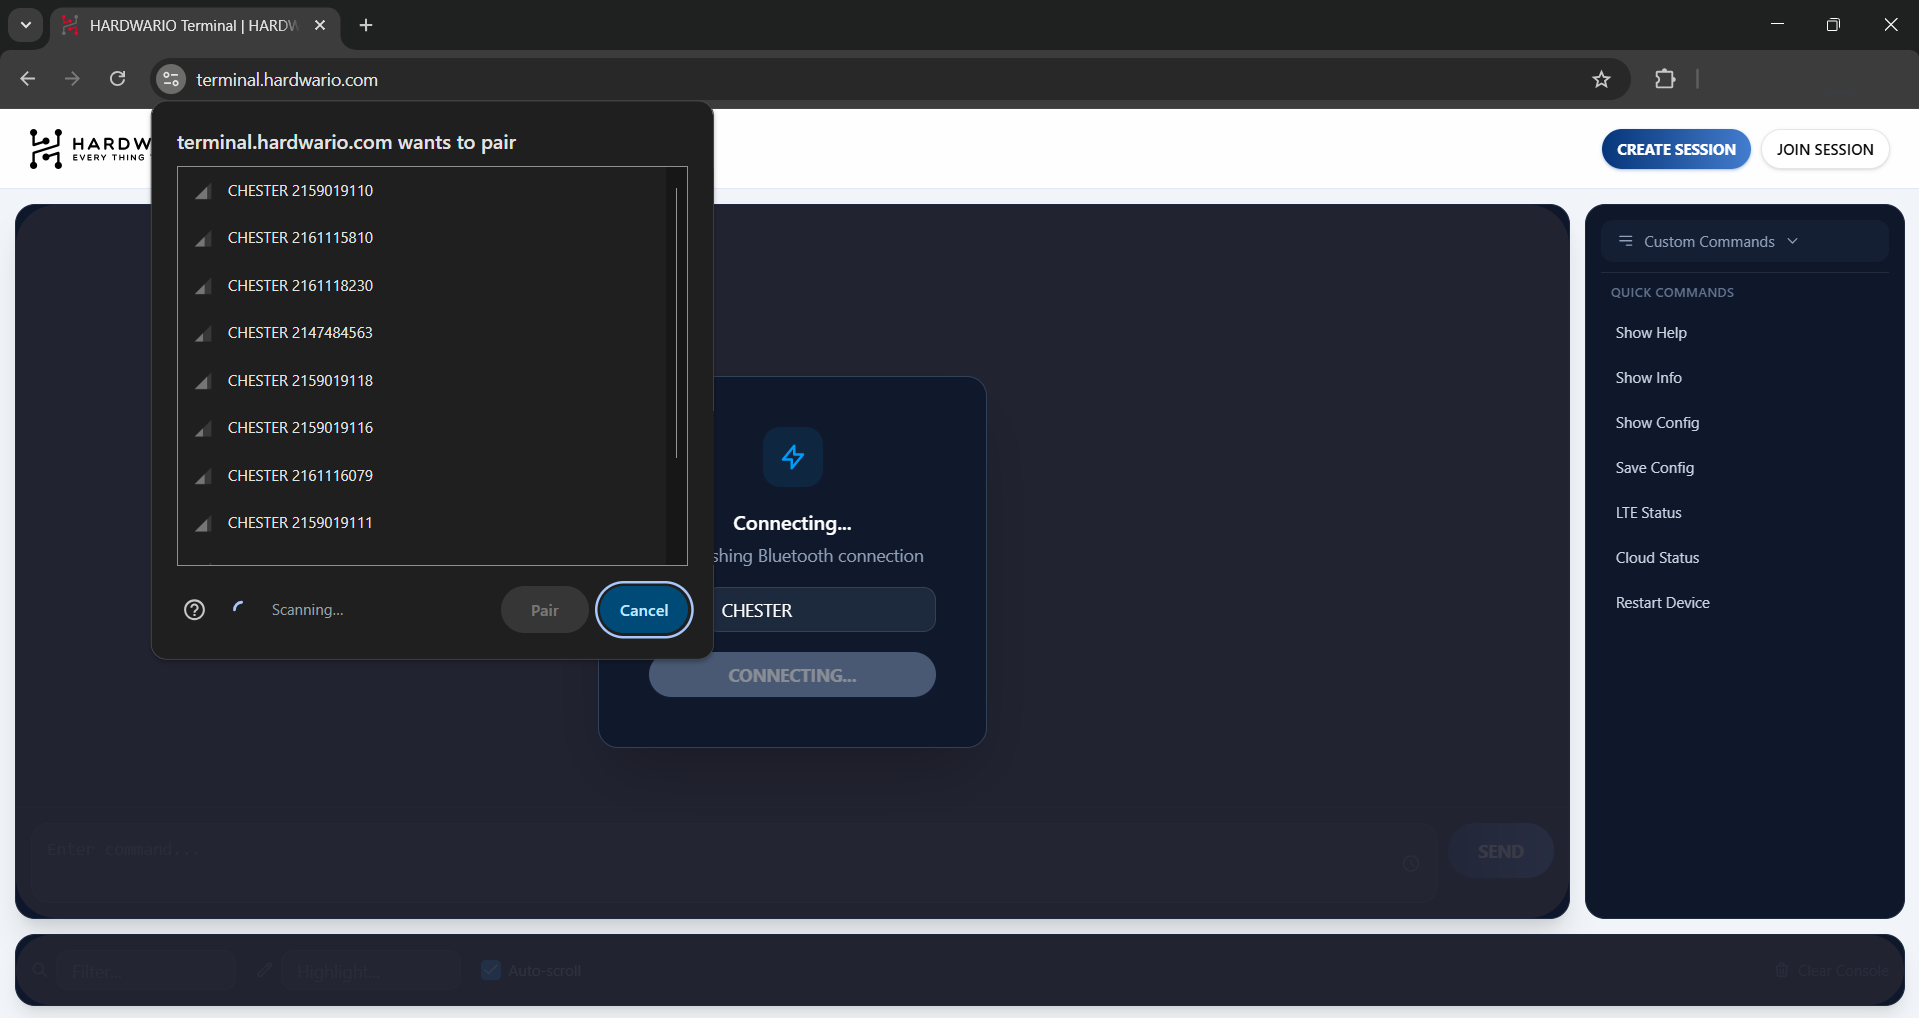
- Step 5: You will be prompted to enter a Bluetooth Passkey.
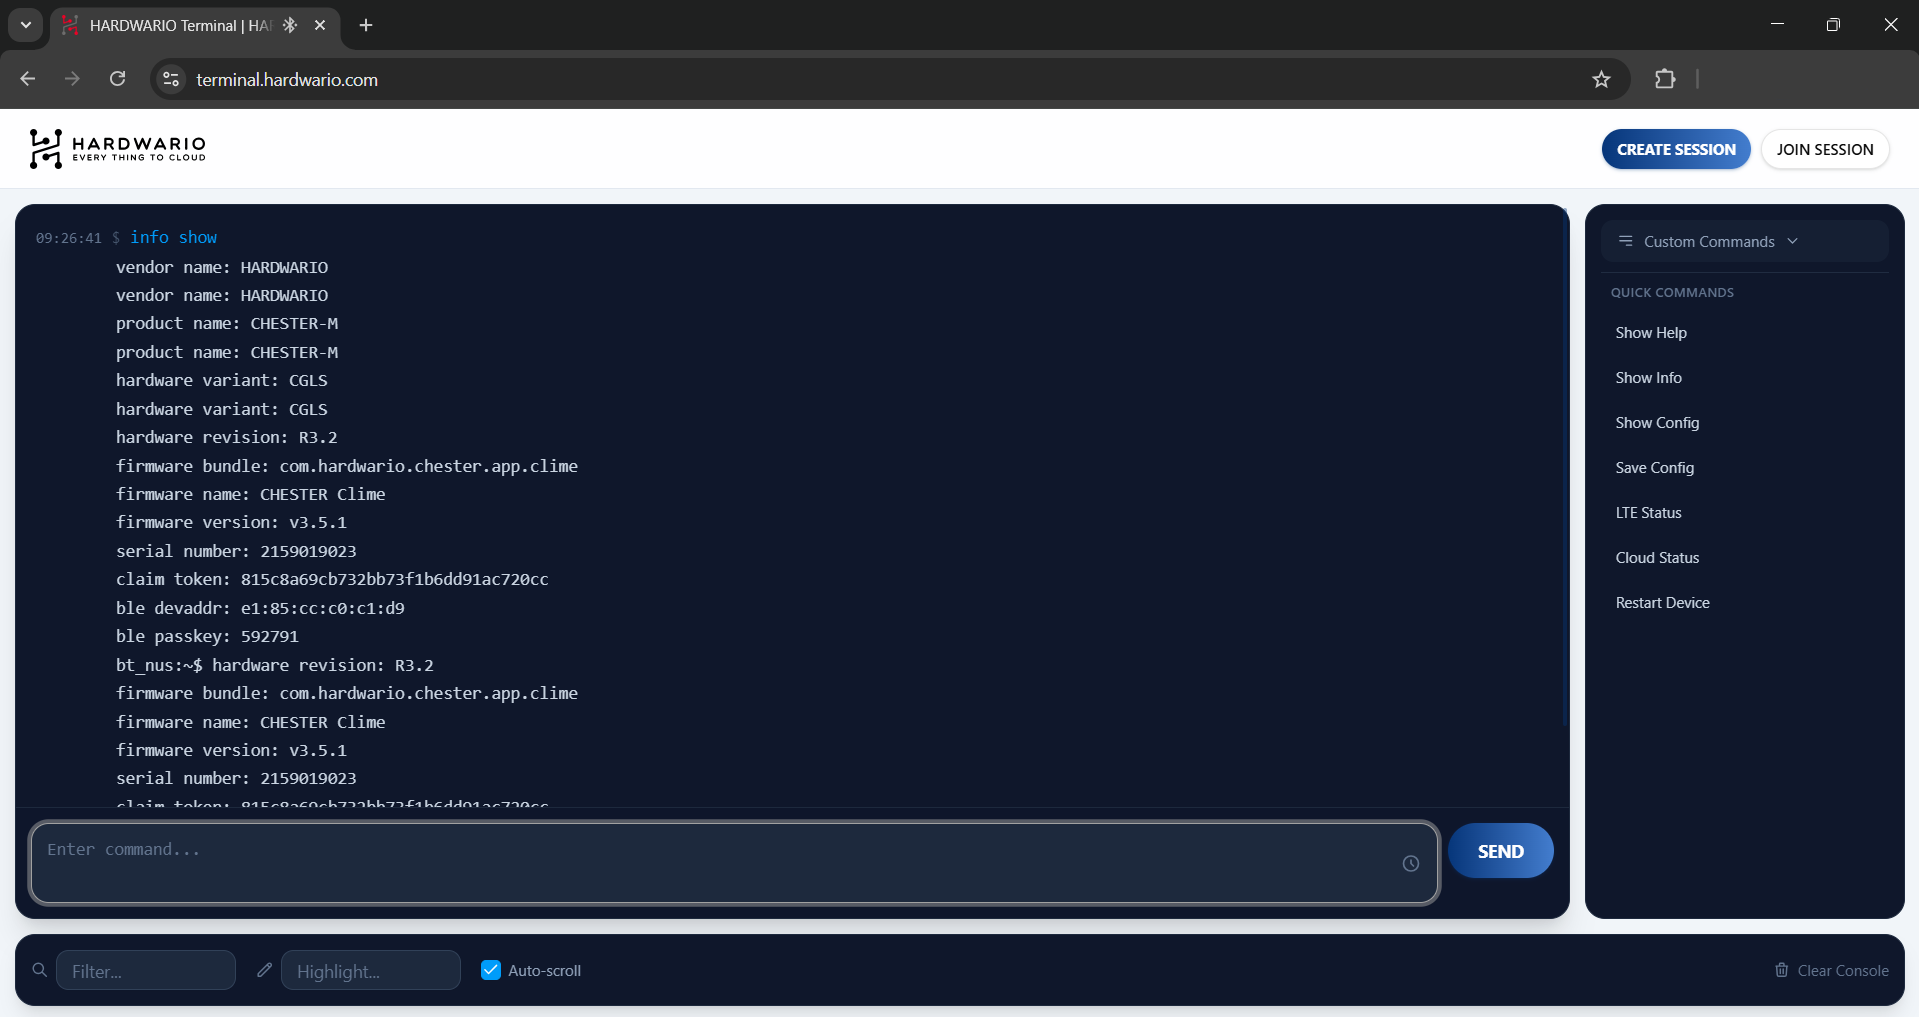
- Note on Passkeys: You can find the passkey by scanning the QR code on the back of the CHESTER device. Alternatively, it can be retrieved using the
info showcommand in the terminal (via the HARDWARIO Manager Mobile App, the HARDWARIO Monitor PC app, or from a previous session in this web terminal).
- Note on Passkeys: You can find the passkey by scanning the QR code on the back of the CHESTER device. Alternatively, it can be retrieved using the
- Step 6: Enter the Passkey. The application will remember this passkey for future sessions, so you won't need to enter it again for this specific device.

- Step 7: Once successfully authenticated, the terminal interface will open, and you can begin typing commands.
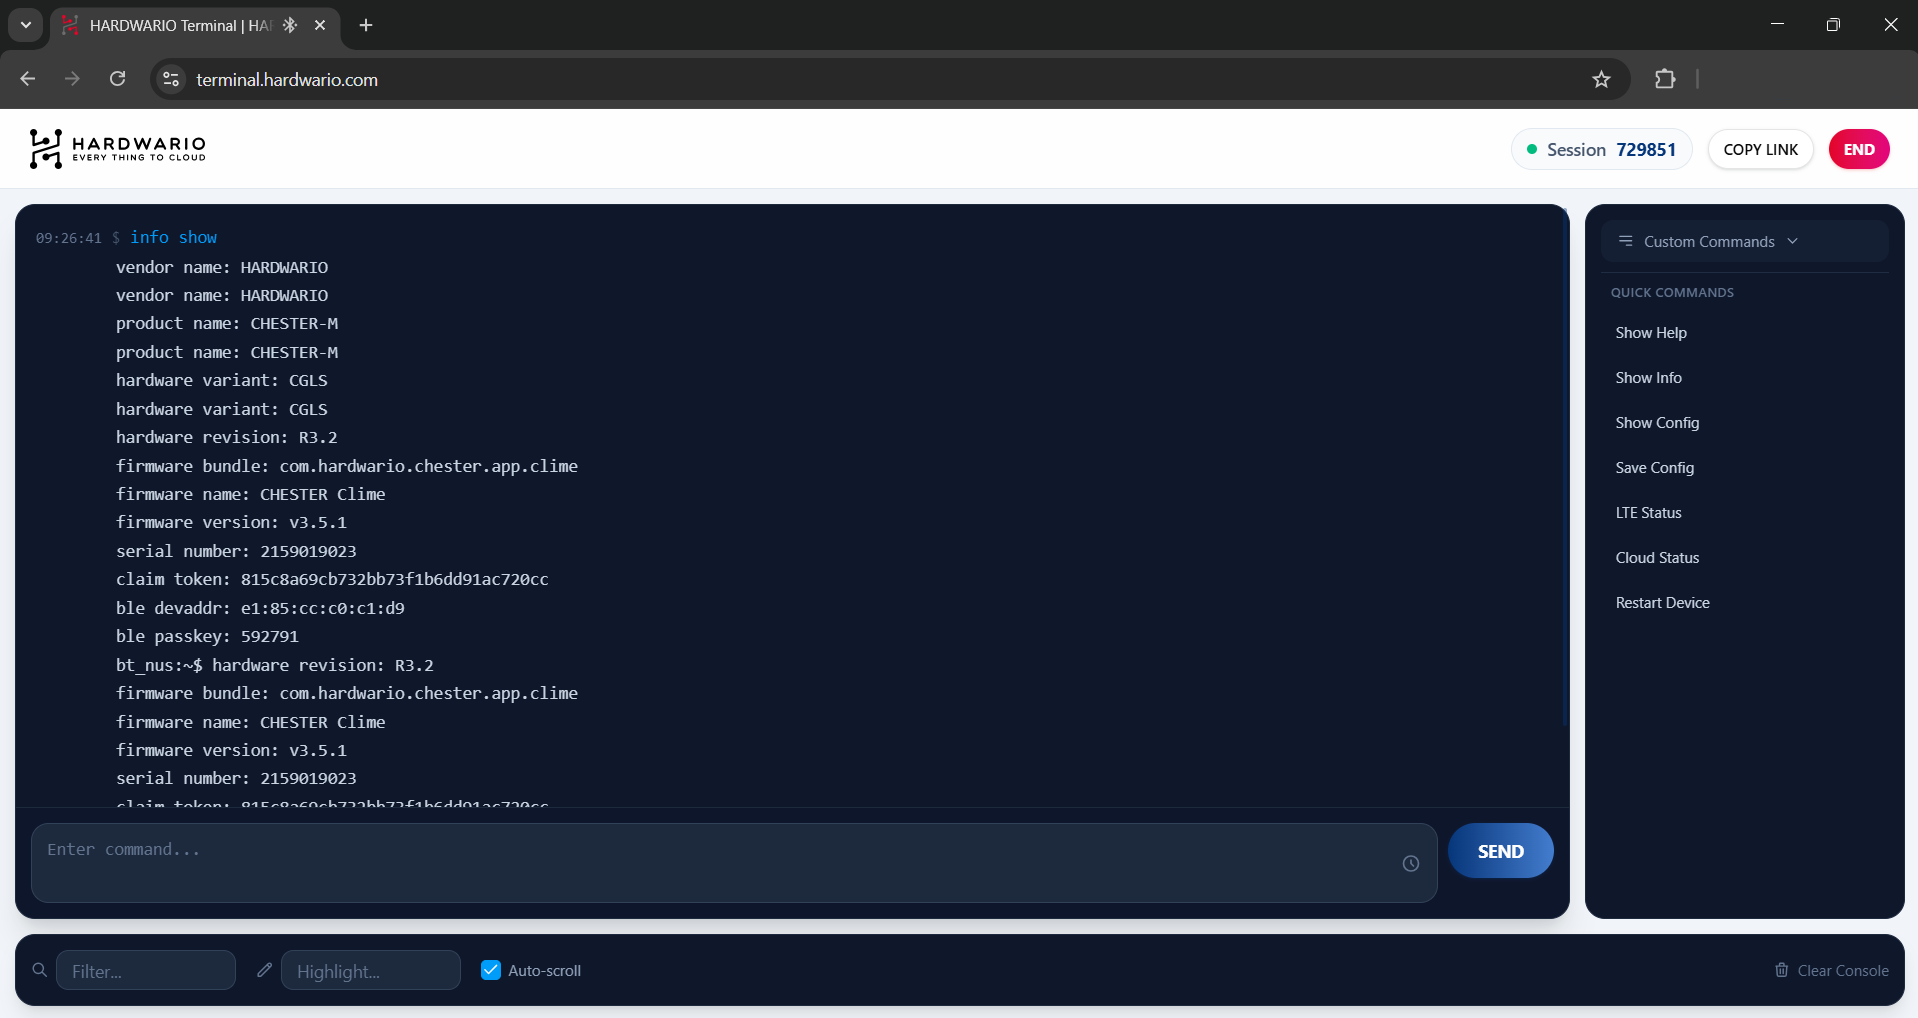
2. Quick Commands
On the right side of the interface, you will see a panel dedicated to Quick Commands. These are the most frequently used CHESTER commands, allowing you to send them with a single click instead of typing them manually into the terminal. This makes controlling the device much faster and easier.
Here is a breakdown of the default Quick Commands:
- Show Help: Executes the
helpcommand. This lists all available terminal commands and their basic syntax. - Show Info: Executes the
info showcommand. This displays vital device information, including the firmware version, serial number, hardware revision, and current battery voltage. - Show Config: Executes the
config showcommand. This prints the current configuration parameters of your CHESTER device, allowing you to verify your current setup. - Save Config: Executes the
config savecommand. This writes any unsaved configuration changes into the device's non-volatile memory so they persist after a reboot. - LTE Status: Executes the command to display the current LTE network connectivity status, including signal strength (RSRP/RSRQ), network operator, and connection state.
- Cloud Status: Executes the command to check the status of the connection between the device and the HARDWARIO Cloud services.
- Restart Device: Executes the reboot command. This performs a secure restart of the CHESTER device.
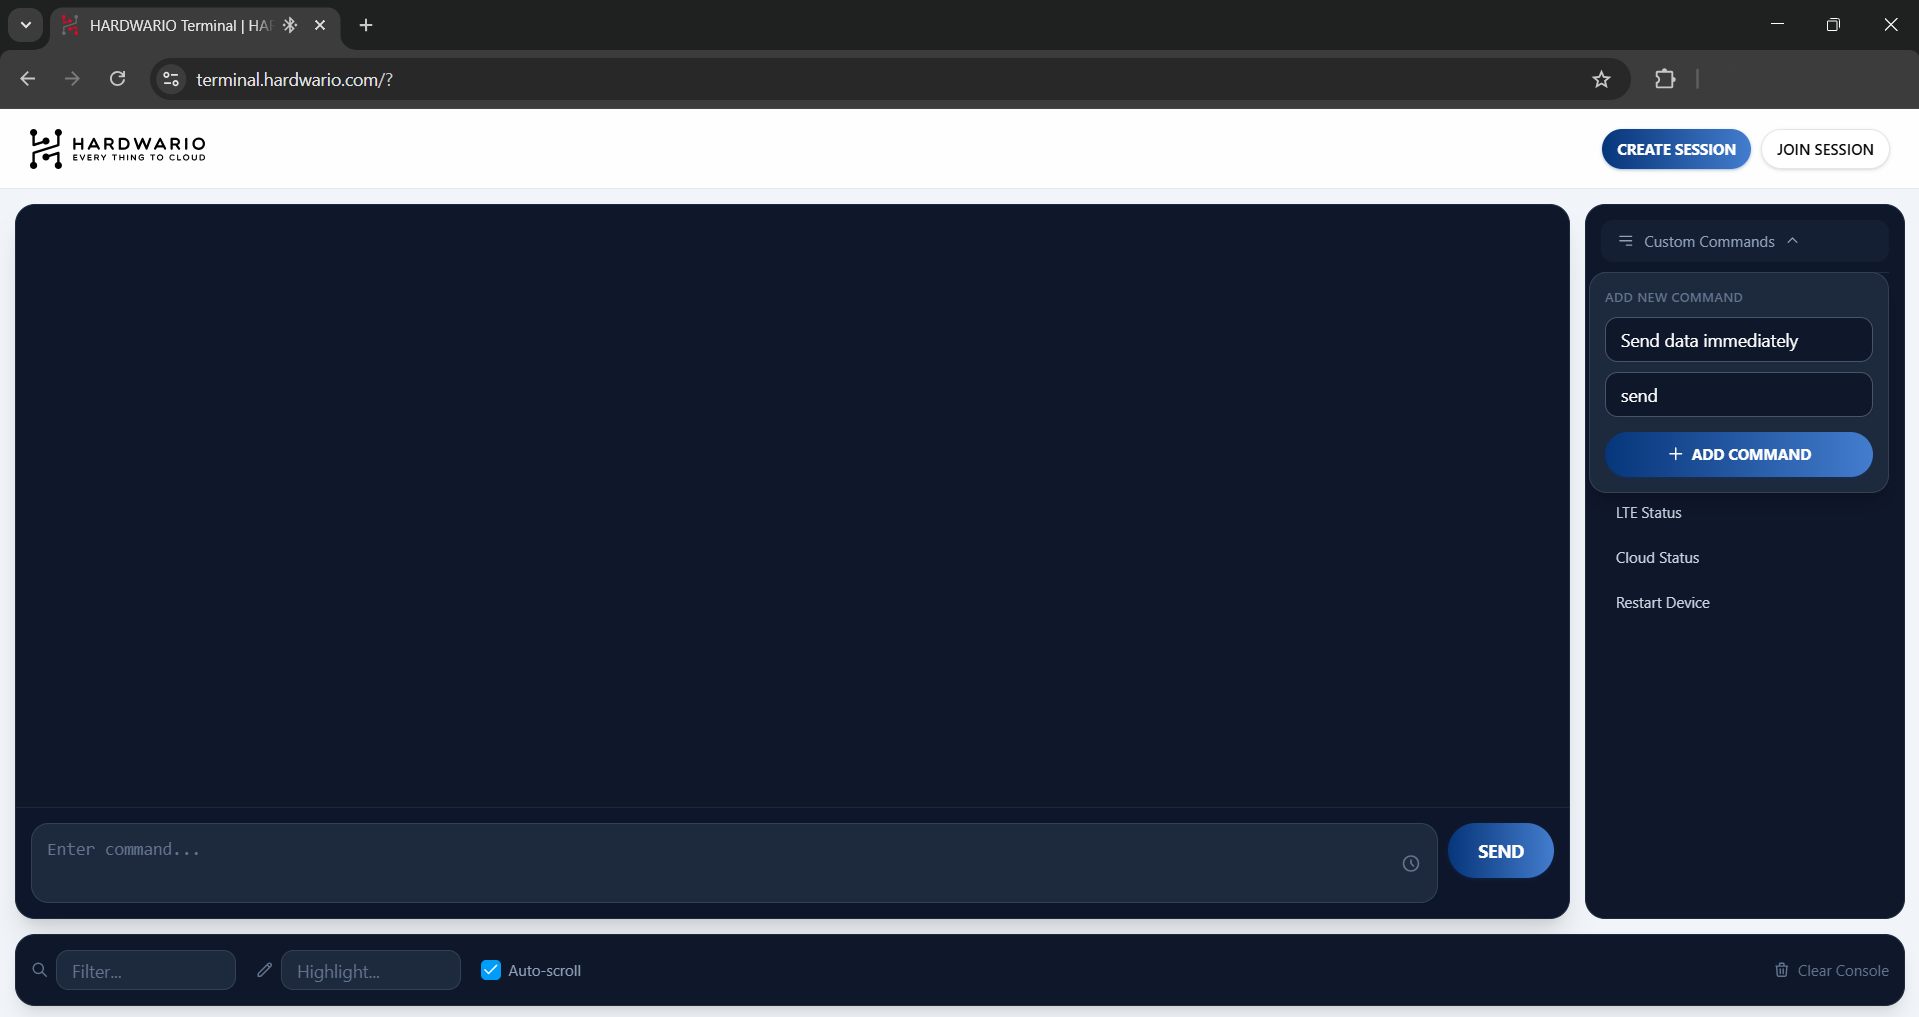
3. Custom Quick Commands
The terminal allows you to create your own personalized Quick Commands for actions you perform frequently.
- Step 1: In the right-hand Quick Commands panel, locate the toolbar at the top.
- Step 2: Click the button to add a new custom command.
- Step 3: Enter a Label (this is the name that will appear on the clickable button).
- Step 4: Enter the exact Command you want to execute when the button is clicked.
- Tip: If you are unsure of the exact command syntax, type
helpin the main terminal window to view all available system commands.
- Tip: If you are unsure of the exact command syntax, type
- Step 5: Save your new custom command. It will now appear in your Quick Commands list.
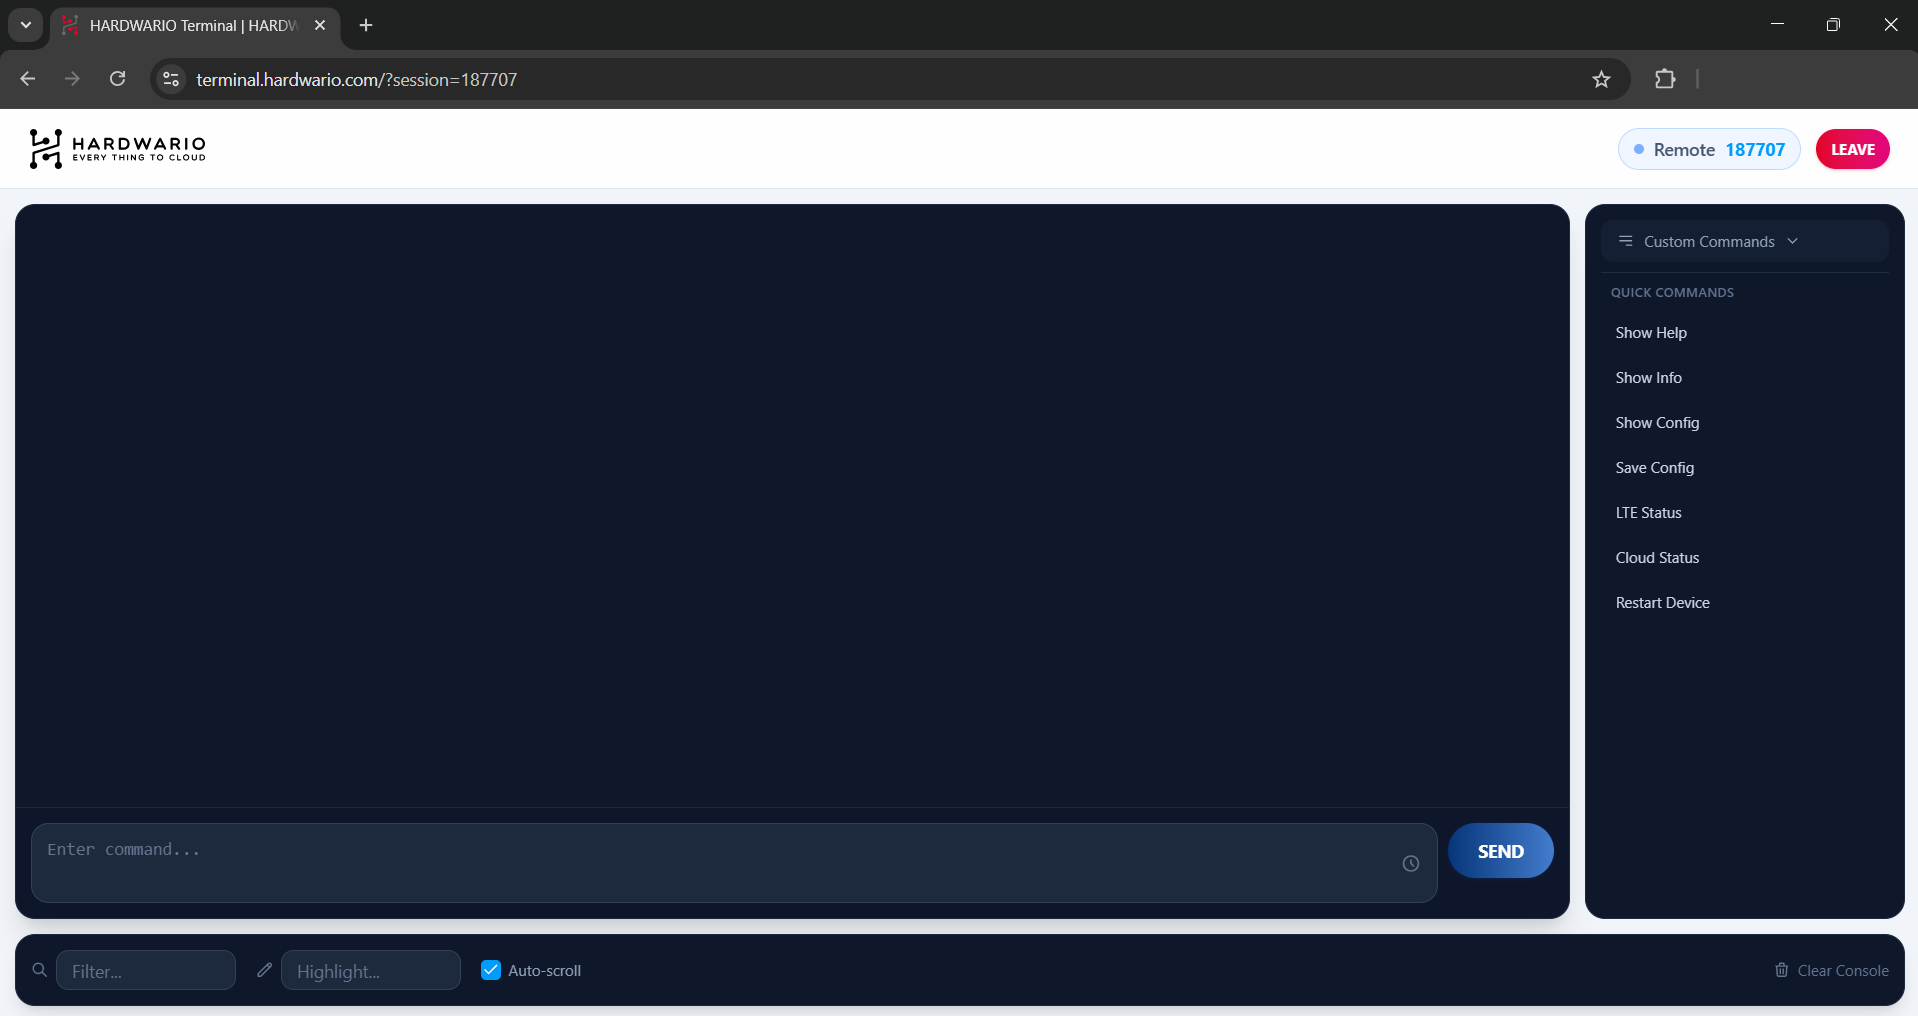
4. Remote Session
A major advantage of the HARDWARIO Terminal App is the Remote Session feature. This allows you to grant access to your device to someone far away (such as HARDWARIO Support) without them needing a direct Bluetooth connection. Only you need to be physically connected via Bluetooth; you can then share a Session ID to let them control the CHESTER remotely.
Creating a Session (Allowing Remote Access)
- Step 1: Click the Create Session button in the top right corner of the terminal interface.
- Step 2: The session will be generated immediately.
- Step 3: Share the generated Session ID with the person you want to grant access to. You can also use the Copy Link button to send them a direct URL.
- Step 4: To terminate the remote connection at any time, simply click the End button.
Joining a Session (Connecting Remotely)
- Step 1: Click the Join Session button in the top right corner.
- Step 2: Enter the Session ID provided by the user who is physically connected to the device via Bluetooth.
- Step 3: Once successfully connected, you can control the device remotely. The terminal output is synchronized, meaning both you and the host user will see all executed commands and their responses in real-time.
- Step 4: To disconnect from the remote session, click the Leave button in the top right corner.