ChirpStack v4 Configuration Guide
This tutorial walks you through the process of adding gateways, creating device profiles, registering devices, decoding payloads, and setting up integrations in ChirpStack v4.
1. Gateways
The first step is to add your gateways into ChirpStack.
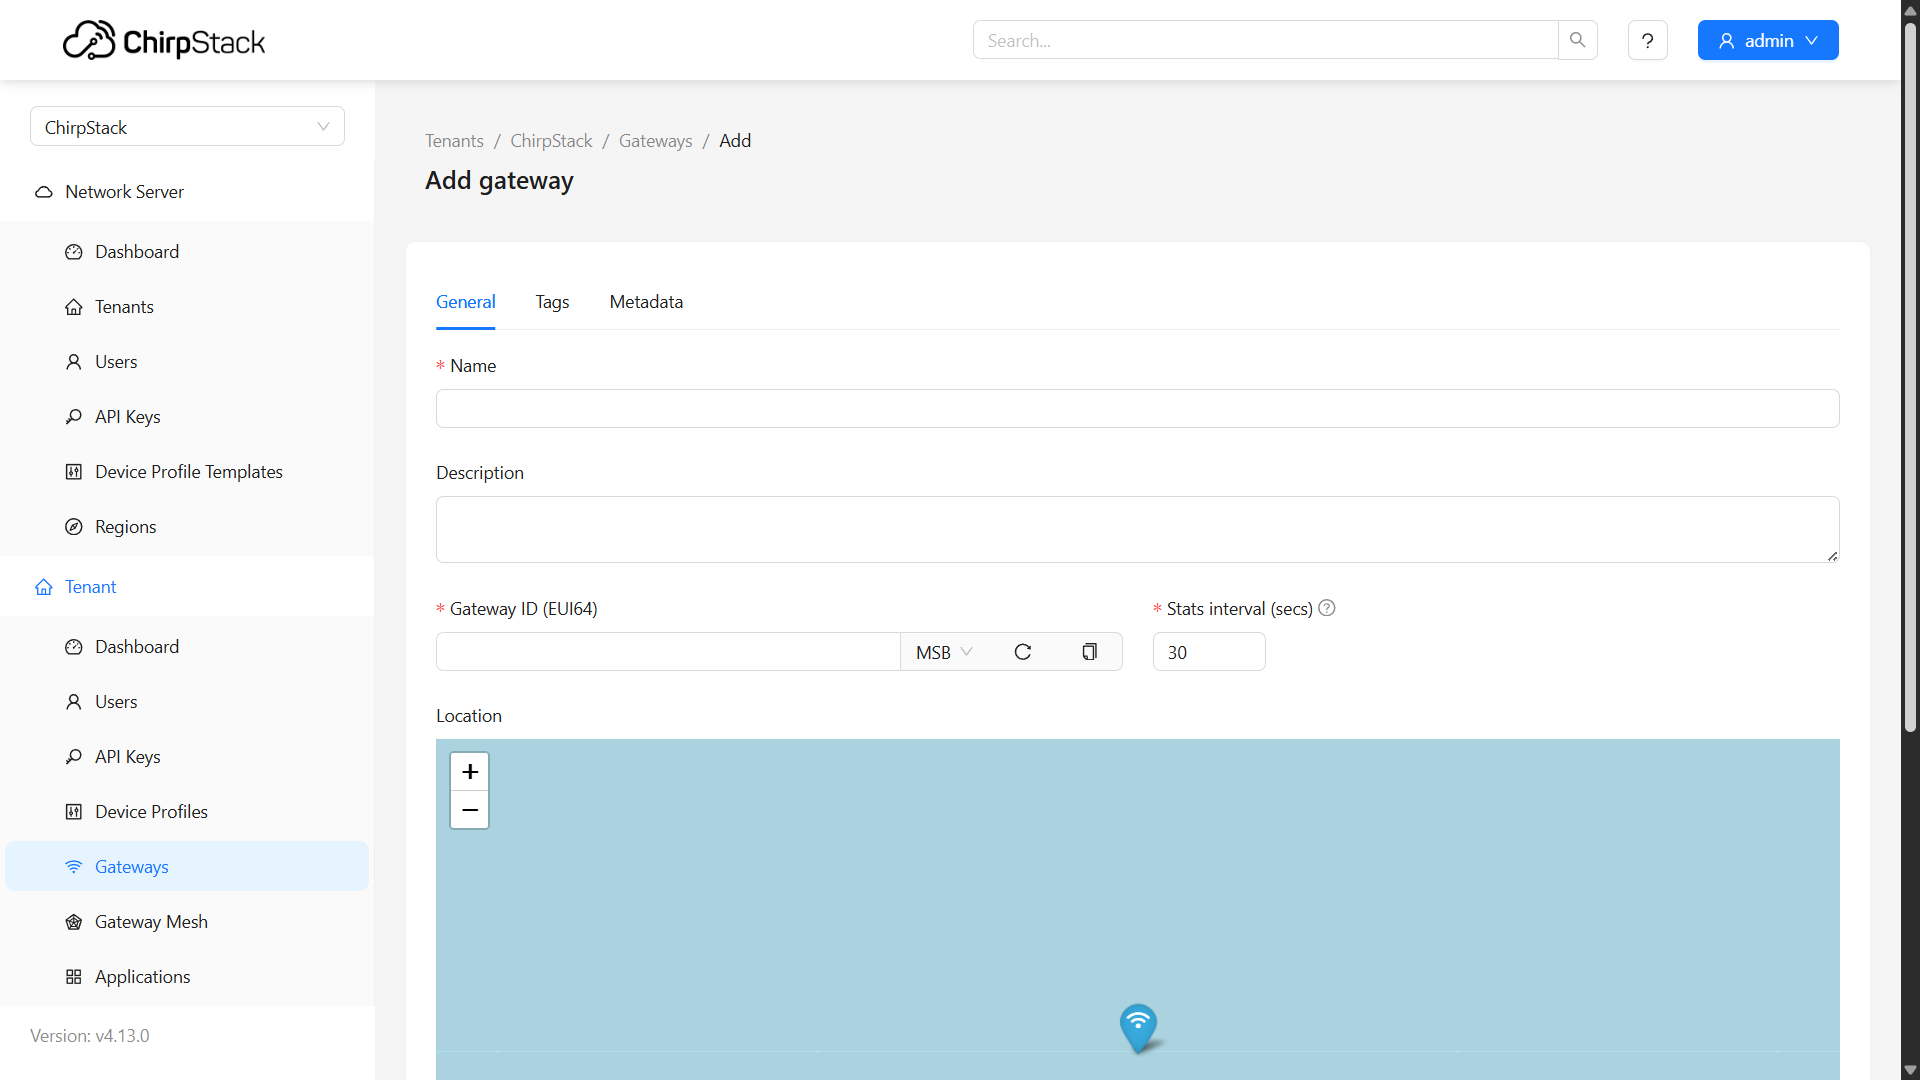
From the left navigation menu, under tenant, select Gateways and then click the Add Gateway button in the top right.
A form will appear where you can enter gateway information such as:
- Name
- Gateway ID
- Stats Interval
Once completed, click Submit.
If you are using our Ember gateway, the Gateway ID can be found in the MikroTik software under LoRa → Devices.
2. Device Profiles
After adding gateways, the next step is to create device profiles in ChirpStack.
-
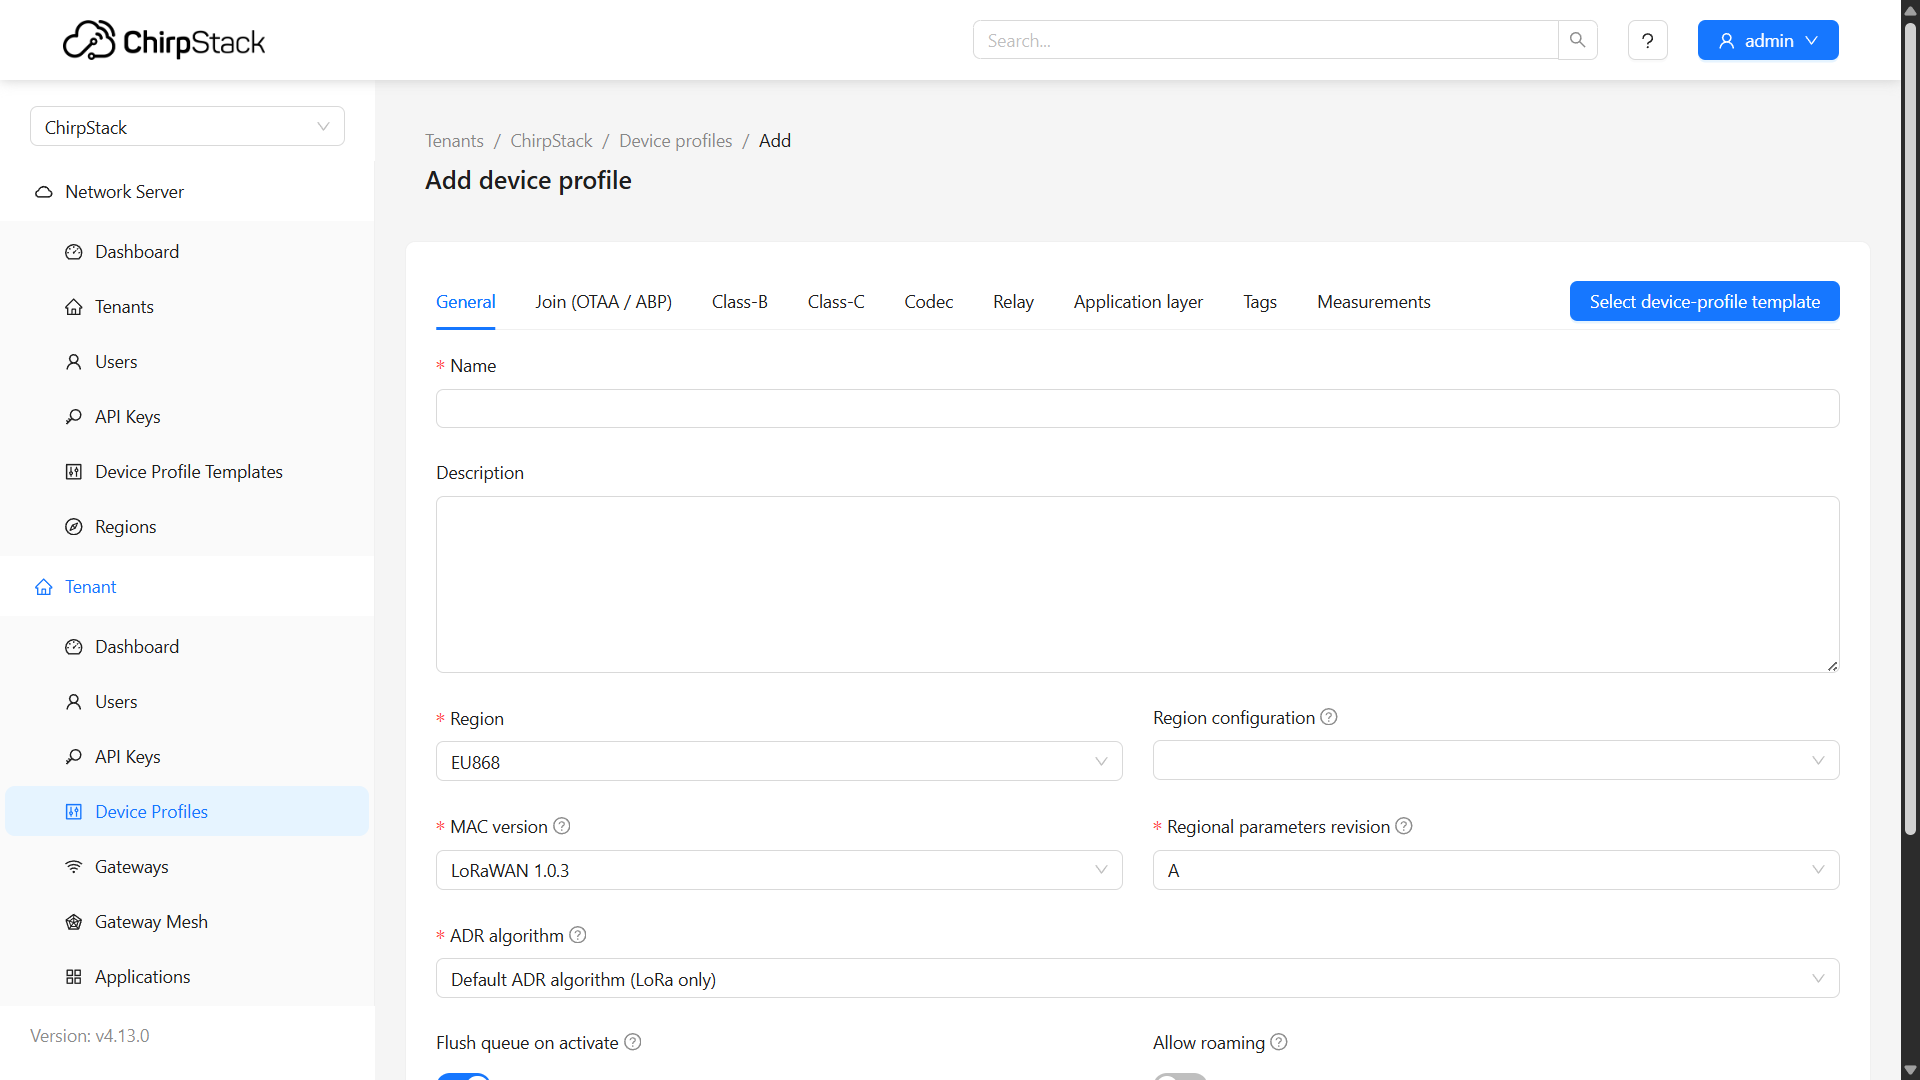
In the navigation bar, click Device Profiles.
-
Click Add Device Profile (top right).
-
Enter the required information such as:
- Name
- Region
- MAC Version
- ADR Algorithm
- Expected Uplink Interval
Example for HARDWARIO devices
If you are using Chester or Sticker as an end device, you can find examples of device profile configurations in the following links:
3. Applications – Adding Devices
Next, create an application:
-
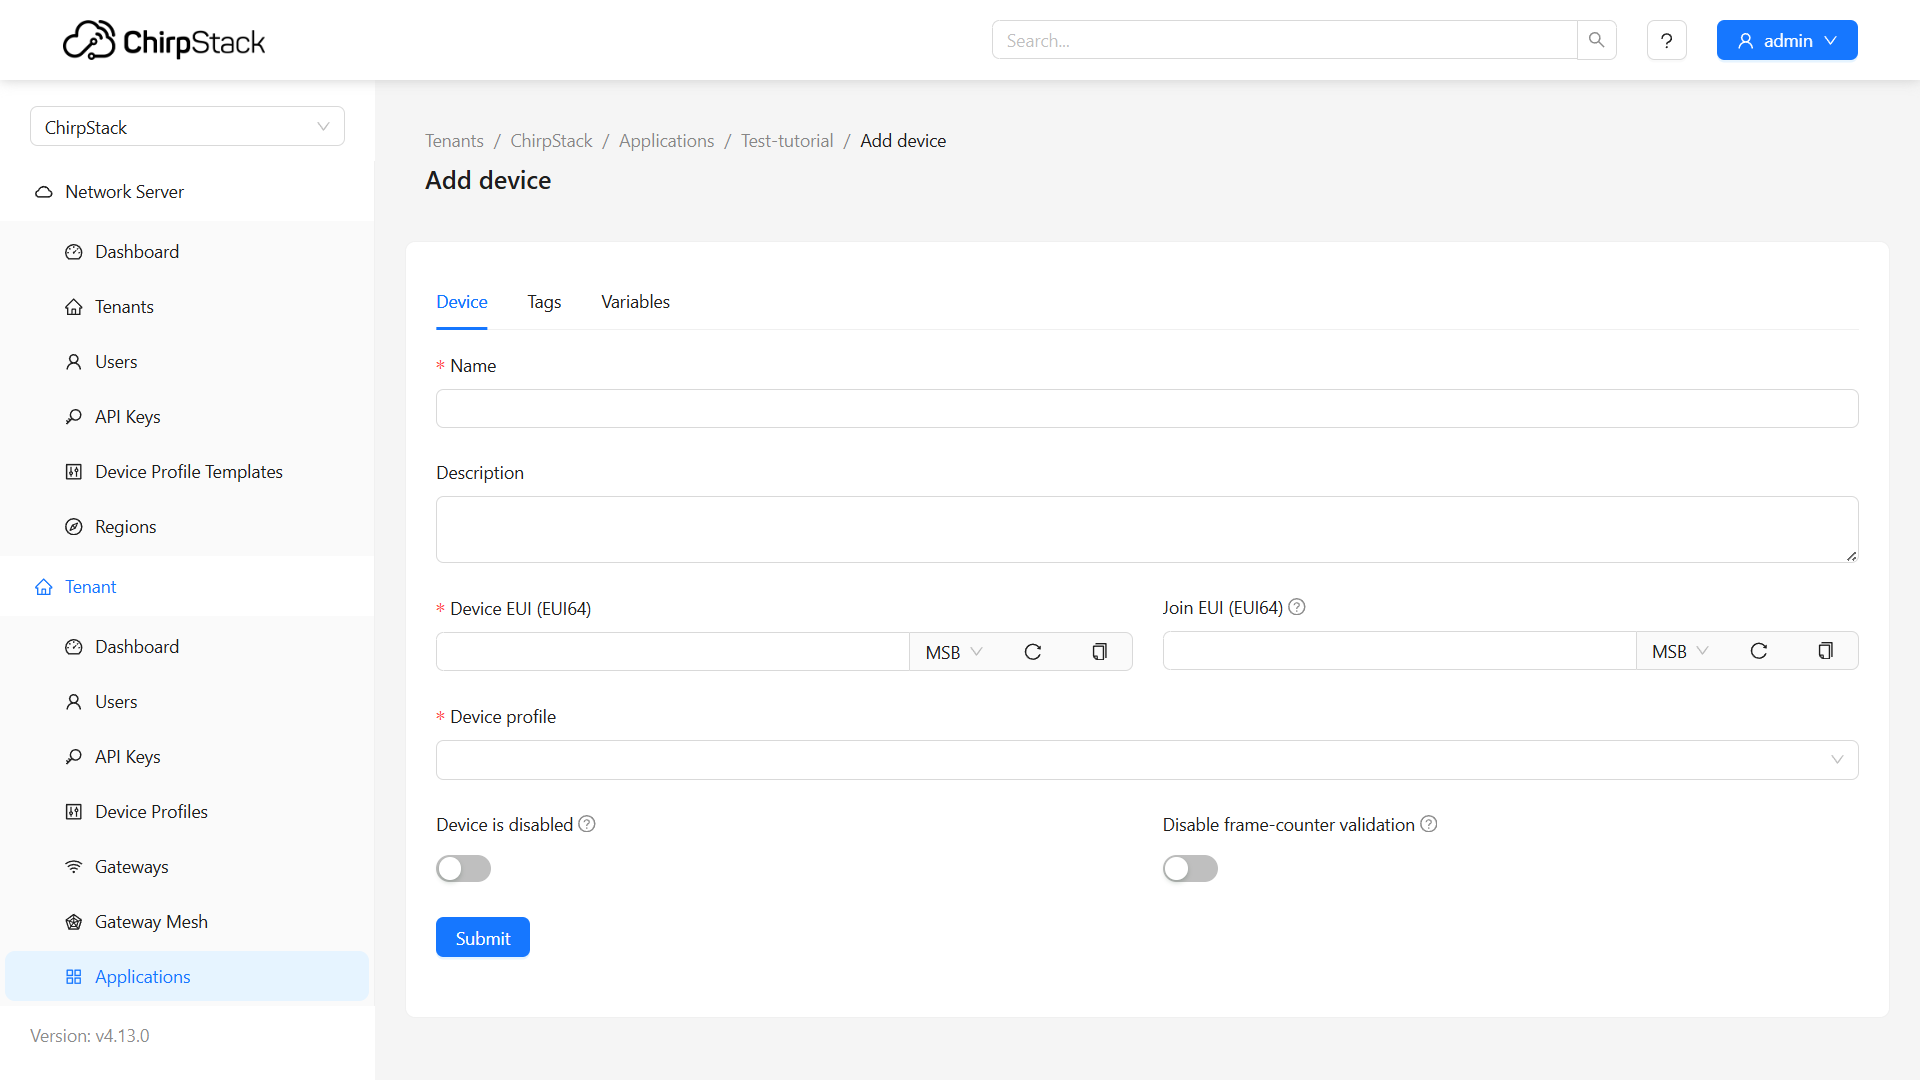
In the navigation bar, select Applications (bottom of the menu).
-
Create a new application and open it.
-
Add devices by providing details such as:
- Name
- Device EUI
- Device Profile
Click Submit.
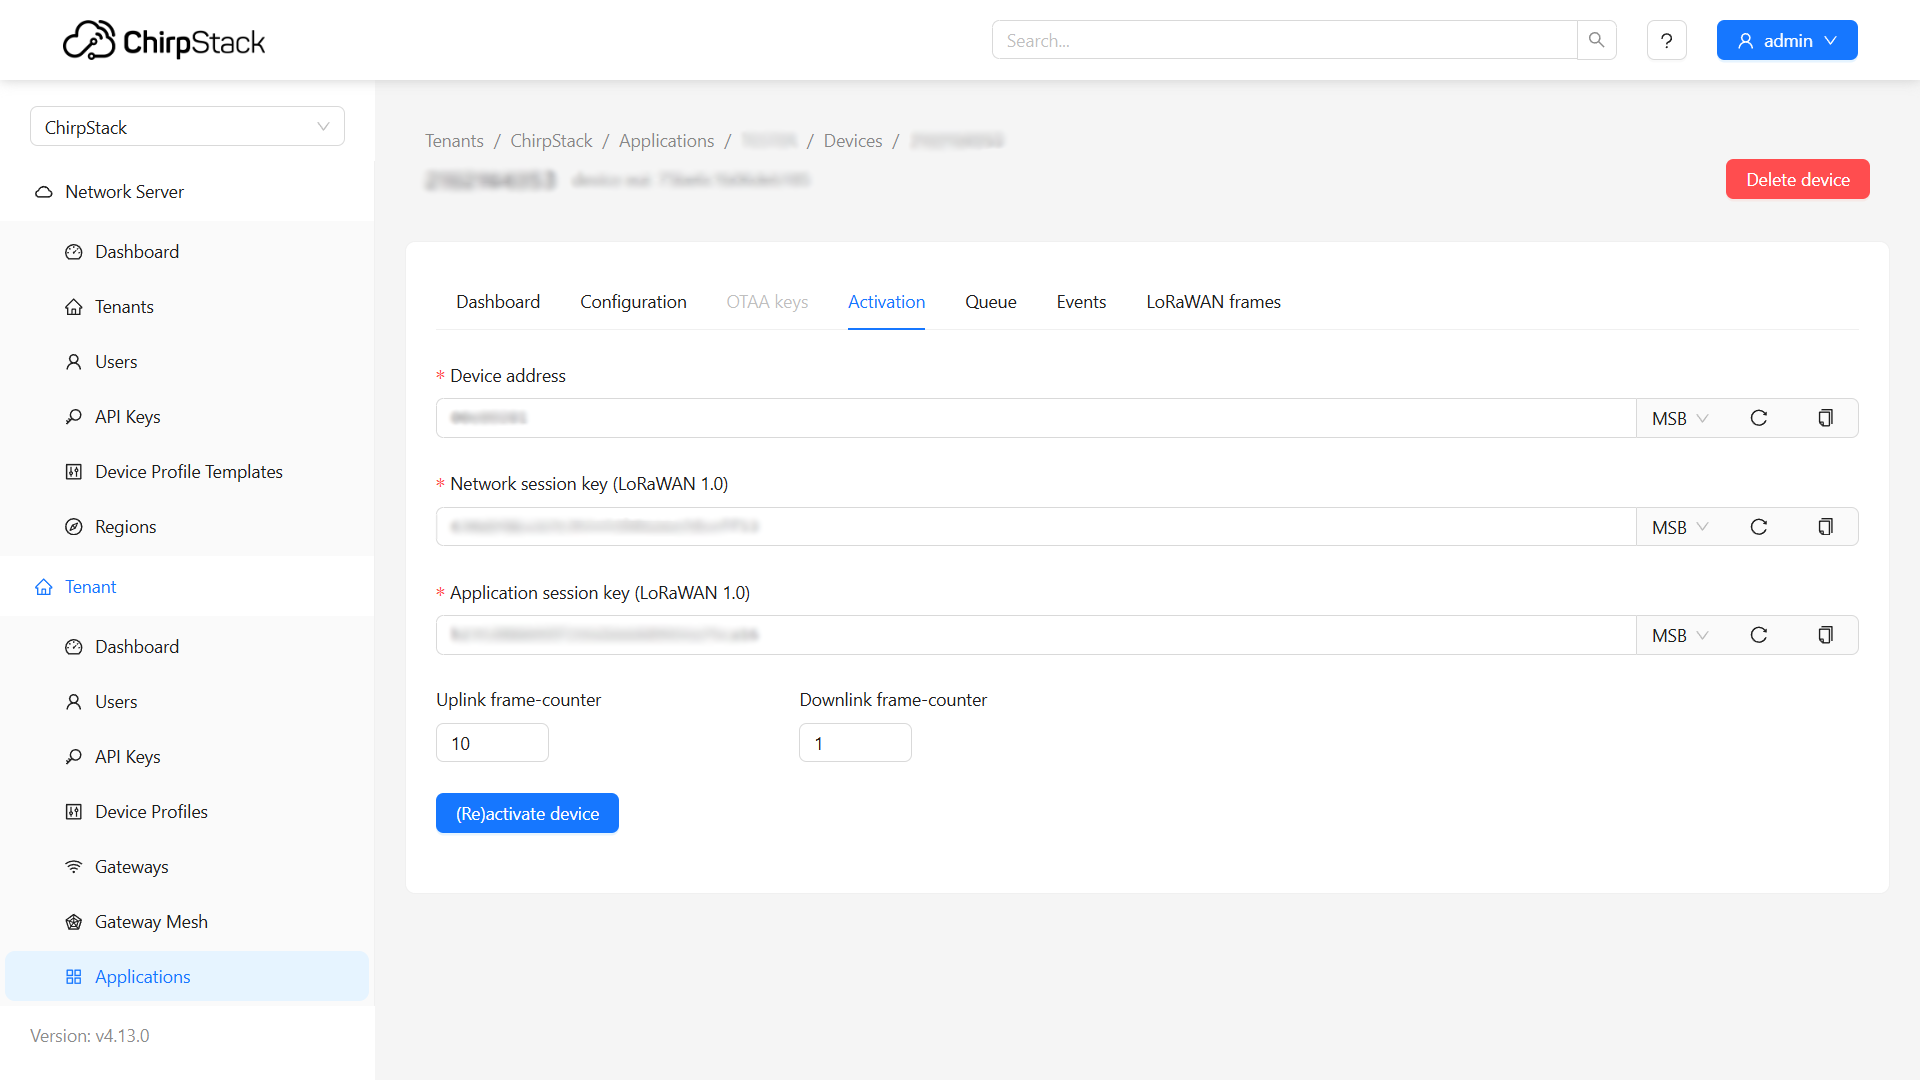
After creating the device, go to the Activation tab and enter:
- Device Address
- Network Session Key
- Application Session Key
Finally, click (Re)activate Device.
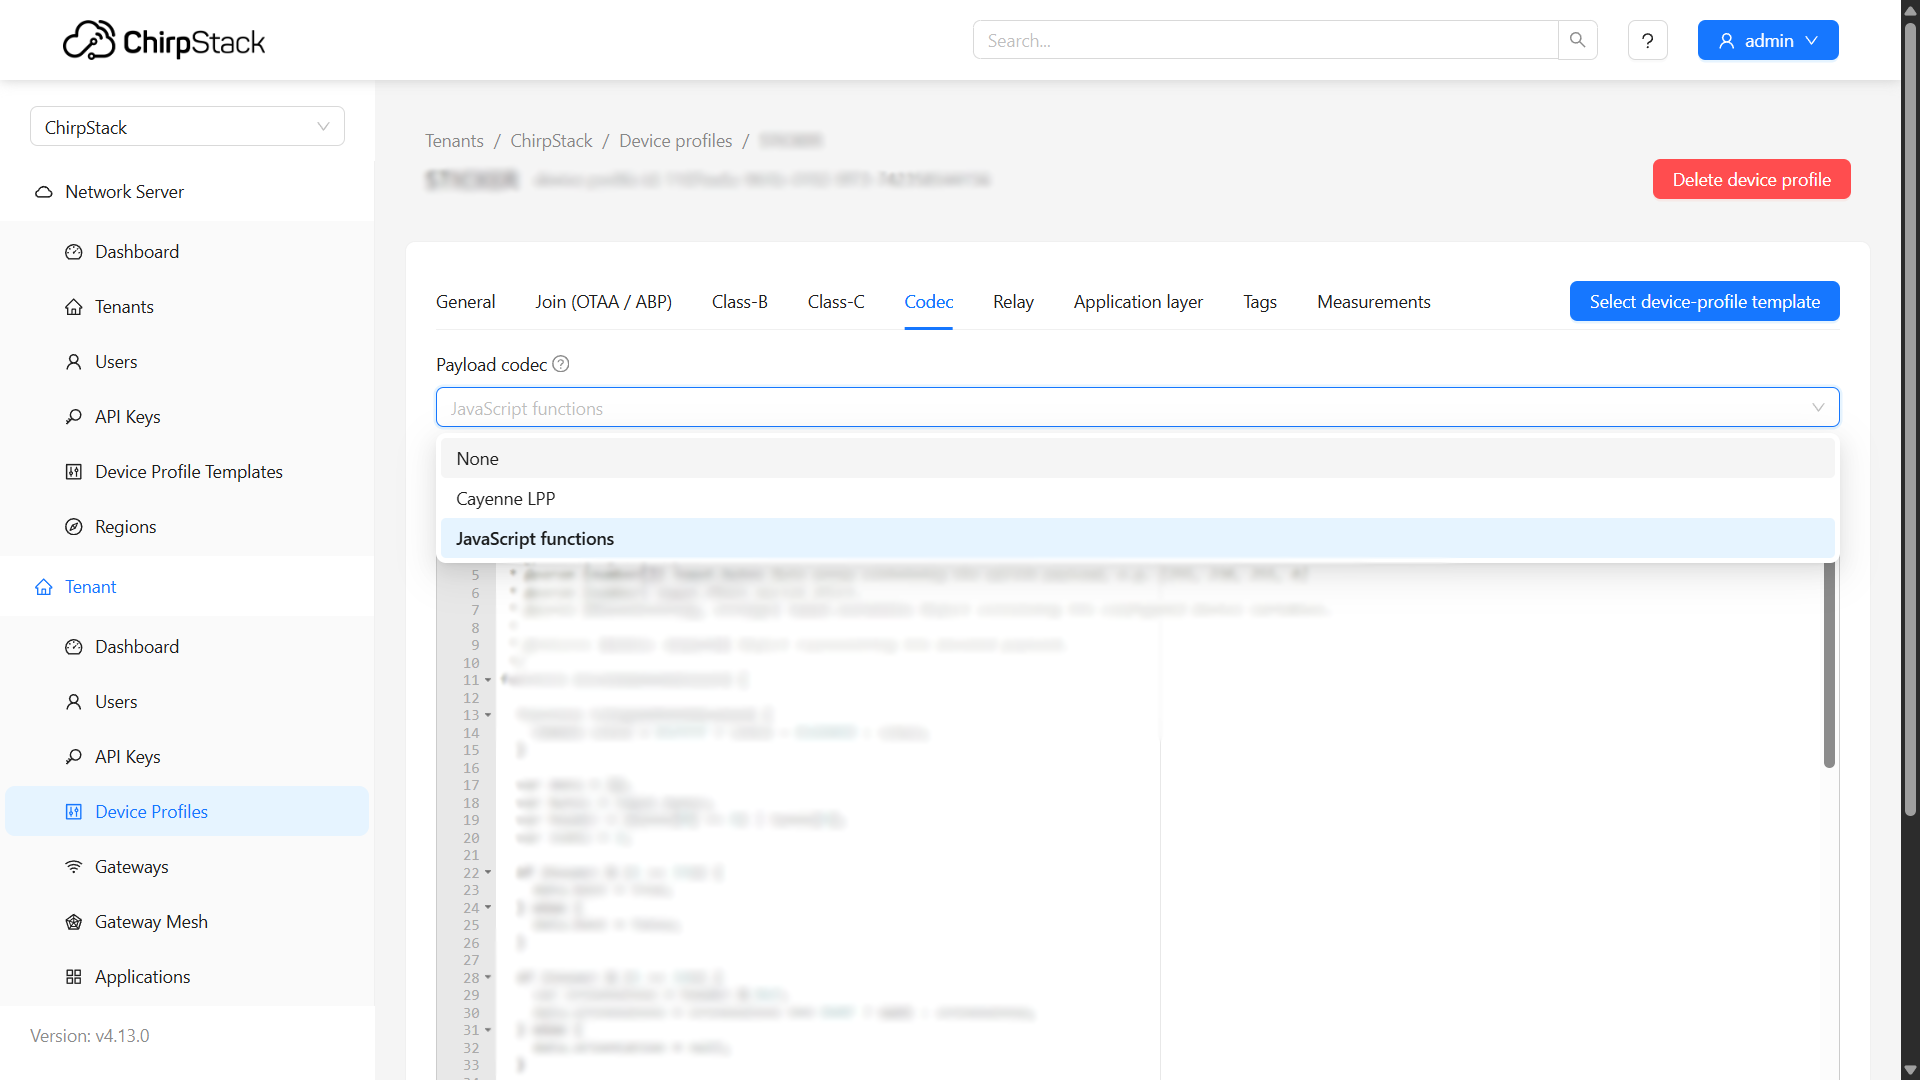
4. Codec
LoRaWAN data is transmitted in a compressed format and needs to be decoded.
- Go to Device Profiles → Codec.
- Select Payload Codec and paste your decoding code.
For STICKER, choose JavaScript functions as the payload codec, then click Submit.
Viewing Decoded Data
- Navigate to Applications → Events.
- Select Up to view uplink messages.
- You will now see decoded data.
Example of Codec (STICKER)
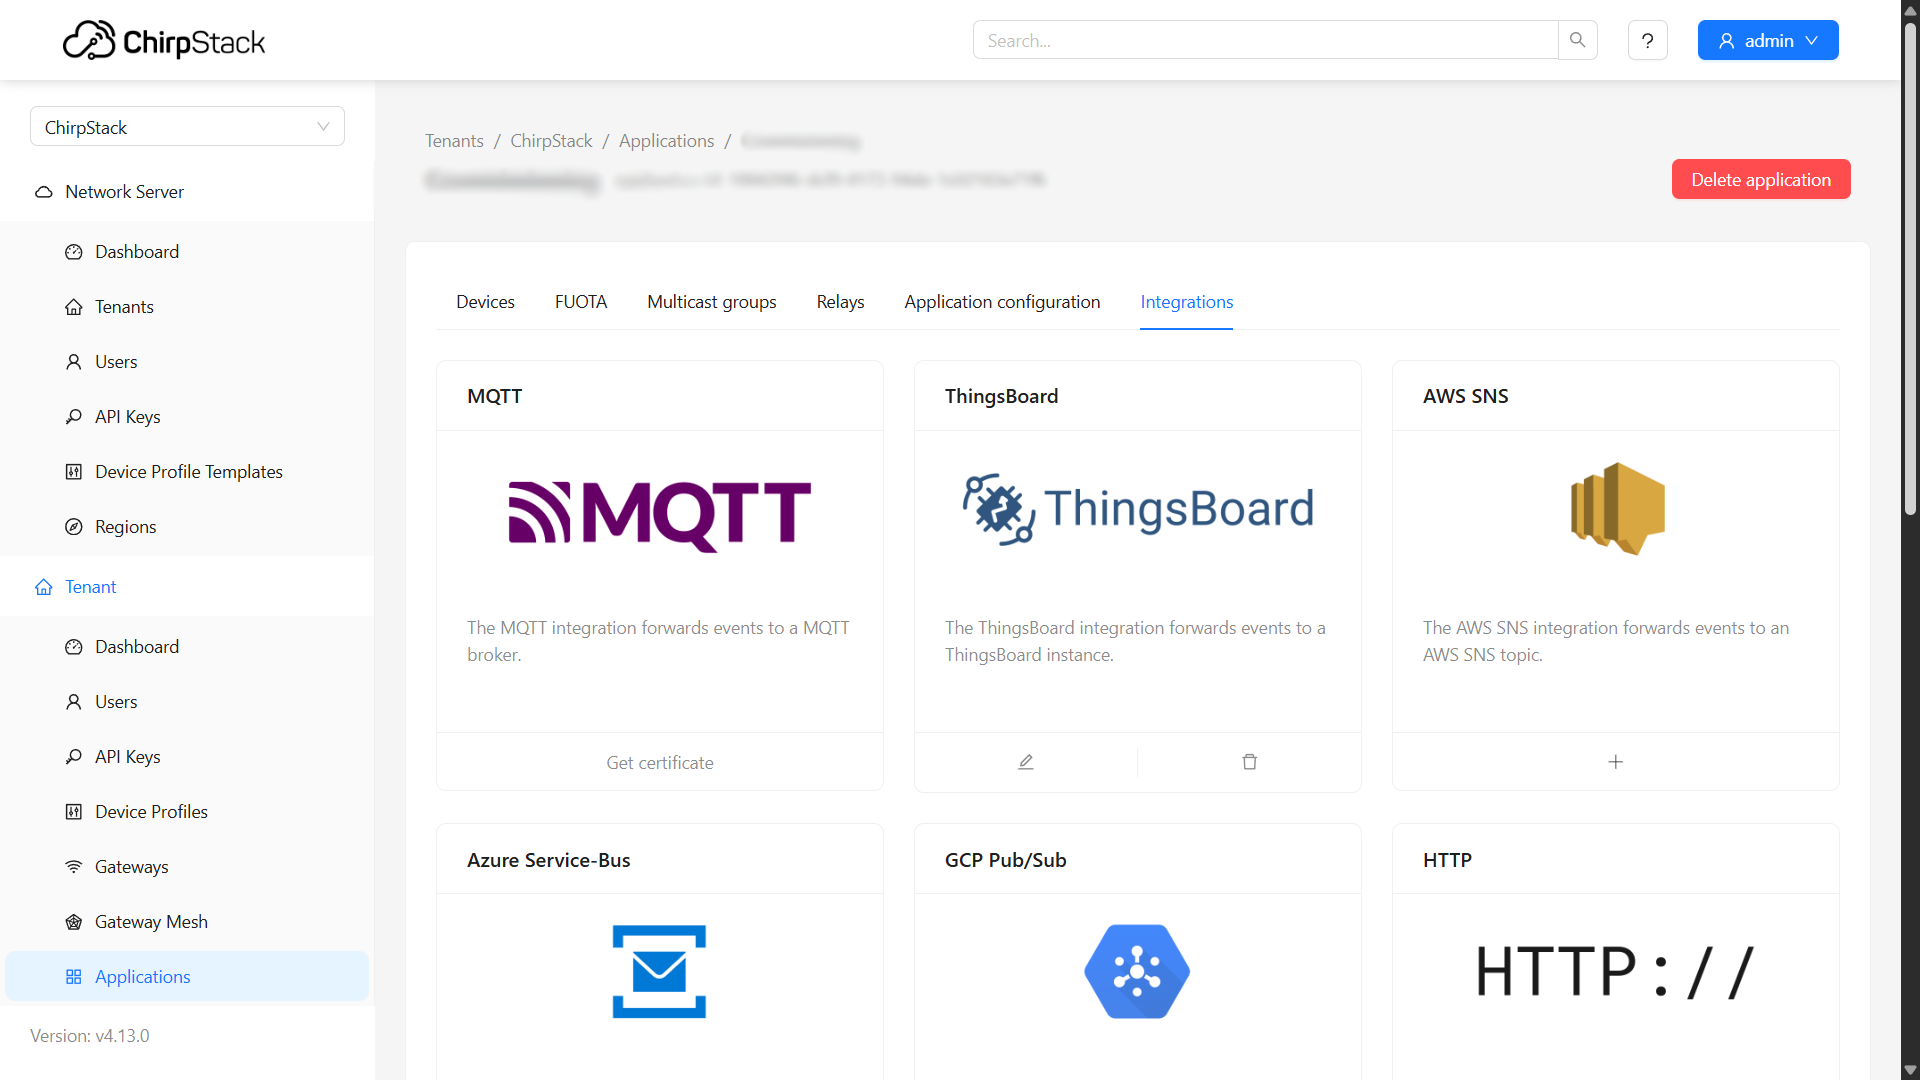
5. Integrations
Finally, you can set up integrations.
Within your Application, go to the Integrations tab and choose the integration method you need, for example:
- Visualization platforms
- External services
- Custom APIs
Ember Gateways – MikroTik Software
If you are using our EMBER as the gateway, all of its configuration must be done directly in the MikroTik system. Once configured, the gateway should become visible and ready to connect with the ChirpStack system.
Here is the link to the step-by-step guide for configuring the gateway via MikroTik: https://docs.hardwario.com/ember/mikrotik/gateway-update
Video Tutorial
If you need further assistance or a visual demonstration of the process described in this guide, consult the Video Guide.