Connectors
A Connector is a webhook that the Cloud calls every time a device sends an uplink message. Connectors are the primary way to push data from HARDWARIO Cloud to your own system, database, or third-party service.
How Connectors Work
- A device sends an uplink message to the Cloud
- The Cloud finds all connectors that share a tag with the device
- For each matching connector, the Cloud runs the transformation function
- The transformed payload is sent as an HTTP request to your endpoint
Creating a Connector
-
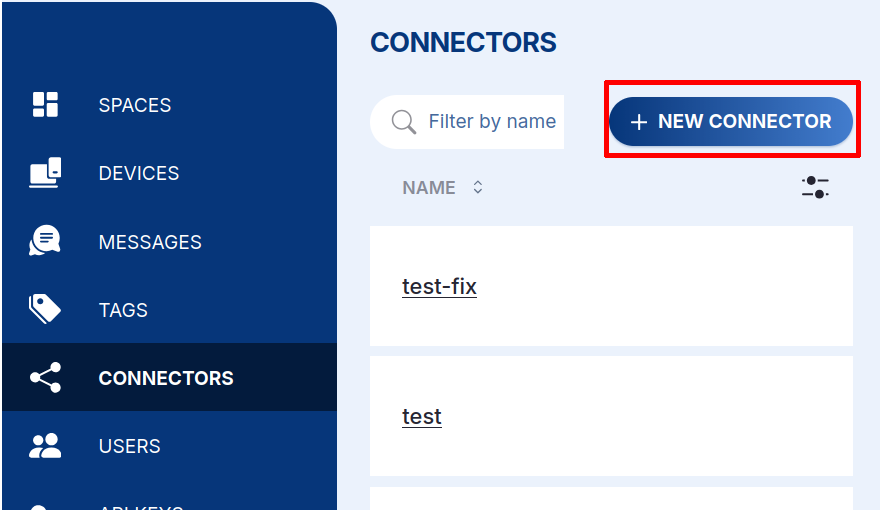
Open Connectors in the left sidebar, then click + NEW CONNECTOR.
-
Fill in the dialog:
Field Description Name Identifier for this connector Direction up. The connector reacts to uplink messages (device → Cloud)Type webhook. Delivers the message as an HTTP requestTriggers Which message types fire it (see Triggers) Tags Which device tags this connector listens to 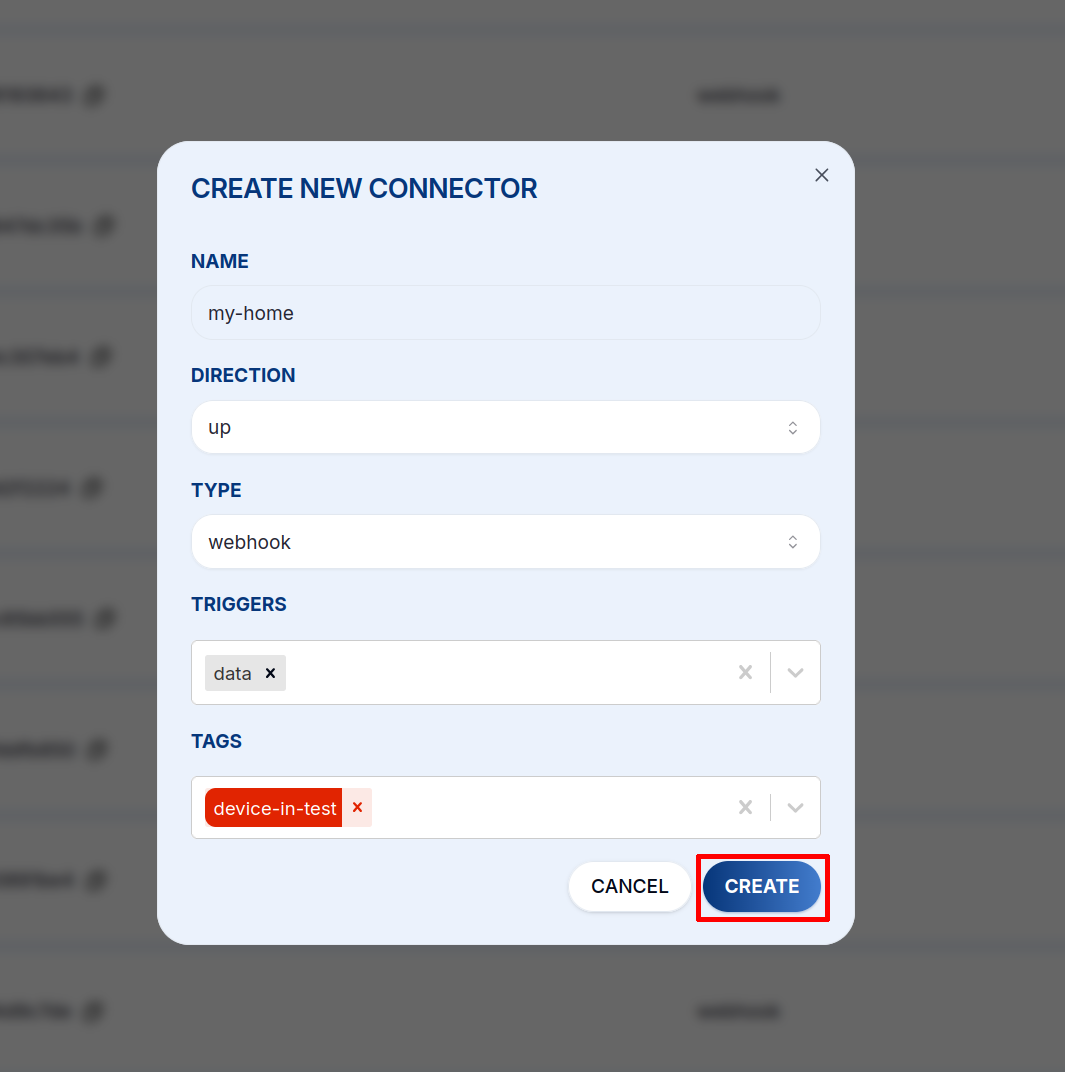
-
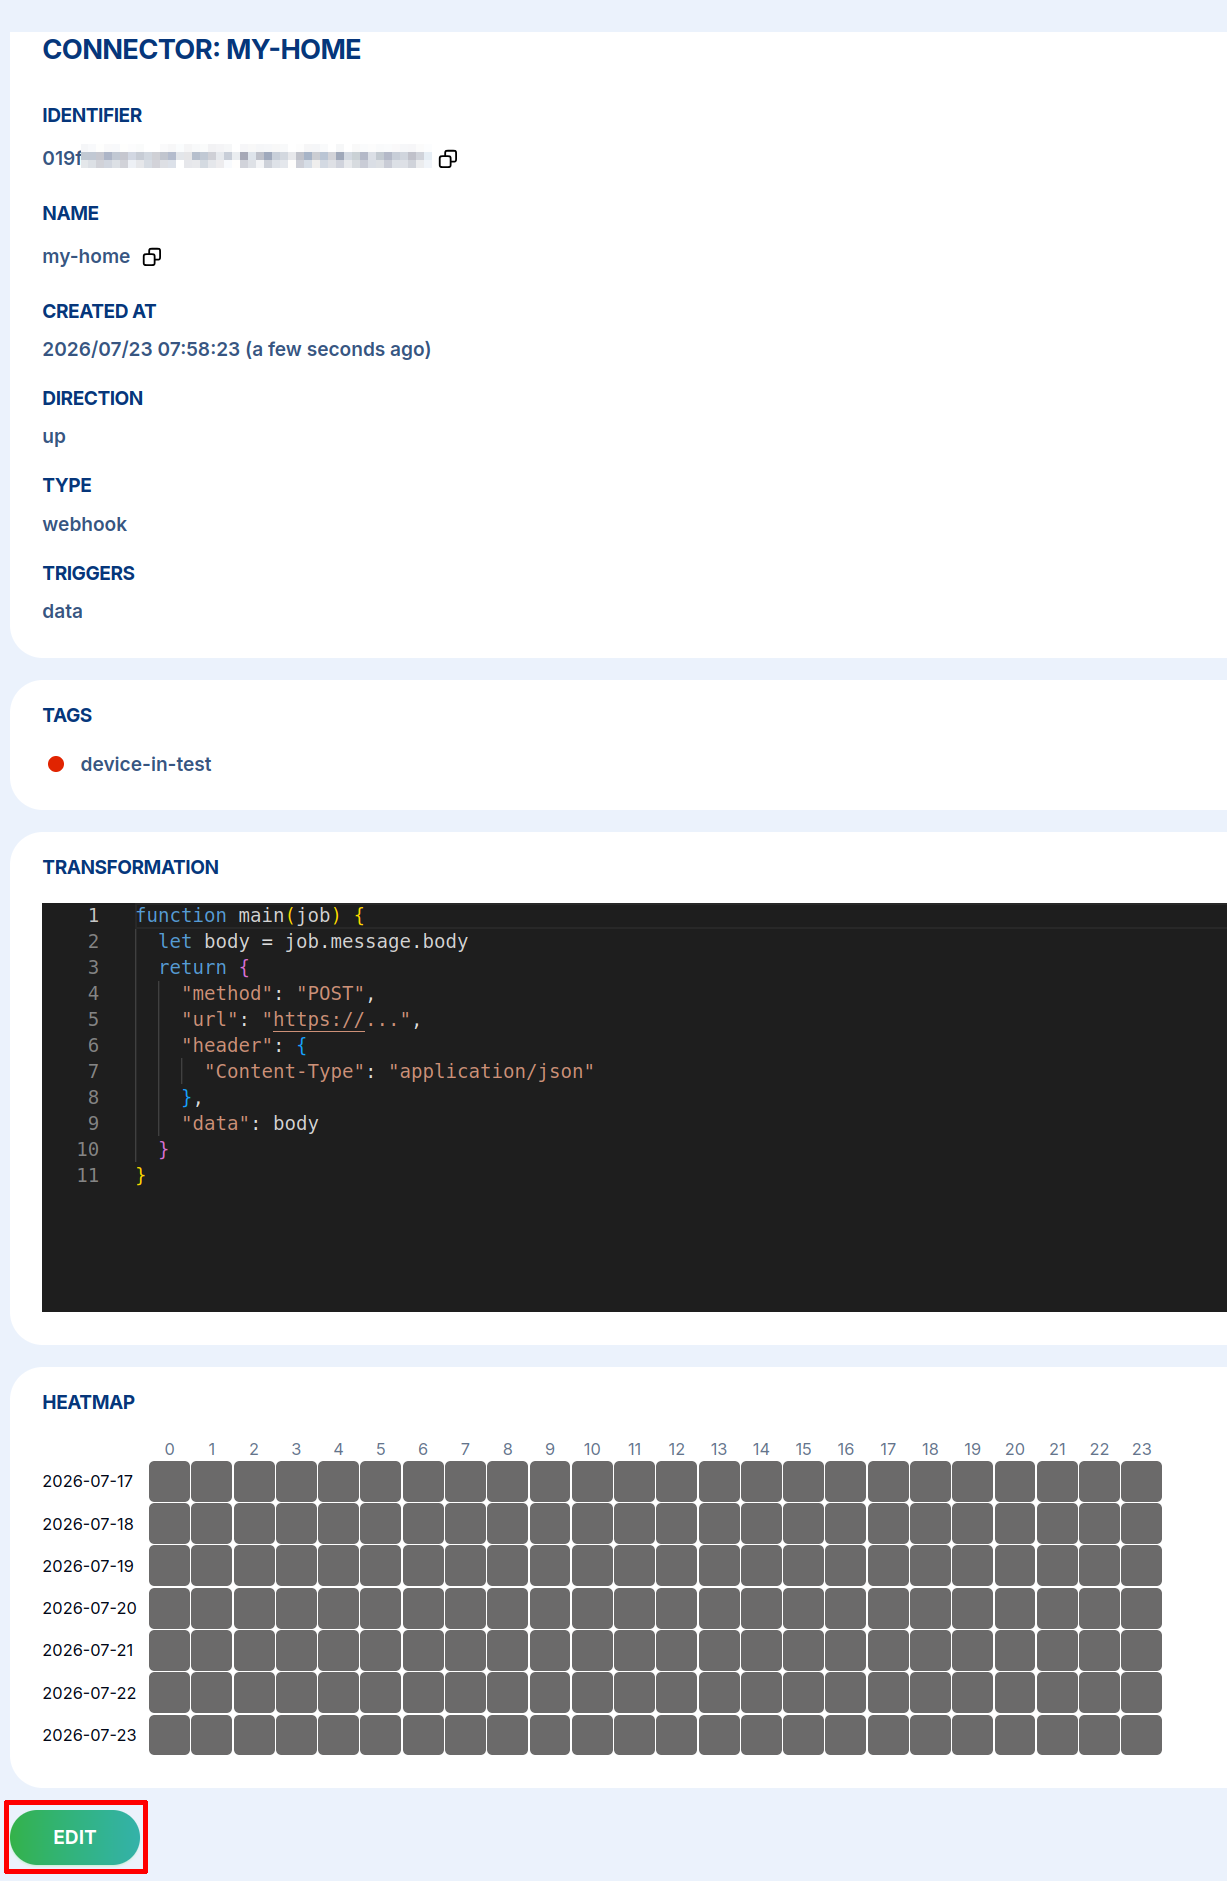
Click CREATE. The connector opens on its detail page, where you can review its settings and activity heatmap, and click EDIT to add the transformation function.
Triggers
Select which message types trigger the connector:
| Trigger | Description |
|---|---|
data | Periodic uplink with sensor readings. Most common |
session | Boot message with firmware and network info |
config | Configuration change acknowledgment |
stats | Internal Cloud statistics |
codec | Encoder/decoder key updates |
The Transformation Function
Every connector runs a JavaScript function that receives a job object and returns the HTTP request to make. This lets you reshape the payload, add authentication headers, or filter messages.
On the connector's detail page, click EDIT. The editor has three tabs: DETAILS (name, direction, type, triggers, tags), PLAYGROUND (the function and its live preview), and ADVANCED (retry settings).
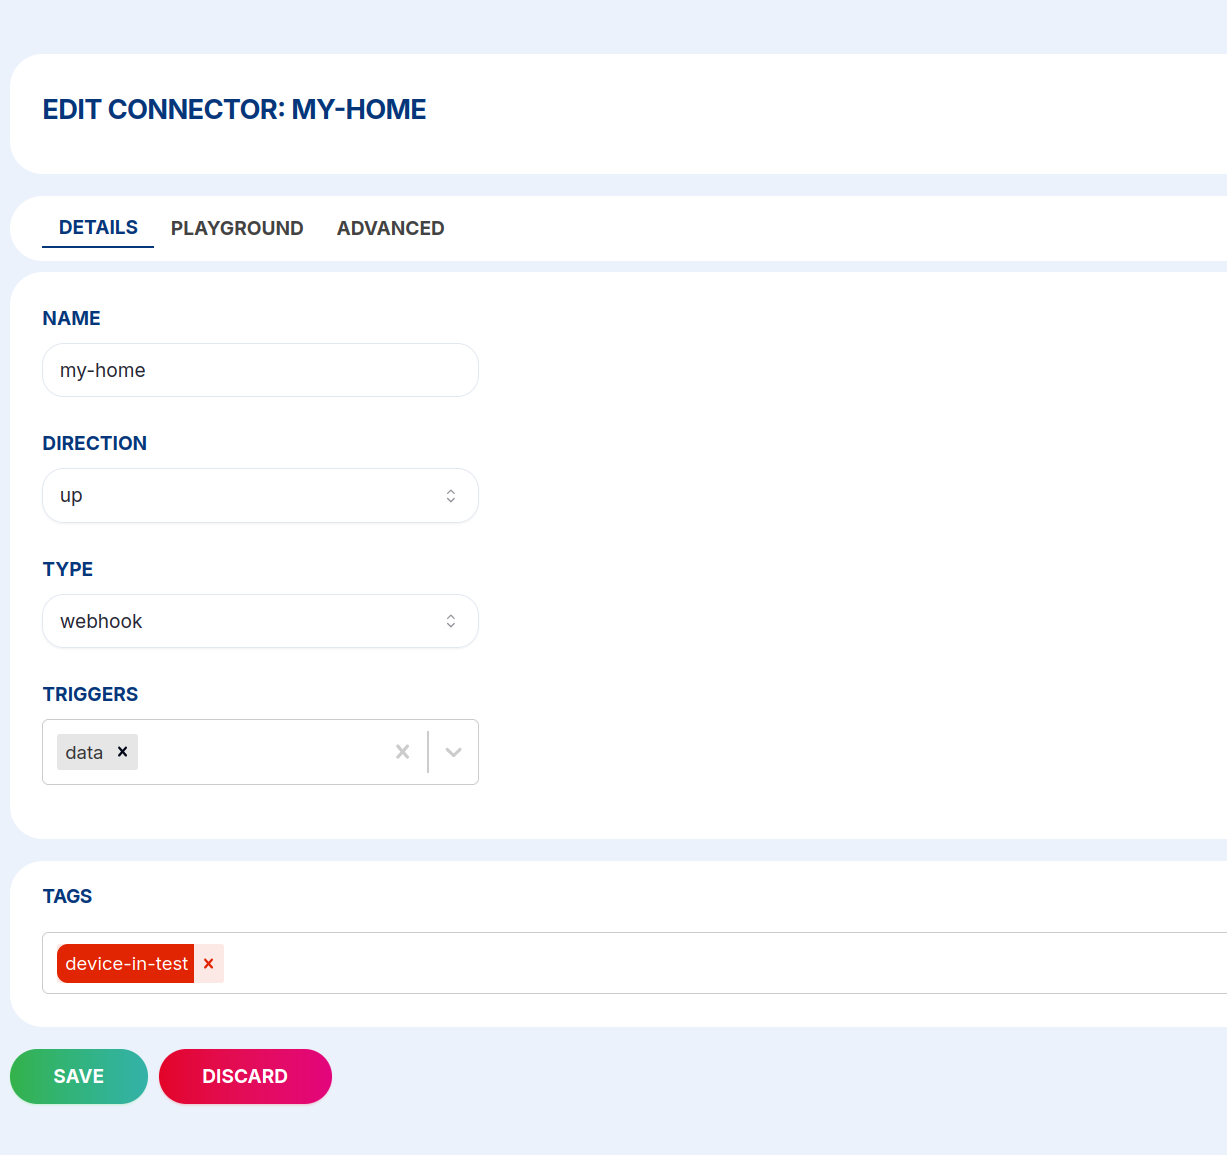
Open the PLAYGROUND tab. Write the function in the middle pane; the left pane shows a real device message (Input) and the right pane shows the request that would be sent (Output), updated live as you type. Use Select device and Select message type to preview against real data. No HTTP request is sent while you edit.
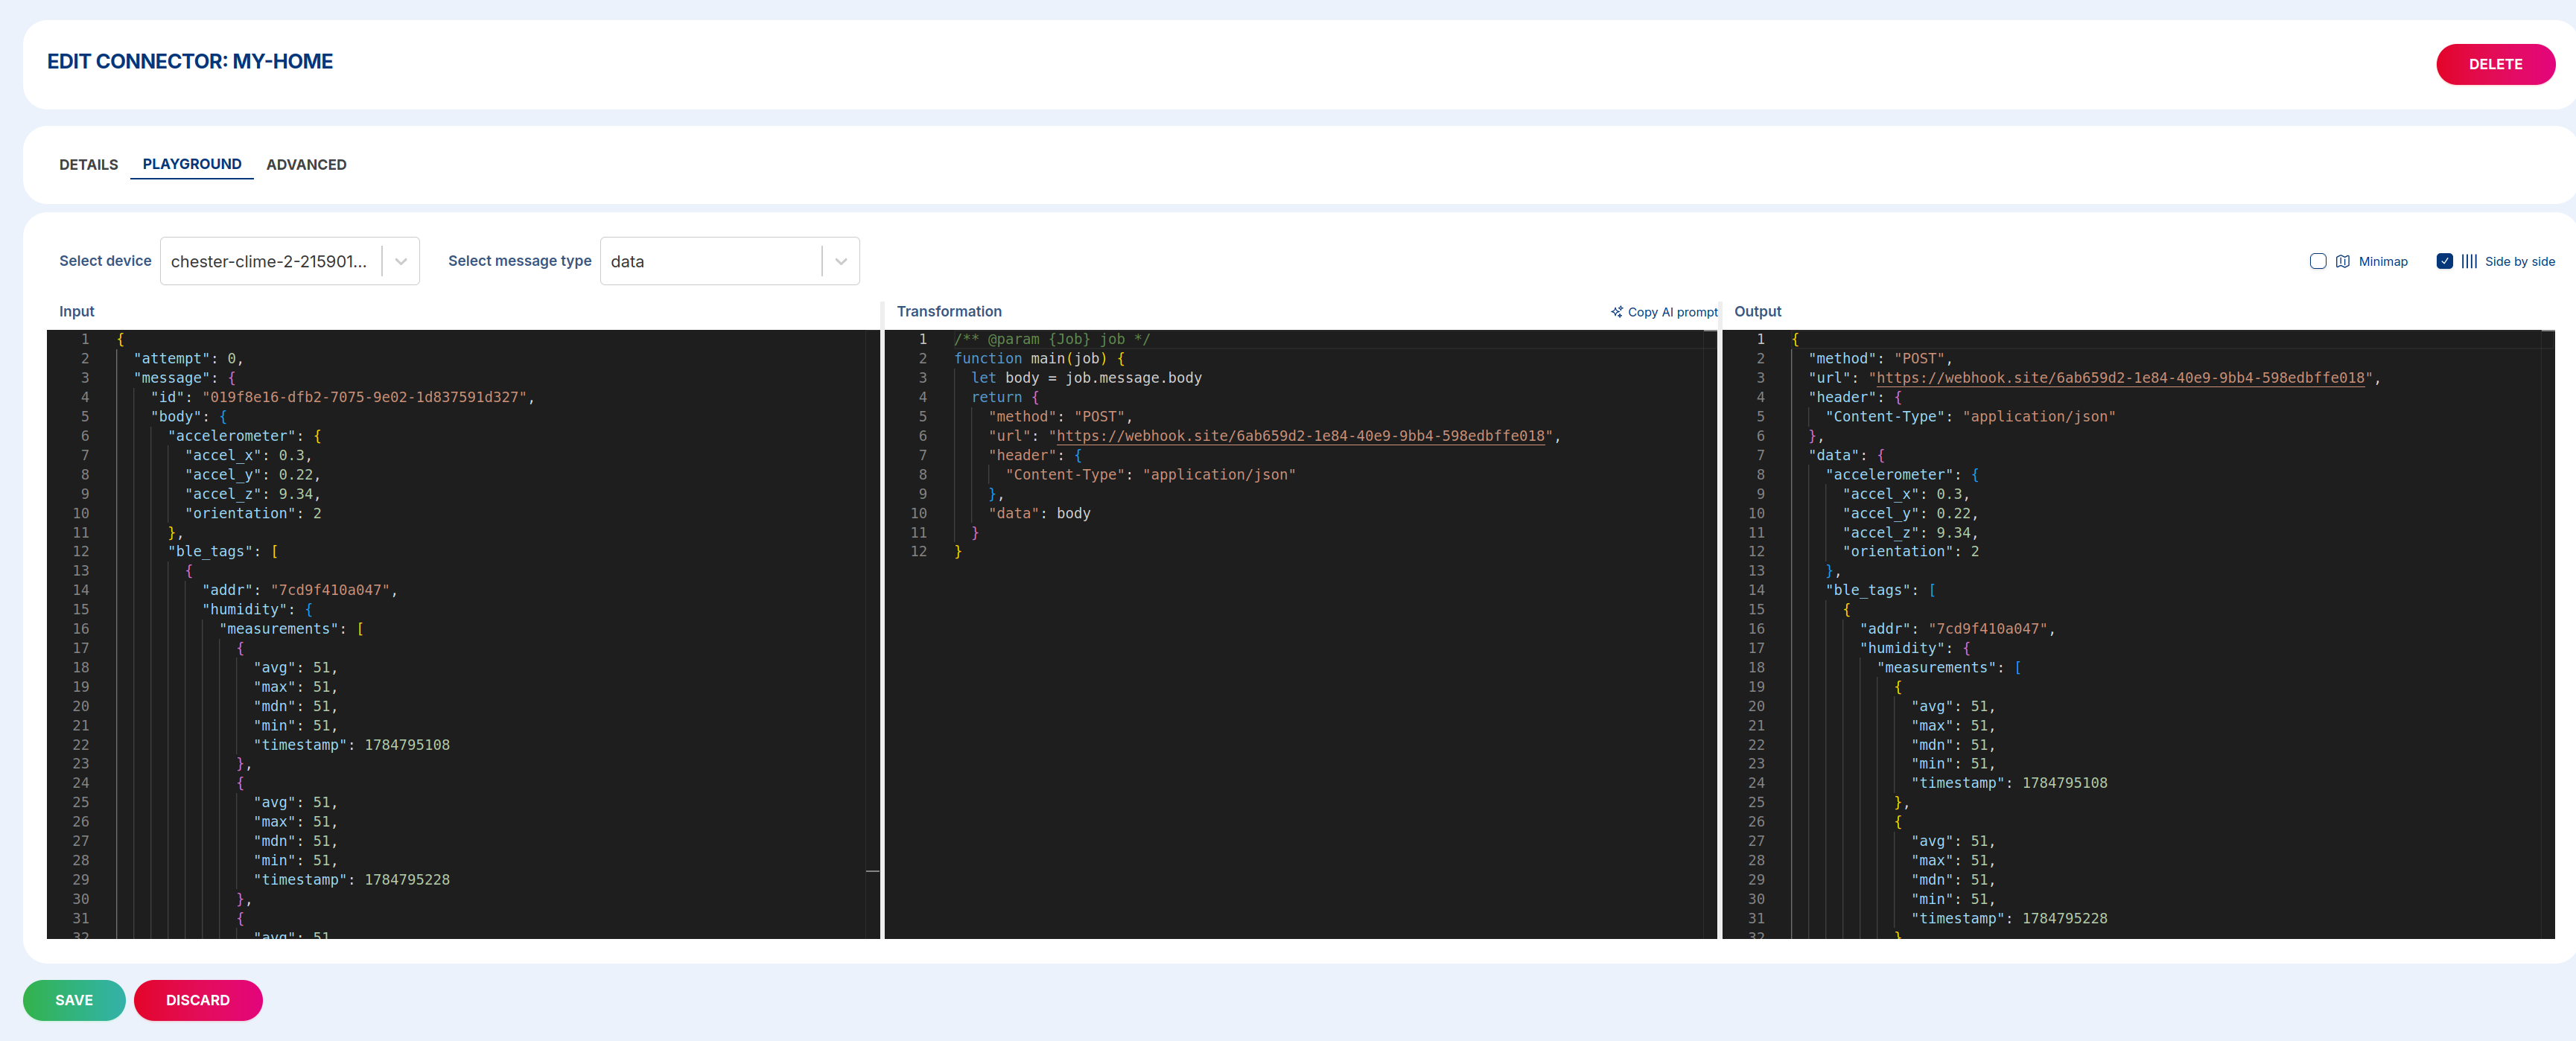
function main(job) {
  let body = job.message.body;
  return {
    "method": "POST",
    "url": "https://your-endpoint.example.com/data",
    "header": {
      "Content-Type": "application/json",
      "Authorization": "Bearer YOUR_TOKEN"
    },
    "data": body
  };
}
Returning null cancels the callback, which is useful for conditional forwarding:
function main(job) {
  let temp = job.message.body?.thermometer?.temperature;
  if (temp === undefined) return null; // skip messages without temperature
  return {
    "method": "POST",
    "url": "https://your-endpoint.example.com/temperature",
    "data": { value: temp, device: job.device.name }
  };
}
When the function is ready, click SAVE.
The job Object
The transformation function receives a job object with the following structure:
Show job object structure
{
  "message": {
    "id": "018eebbe-678d-7c60-b4ef-d141f48378e8",
    "type": "data",
    "direction": "up",
    "created_at": "2024-04-17T11:08:27.917Z",
    "body": {
      "thermometer": { "temperature": 22.43 },
      "accelerometer": { "accel_x": 0.22, "accel_y": 9.8, "accel_z": 0.15, "orientation": 3 },
      "network": {
        "parameter": { "band": 20, "rsrp": -95, "rsrq": -6, "snr": 2 }
      }
    }
  },
  "device": {
    "id": "018a1535-fd39-7293-bd36-52df3e62e962",
    "space_id": "018a14f6-27e3-7293-b7d2-c39d7b0d7cd2",
    "serial_number": "2159020389",
    "name": "my-device",
    "label": { "location": "prague-floor-3" },
    "tags": ["temperature-sensors"]
  },
  "connector": {
    "id": "018aef7c-c122-7893-a07c-70dbc6ebbddc"
  }
}
Testing Your Connector
The quickest way to confirm a connector actually fires, and to see exactly what it sends, is to point it at a free, temporary receiver such as webhook.site. No backend of your own required. (The PLAYGROUND above tests your function's output; this tests the real HTTP delivery.)
-
Get a receiver URL. Open webhook.site and copy the "Your unique URL" shown at the top (it looks like
https://webhook.site/<id>).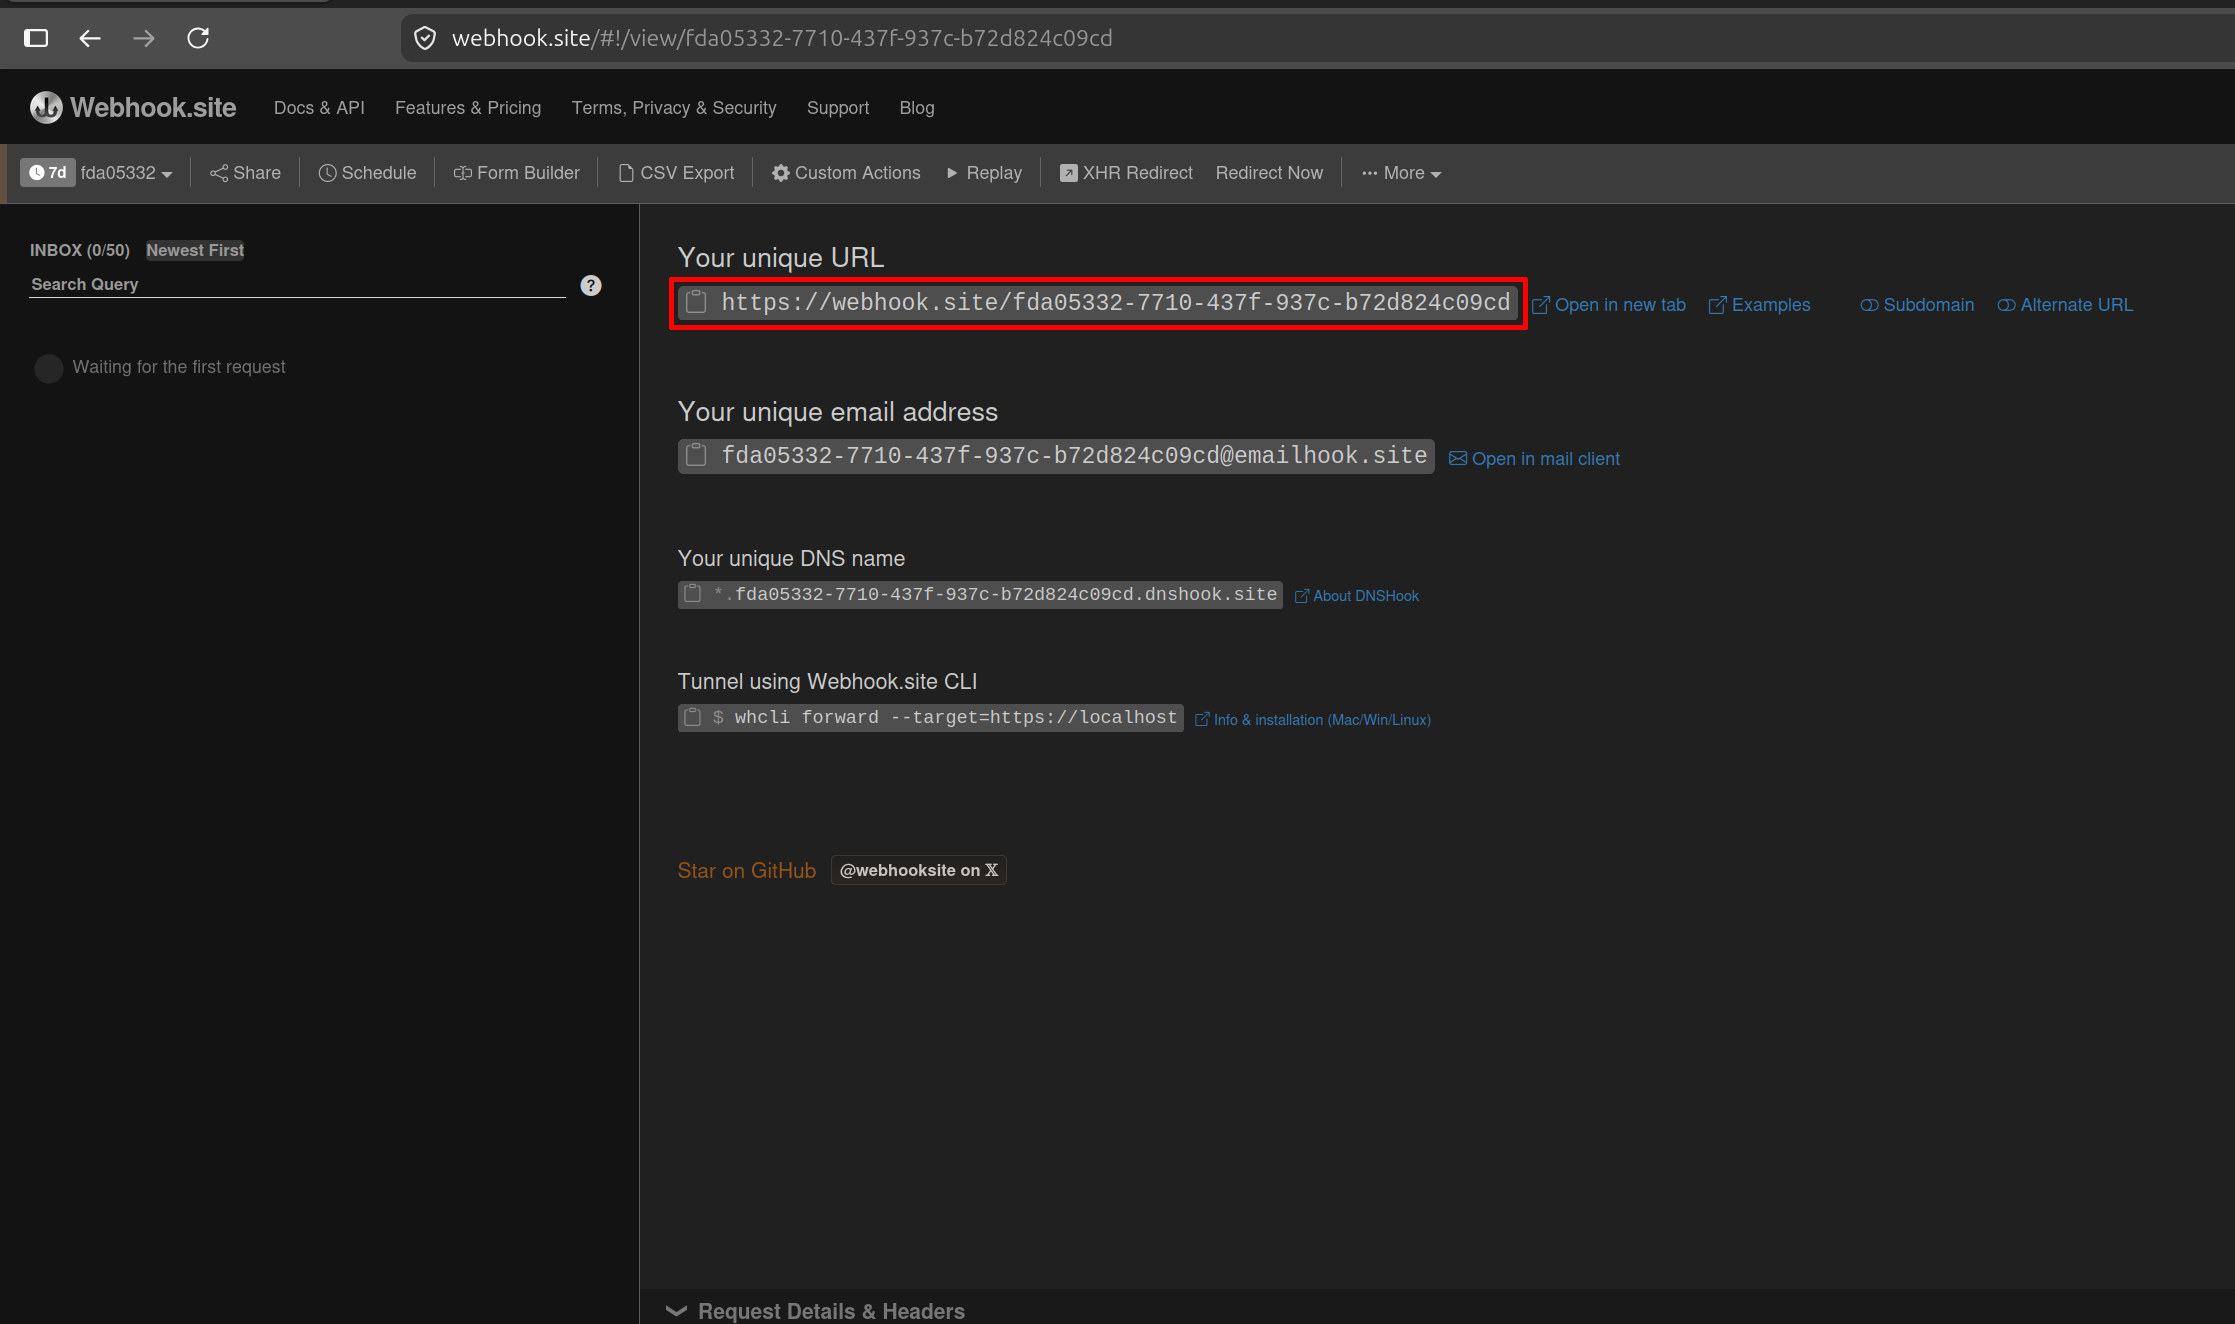
-
Point the connector at it. In the connector's PLAYGROUND, set the
urlin the transformation function to that address, then SAVE:function main(job) {let body = job.message.body;return {"method": "POST","url": "https://webhook.site/xxxxxxxx-xxxx-xxxx-xxxx-xxxxxxxxxxxx","header": { "Content-Type": "application/json" },"data": body};}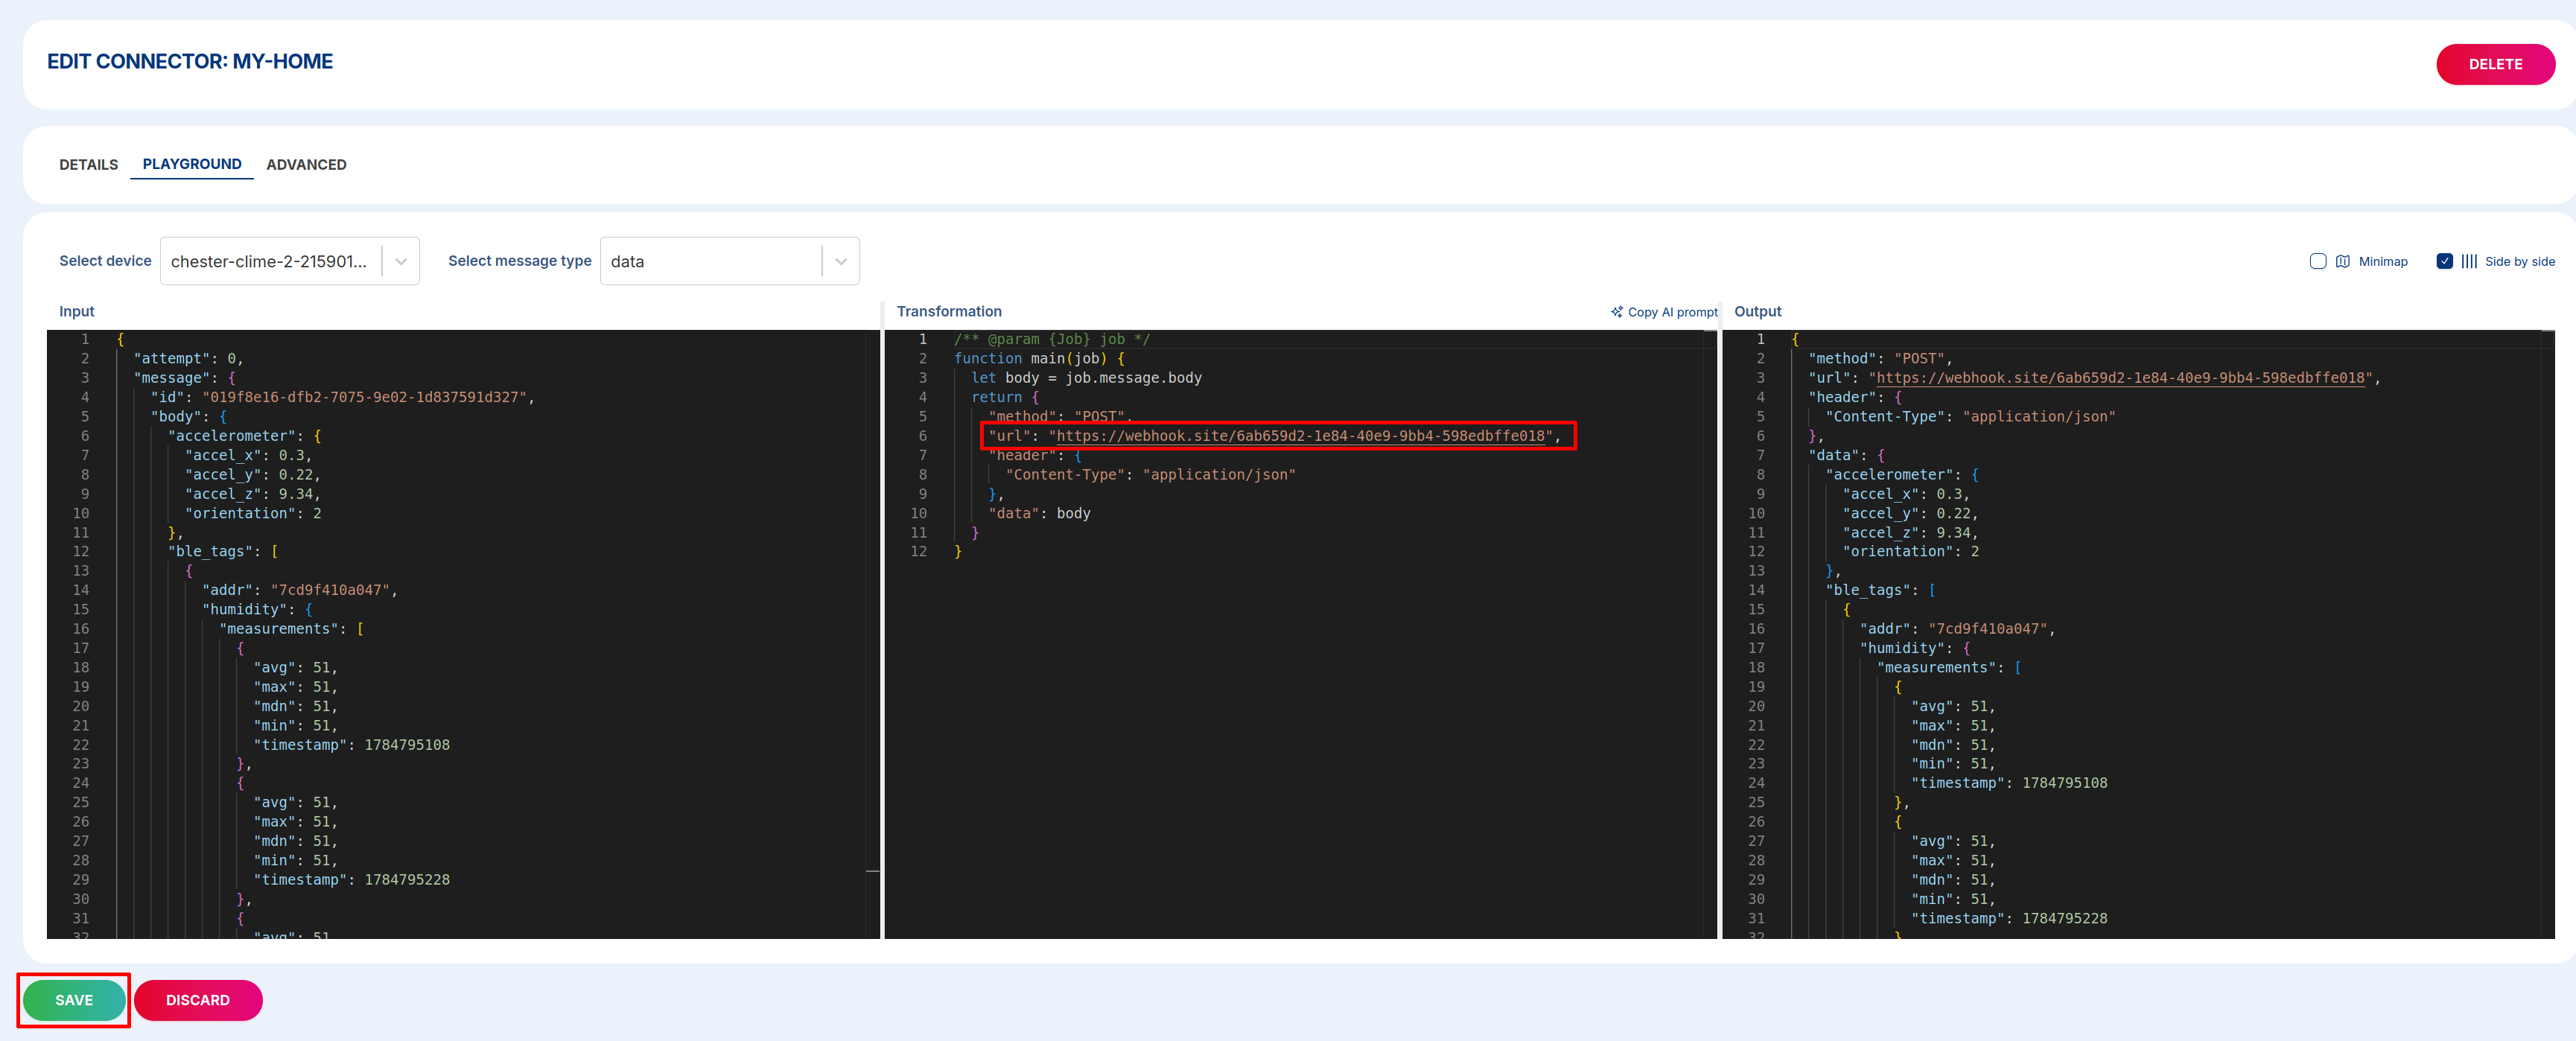
Make sure the connector's Tags and Triggers match your device (e.g. the
datatrigger). -
Trigger an uplink. Wait for, or force, a message from a device in the space. A connector runs on real device uplinks.
-
Check the result. Go back to webhook.site: the request appears in the inbox on the left. Click it to inspect the method, headers, and JSON body the Cloud sent. Seeing it arrive confirms your connector works end to end.
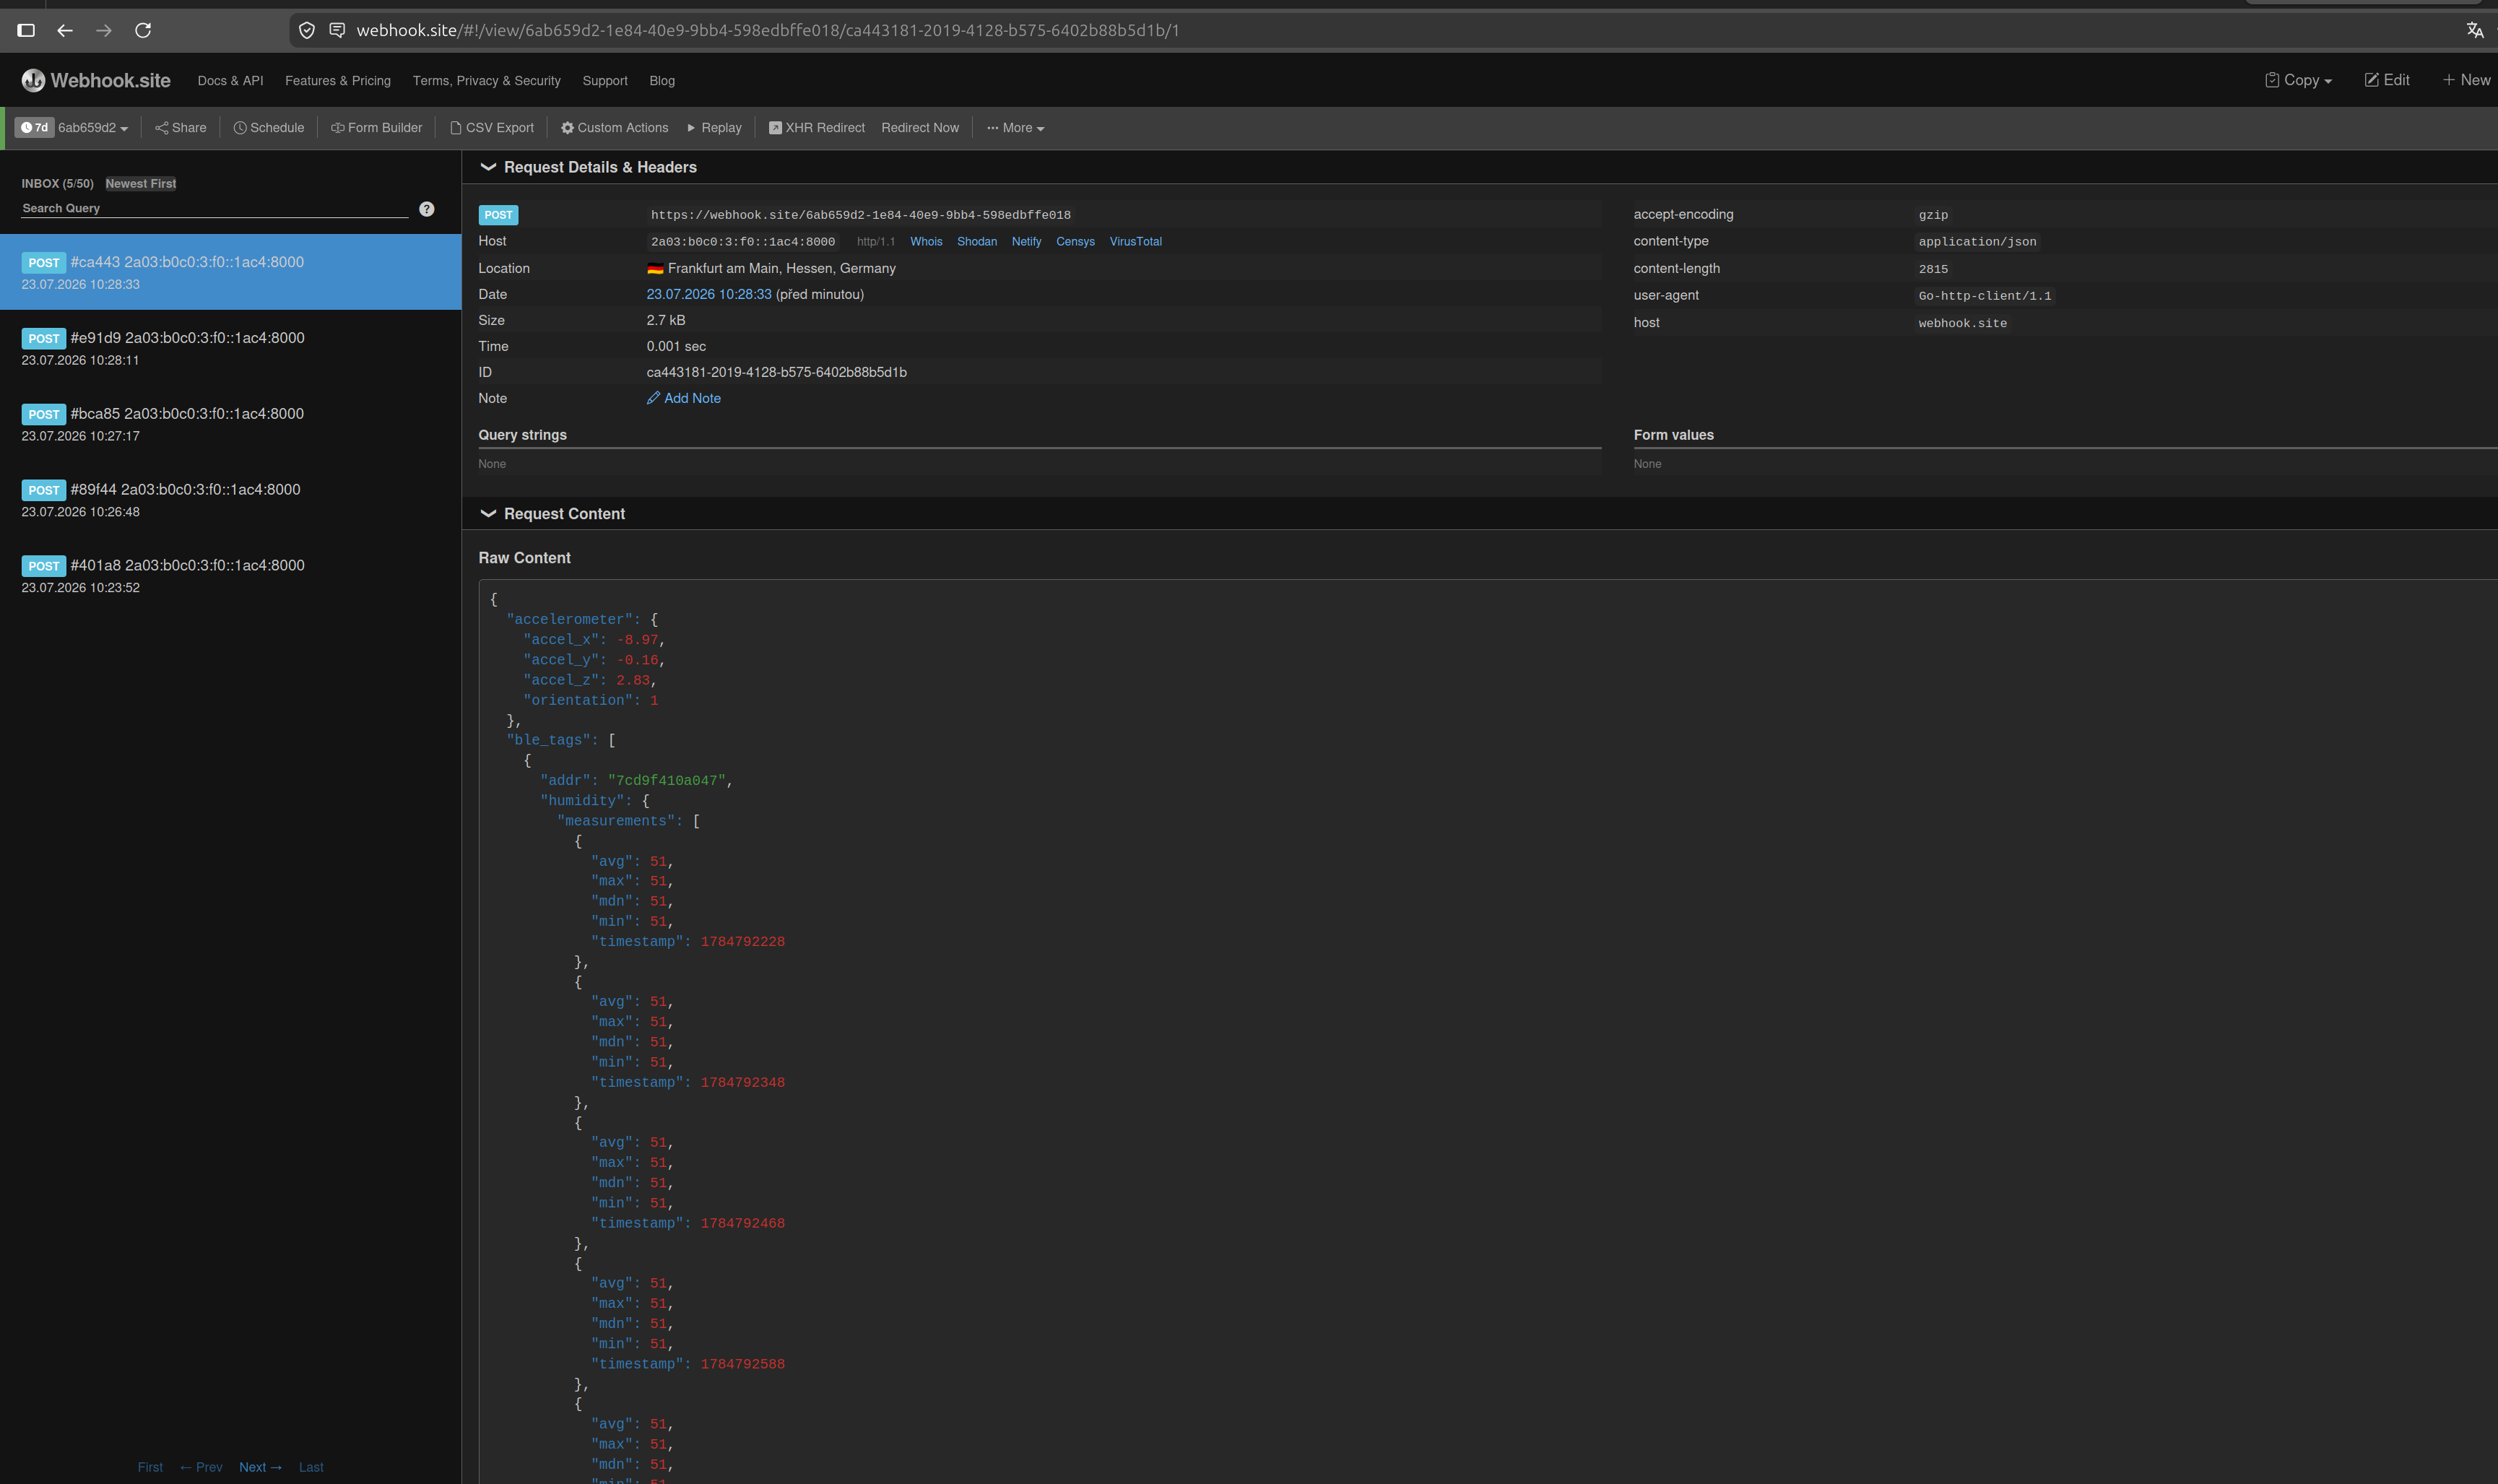
Edit the transformation function and trigger again to watch your changes land in real time. When you're happy, swap the webhook.site URL for your real endpoint.
webhook.site URLs are public, so use only test data while testing, and switch to your own endpoint for production traffic.
Other receivers you can use the same way: requestinspector.com (instant public endpoint), ngrok.com (tunnel to a server on your machine), tailscale.com (private network with a public funnel).
Retry Policy
If the HTTP request fails (non-2xx response or timeout), the Cloud retries automatically. The default retry schedule (in seconds):
10 → 30 → 60 → 600 → 1800 → 3600 → 10800 → 21600 → 43200
You can customize the retry intervals in the connector's ADVANCED tab.